Learn how to make a stylish and comfy crochet jacket with this free pattern, perfect for adding warmth and charm to your outfits for any season.
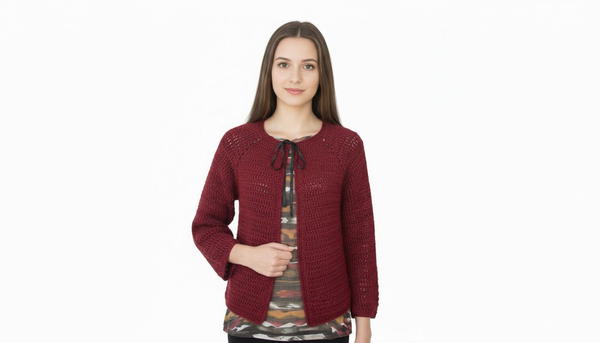
A cozy jacket that feels warm and stylish is perfect for any season. This crochet jacket has an elegant and textured design created with simple stitches that come together beautifully. Its soft and breathable material makes it comfortable to wear, whether you are enjoying a chilly day outside or lounging indoors. The jacket’s appearance stands out with unique patterns and charming details that can be adjusted to match your favorite colors or fit.
Cozy Free Crochet Jacket Pattern to Keep You Warm

It can be paired easily with outfits for casual or special occasions, adding a handmade touch to your look. The jacket is lightweight yet warm and designed to fit people of all sizes. Its timeless design makes it a wonderful addition to anyone’s wardrobe. With soft textures and stunning details, this jacket is not just clothing but a piece of wearable art that brings joy and warmth.
Step-by-Step Crochet Natural Jacket Pattern
Materials Needed:
- Yarn: Miss Tricot Yarns - Four Seasons (100g skeins, 250 meters per skein). Choose your preferred color. The yarn is soft and ideal for lightweight wear.
- Crochet Hook: Size 5.5 mm (adjust based on your tension).
- Stitch Markers: For marking corners during increases.
- Scissors: To cut yarn.
- Tapestry Needle: For weaving in ends.
Gauge:
- Before starting the pattern, create a swatch to match the gauge given.
Gauge: 16 double crochet (dc) stitches x 8 rows = 10 cm (4 inches). - Adjust hook size if your stitches are tighter or looser.
Finished Size:
The pattern described is for Size S, but customization tips to adjust for other sizes are provided below.
- Length: Adjustable as per preference (30 rows worked for the tutorial).
- Sleeves: Can be modified in width and length.
Tips for Customization:
- Sizing Adjustments: Increase or decrease the number of foundation chains in increments of 4 to widen the jacket for larger or smaller sizes.
- Length Modification: Work more rows after sleeves are joined for a longer jacket.
- Sleeve Modifications: Adjust the frequency of decreases for a snug or loose sleeve fit.
- Edging Creativity: Add decorative edging (e.g., scallops or picots) for a more unique finish around the openings and neckline.
Special Techniques:
- Seamless Construction: The jacket is crafted entirely without seams, making it perfect for beginners.
- Tubular Sleeves: Sleeves are worked directly onto the jacket body.
- Corner Increases: Increases are done in specific corners using a (dc, 2 chains, dc) sequence to maintain shape.
Pattern Instructions:
Foundation Chain:
- For Size S, begin with 80 chains.
- Add 3 additional chains to serve as a turning stitch.
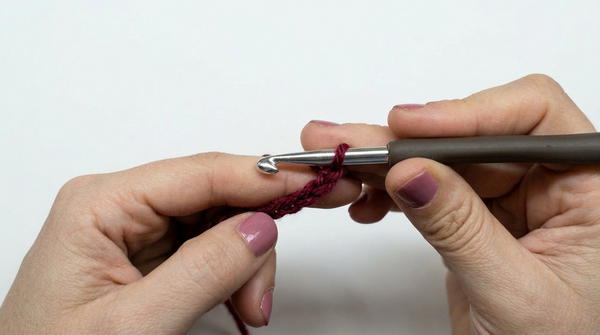
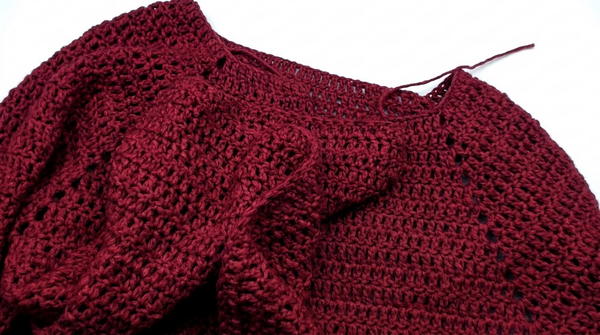
First Round: Creating the Neckline:
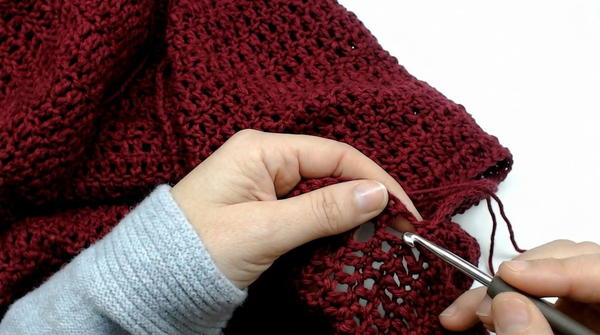
- Start in the 4th chain from the hook. Work 1 dc; this replaces the first dc stitch.
- Continue working 12 dc stitches till the first corner.
- In the next chain (first corner), create a corner increase: 1 dc, 2 chains, 1 dc.
- Work 16 dc (shoulder section).
- At the second corner, repeat the corner increase: 1 dc, 2 chains, 1 dc.
- Work 24 dc (back section).
- Repeat the corner increase for the third corner: 1 dc, 2 chains, 1 dc.
- Work another 16 dc (second shoulder section).
- At the fourth corner, repeat the corner increase: 1 dc, 2 chains, 1 dc.
- Finish the row with 12 dc stitches.
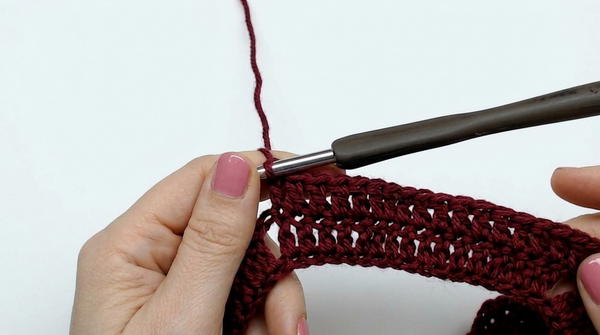
Subsequent Rounds:
- Start each row with 3 chains, acting as the first dc.
- Work dc across all existing stitches.
- At each corner (2 chains space), work the increase pattern: 1 dc, 2 chains, 1 dc.
- Repeat until the desired yoke height is achieved. For the tutorial, 15 rows were worked.
Joining the Sleeves (16th Row):
- Work 26 dc on the first front half, then reach the first corner.
- In the first corner of the sleeve opening, work 1 dc, chain 1, then fold the sleeve and secure it by inserting the hook into the second corner.
- Slip stitch the sleeve edges together using 1 single crochet.
- Continue working dc across the back section and repeat the join for the second sleeve.
- Finish the row by working dc on the second front half.
Body Section:
- With the sleeves joined, work only on front, back, and openings.
- Continue working rows of dc until the desired body length is achieved. For the tutorial, 30 rows were worked.
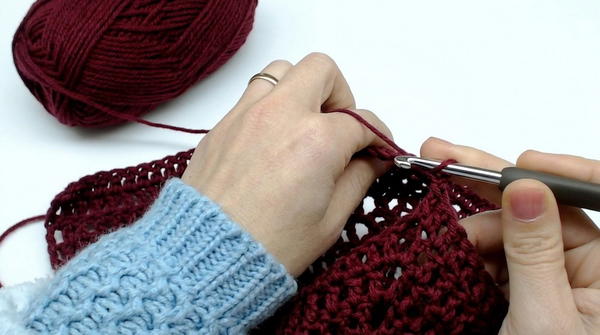
Sleeves:
- Start sleeves by inserting the hook into the first corner of the armhole.
- Work 48 dc evenly around the armhole for the first 3 rows.
- For the 4th row, begin decreases:
- At the start and end of each row, work dc2tog (double crochet two together).
- Repeat decreases every 5th row until 30 rows are completed, reducing the stitch count to 36 dc.
- Finish sleeves by working 5 rows of single crochet to form a tidy cuff.
Edging and Finishing:
- Work 3 rounds of single crochet around the base, openings, and neckline for a clean finish.
- In corners, add 1 sc, chain 1, 1 sc to create rounded shapes.
Conclusion:
Your seamless crochet natural jacket is now complete! With its tailored yet simple design, this jacket provides comfort and style, perfect for layering during cooler months.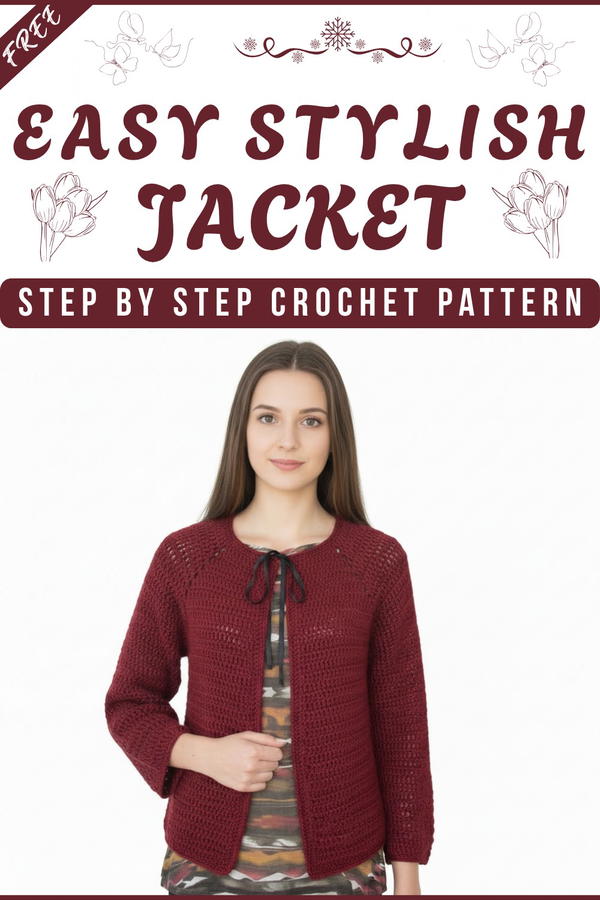
Important Remarks:
- Yarn Substitution: If using a different yarn, ensure it matches the gauge for a proper fit.
- Blocking: Block the jacket after finishing to achieve a polished look and shape.
- Final Look: With its elegant seamless design and tubular sleeves, this crochet jacket is perfect for casual wear or styling over dresses.


