Chilly days become cozier with the Crochet Snowman Plush pattern, a charming, huggable companion perfect for holiday joy and gifts.
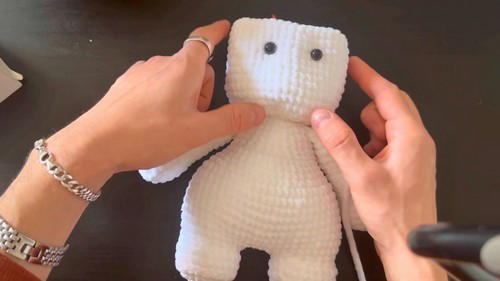
A simple ball of yarn can turn into a charming companion, bringing warmth and joy to any home. The Crochet Snowman Plush pattern captures the spirit of the season in soft, huggable form. Its cheerful features—a carrot nose, button eyes, and a tiny scarf—bring a delightful personality to each snowman, making it more than just a decorative piece. Perfect for adorning shelves, mantels, or holiday tables, it also doubles as a comforting toy for children or a thoughtful handmade gift for friends and family.
Huggable Crochet Snowman Plush for Holiday Charm

The pattern offers clear instructions, allowing both beginners and experienced yarn enthusiasts to enjoy the satisfaction of creating something tactile and heartwarming. Lightweight yet sturdy, the plush maintains its shape while remaining soft to touch, inviting endless hugs and seasonal smiles. Its timeless charm adds a cozy ambiance to any space, celebrating the joy of winter and the nostalgia of snow-filled memories.
Beyond visual appeal, the Crochet Snowman Plush fosters patience, focus, and mindfulness through its step-by-step crocheting process. Every stitch contributes to a sense of accomplishment and personal connection, turning ordinary yarn into a symbol of warmth, happiness, and holiday spirit. A small creation, it leaves a lasting impression.
Materials Needed
You’ll need the following materials to make the snowman:
- Yarn:
- White yarn for the snowman’s body (YarnArt DOL No. 741).
- Dark red yarn for the hat (No. 752).
- Orange yarn for the nose (No. 85).
- 4mm Crochet Hook: Suitable for the yarn weight.
- Stuffing: Fiberfill or similar material to fill the snowman and maintain its shape.
- Scissors and Needle: Essential tools for cutting yarn and sewing parts together.
- Markers: To keep track of rounds when working in spirals (optional).
- Safety Eyes: (Optional) Adds personality to the snowman.
Special Features
- Festive and Adorable Design: The snowman is ideal for holiday decorations or as a handmade gift.
- Realistic Details: Its 3D structure includes a rounded body, carrot-shaped nose, and a cute crocheted hat with ear flaps.
- Customizable: You can choose your own yarn colors or add embellishments like cheeks or embroidery for a personal touch.
- Structured Shape: Features intentional increases and decreases to create a realistic, snowball-like texture and structure.
Level of Difficulty
Intermediate, with Beginner-Friendly Elements:
- It requires knowledge of basic stitches like single crochet, increases, decreases, and the magic ring.
- Some rows have more complex shaping, making it moderately challenging for beginners.
- Those with basic crochet skills can also succeed by carefully following the step-by-step instructions.
Step-by-Step Instructions
Part 1: Making the Arms
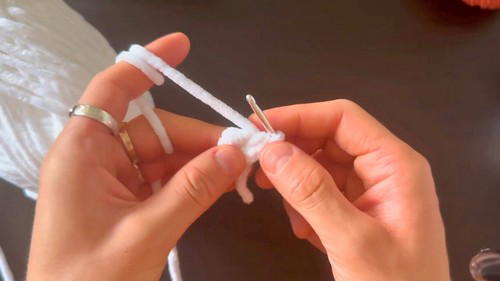
- Start with Magic Ring:
- Make a magic ring and crochet six single stitches into it.
- Second Round (Increases):
- Make six increases (2 stitches in each stitch). You’ll now have 12 stitches.
- Make six increases (2 stitches in each stitch). You’ll now have 12 stitches.
- Third Round (Pattern of Stitches and Increases):
- Crochet three stitches in a row, then make one increase. Repeat this three times. You’ll now have 15 stitches.
- Three Rounds – No Changes:
- Crochet one stitch in each of the 15 stitches for three rounds.
- Decreasing Round:
- Make one stitch, then make a hidden decrease by pulling through the front loops of two stitches and crocheting them together. Repeat for the rest of the round, finishing with 12 stitches.
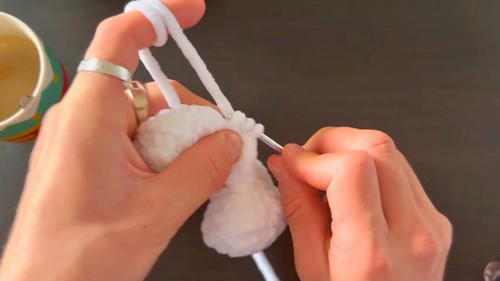
- Stuff the Arms:
- Use fiberfill to stuff only the broader part of the arms. Leave the top part empty so the arms can be easily attached to the snowman’s body.
- Flatten Stitch Ends:
- Flatten the open side and crochet both sides together with five stitches. Cut the yarn, leaving a bit for sewing.
- Flatten the open side and crochet both sides together with five stitches. Cut the yarn, leaving a bit for sewing.
2: Making the Legs
- Start the Base:
- Create a magic circle and chain two. Crochet eight stitches into the second loop from the hook.
- Second Round:
- Make eight increases (16 stitches).
- Third Round:
- Alternate one stitch, then one increase around (24 stitches).
- Flat Sole Technique:
- Crochet between stitches for a flat, stable base. Continue this technique for 24 stitches.
- Build the Size:
- Crochet two rounds with 24 stitches (no increases or decreases).
- Shape the Leg:
- Start decreasing with a pattern of one stitch and one decrease, reducing to 16 stitches.
- Stuff the Legs and Close:
- Fill the legs evenly with stuffing for a firm shape. Cut the yarn and close the first leg completely. Leave yarn on the second leg to join it later to the body.
- Fill the legs evenly with stuffing for a firm shape. Cut the yarn and close the first leg completely. Leave yarn on the second leg to join it later to the body.
3: Building the Body
- Combine the Legs:
- Attach the two legs by chaining four stitches between them. Crochet into both legs to connect them into a single piece.
- Increase Body Shape:
- Alternate increases and single stitches to build the shape gradually, ensuring the bottom structure is wide.
- Crochet the Torso:
- Continue crocheting upwards with no increases for around nine rows (row counts may vary to suit your desired body height).
- Attach Arms:
- Position the arms symmetrically on each side, aligning them just above the torso. Crochet the arms into the body using the unstuffed part for ease.
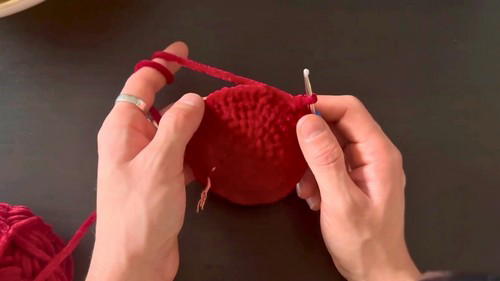
4: Crocheting the Head
- Start with Increases:
- Begin with a magic ring (6 stitches) and increase it round by round to build the shape, doubling stitches to reach 48 stitches at its widest point.
- Stabilize Size:
- Crochet 11 rounds with 48 stitches (no changes). This gives the face a rounded look.
- Add Eyes:
- Place safety eyes between the 3rd and 4th rounds of the head. Space them 5 stitches apart.
- Shape the Head’s Top:
- Decrease using patterns such as five stitches and one decrease, four stitches and one decrease, and gradually down to six decreases total.
- Decrease using patterns such as five stitches and one decrease, four stitches and one decrease, and gradually down to six decreases total.
5: Crocheting the Nose (Carrot)
- Start with Magic Ring:
- Crochet six stitches into the ring.
- Increase Gradually:
- Work increasing rows, with one stitch and one increase, two stitches and one increase, and three stitches and one increase until you’re satisfied with the size of the carrot.
- Stuff and Attach:
- Gently stuff the carrot and sew it securely onto the snowman’s face, two rows below the eyes.
6: Making the Hat
- Hat Base:
- Use red yarn to crochet a large circular base, gradually increasing rows to reach 48 stitches.
- Build Hat Structure:
- Crochet 6 rows with no increases for the main body of the hat.
- Ear Flaps:
- Count three stitches from the corners and add eight stitches for ear flaps. Crochet back and forth for seven rows to complete the ear flaps.
- Count three stitches from the corners and add eight stitches for ear flaps. Crochet back and forth for seven rows to complete the ear flaps.
- Edge Detailing:
- Add a border around the hat using a contrasting yarn color (e.g., white or blue) for a finished look.
Tutor’s Suggestions
- Focus on Stitch Consistency: Keep stitches consistent to ensure an even finish.
- Use Markers: This is especially helpful for tracking rounds during spirals.
- Even Stuffing: Stuff carefully to maintain shape and avoid lumps.
- Be Patient with the Details: Parts like the carrot and shaping the legs might be challenging for beginners, so take your time.
Uses of the Crocheted Snowman
- Holiday Décor: This snowman can be used as a festive centerpiece or Christmas tree décor.
- Handmade Gift: Give it to kids or friends during the holidays as a token of love.
- Photo Prop: Add it to holiday-themed photo shoots for a whimsical touch.
Tip for Success
To create clean finishes and avoid visible gaps, crochet tightly and weave in loose ends as you work. For a polished look, use a smaller hook size than suggested on your yarn label if needed.
Conclusion
This crocheted snowman is a delightful project that incorporates fun techniques like shaping body parts, joining legs, and sculpting details like the carrot nose. With a bit of patience and practice, you’ll create a festive decoration or a meaningful holiday gift that embodies the spirit of winter.


