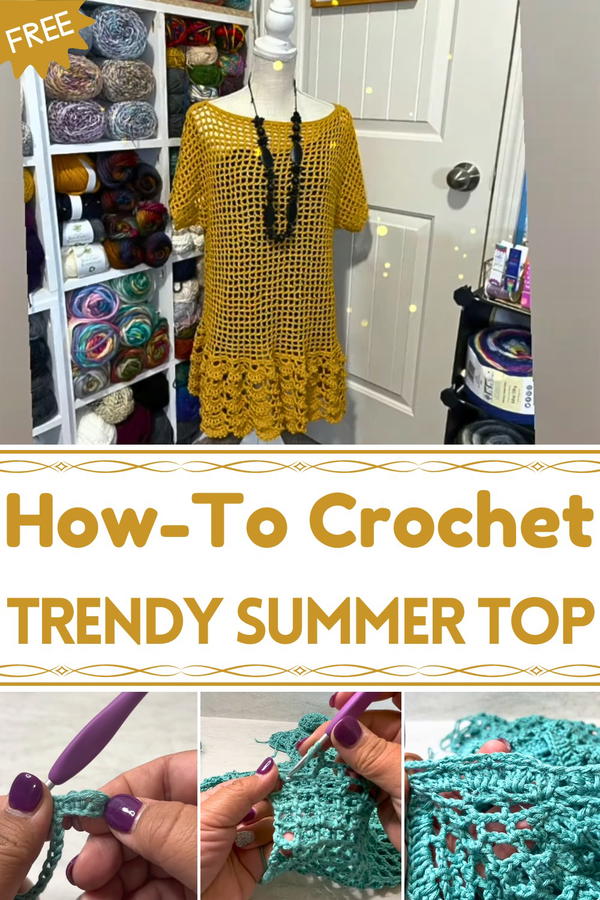
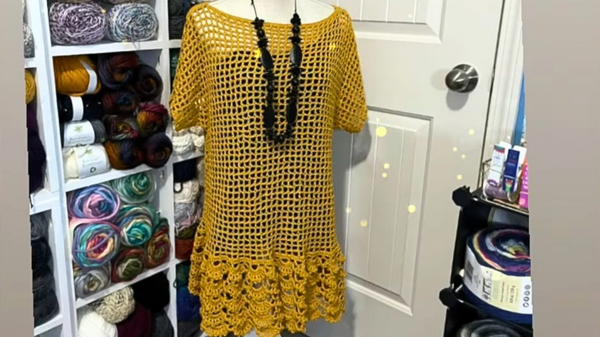
Breeze through sunny days with the Free Crochet Summer Top Pattern, a light and stylish creation ideal for casual wear and effortless seasonal style.
Sunlight filters through leafy branches, casting playful shadows over a warm afternoon, and a soft, airy top moves gracefully with every gentle breeze. With the Free Crochet Summer Top pattern, this lightweight garment comes to life, offering both comfort and understated style for sunny days. Its open, breathable texture ensures coolness, while the thoughtful stitch work adds subtle elegance to casual outfits.
Stylish Crochet Summer Top for a Chic Look
Ideal for leisurely walks, beach visits, or relaxed social gatherings, this summer top combines versatility and charm. It pairs effortlessly with shorts, skirts, or swimwear, and can be personalized with different yarn shades or subtle decorative touches, allowing each piece to reflect individual taste. Beyond its aesthetic appeal, the project encourages patience and focus, providing a calming and rewarding experience as the garment gradually takes shape.
The Free Crochet Summer Top pattern creates a piece that is both practical and refined, blending functionality with a handcrafted touch. Completing this project leaves crafters with a beautiful, wearable item that enhances any wardrobe while offering a sense of accomplishment. It’s a thoughtful way to enjoy the rhythm of stitching, celebrate personal creativity, and add a delicate, handmade elegance to everyday summer attire.
Materials Needed
- Yarn: Cotton yarn, size 3, in your choice of color. Veronica used a brand with approximately 257 yards per skein. For larger sizes, you’ll need about 4 skeins.
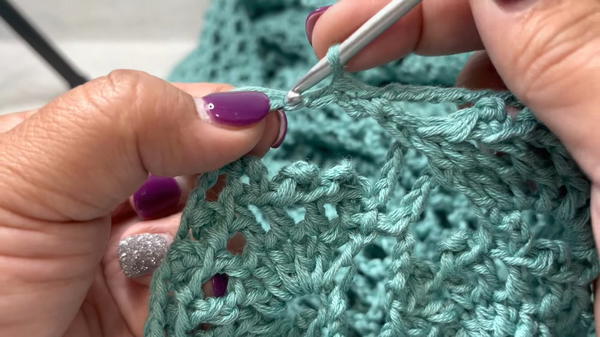
- Crochet Hook: Clover size 4mm (as per the yarn label).
- Scissors: To cut the yarn at various stages.
- Tapestry Needle: For weaving in ends and sewing pieces together.
- Measuring Tape: To ensure accurate dimensions.
- Stitch Markers or Clips: To hold pieces together securely while sewing.
Special Features of This Summer Top
- Customizable Fit: The top can be adjusted for any size by modifying the number of foundation chains and rows. Veronica provides tips to measure for a perfect fit.
- Basic Stitches: Uses simple techniques like chain stitch, single crochet (SC), and double crochet (DC).
- Elegant Fan Edging: Decorative edging at the bottom creates a unique and stylish look.
- Breathable and Lightweight: Perfect for summer, the top is made from comfortable cotton yarn.
Level of Difficulty
- Skill Level: Beginner-Intermediate
While the stitches themselves are easy (chain, SC, DC), the project involves measuring for custom size, sewing pieces together, and creating intricate decorative edging.
Step-by-Step Instructions
Step 1: Measure and Calculate Foundation Chain
- Use a measuring tape to determine the size of your top.
- Measure from one shoulder to the other for the top width.

- Add a little extra space by placing one finger under the measuring tape to avoid tightness.
- Measure from one shoulder to the other for the top width.
- For a large or extra-large size, start with 160 chains.
- Ensure your chain length measures 75 cm (approximately 29.5 inches).
Step 2: Work the First Panel
Foundation Row:
- Work a single crochet (SC) into the second chain from the hook and into each chain across. Turn your work at the end of the row.
Establish Texture (Rows 2–44):
- Chain 1, turn, and work SC into the back loop only (BLO) for each stitch across. Repeat for 44 rows.
- The back-loop technique creates a flexible ribbing texture.
When done, fasten off, leaving a long tail for sewing.
Step 3: Create the Second Panel
- Follow the same steps as above to create a second, identical panel.
- These two panels will form the front and back of your top.
Step 4: Assemble the Top
- Place the two panels right sides together (the textured side facing outwards).
- Use stitch markers or clips to secure the sides and shoulders together:
- Shoulders: Leave about 22 stitches unsewn on each side for the neckline.
- Sides: Leave space near the top for the armholes. Use stitch markers to mark your desired armhole length.
- Sew the panels together using your tapestry needle and the yarn tail:
- Use a whip stitch for secure seams.
- Stretch slightly while sewing to ensure give and flexibility.
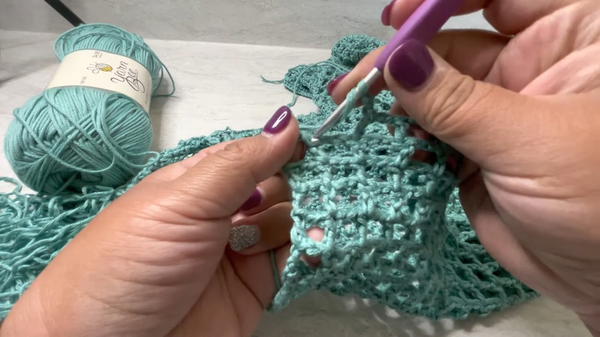
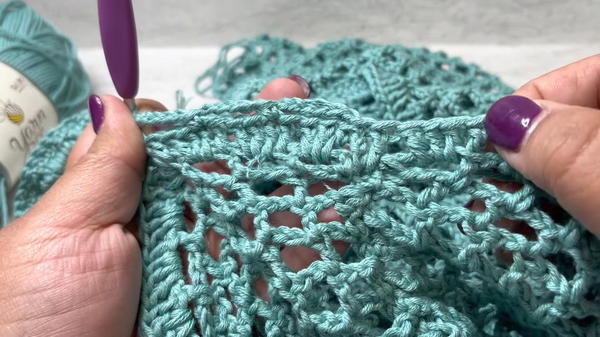
Step 5: Add Fan Edging at the Bottom
The edging creates a beautiful fan or lace-like design along the bottom of the top.
Round 1 – Base for Edging:
- Attach yarn to any bottom edge. Chain 1 and work SC evenly across the entire bottom. Join with a slip stitch.
Round 2 – Creating Fan Stitches:
- Chain 5, skip 3 stitches, and work a single crochet into the fourth stitch. Repeat this all around to create loops.
Round 3 – Build Fans:
- In the first loop, work 8 double crochets (DC).
- Single crochet into the next loop to anchor the fan. Repeat for each loop around.
Round 4 – Fan Points:
- Add points to the fans with double crochets and chain stitches.
- For example, chain 3 in the middle of a fan and work into the 4th stitch to create small peaks.
Step 6: Finish Off
- Weave in all loose ends with a tapestry needle.
- Block the top (if needed) to ensure the panels lay flat.
Tutor’s Recommendations
- Take Your Time: Go slow, especially when sewing the panels together to ensure even seams.
- Soft Tension: Avoid stretching your stitches too tightly, particularly with cotton yarn, which has limited elasticity.
- Experiment with Colors: Use solid colors or variegated yarn for creative effects.
- Use All Materials: Veronica recommends using all your yarn instead of wasting it—this makes the top slightly longer and avoids leftover yarn.
Uses of the Crochet Summer Top
- Casual Wear: Pair it with jeans, shorts, or skirts for a stylish summer outfit.
- Layering Piece: Wear it over tank tops, bralettes, or swimwear.
- Handmade Gift: Perfect as a thoughtful creation for friends or family.
Conclusion
In this tutorial, Veronica Steele equips you with the skills to crochet a stunning summer top, combining basics with chic details. The process is straightforward, creative, and leaves you with a custom garment you can proudly wear. Whether you’re a beginner or looking for your next fun project, this crochet top is a worthy addition to your handmade wardrobe!
Final Tip
When working on the fan edging, count your stitches carefully to ensure each fan is evenly spaced. This will give your summer top a clean and professional finish.


