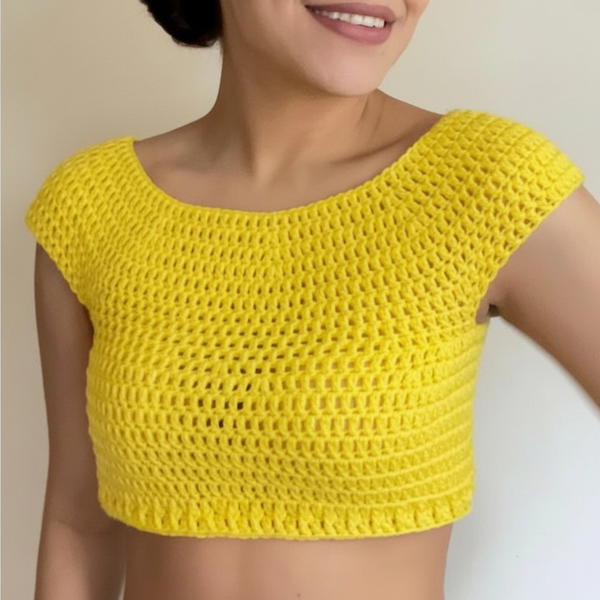
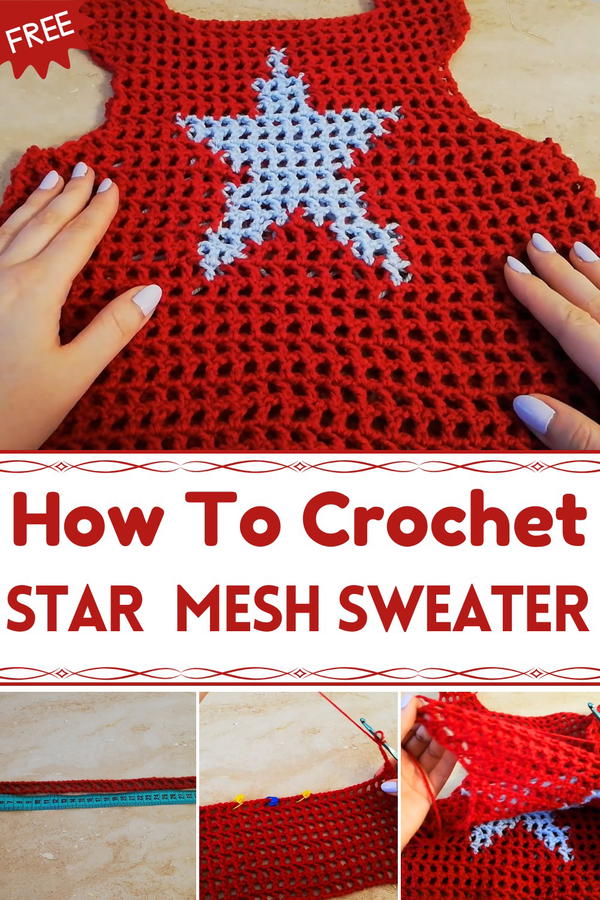
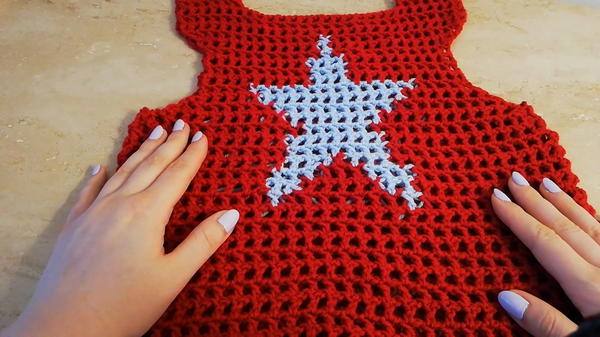
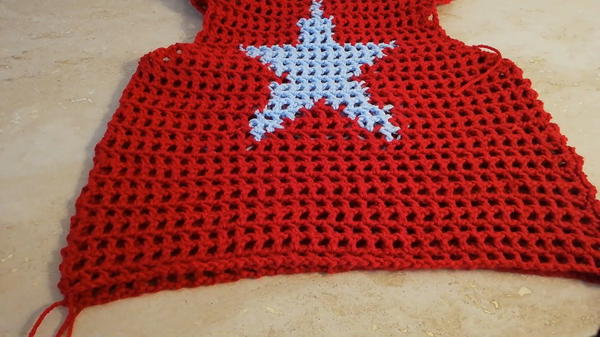
This crochet design offers both elegance and functionality, combining beauty with practicality. The crochet star mesh sweater pattern features an intricate star detail set against a light, breathable mesh background, making it perfect for any season. Its airy texture keeps you cool in warm weather, while its delicate pattern adds a stylish flair to your wardrobe.
Simple Star Mesh Crochet Sweater You’ll Adore
Whether worn casually with a pair of jeans or layered over a dress, the sweater’s versatile appearance ensures it can be dressed up or down for various occasions. The unique star motifs give it a playful charm, drawing attention to its handcrafted beauty.
The pattern is easily customizable, adjust the size, colors, or details to match your personal style. This sweater seamlessly blends comfort and creativity, offering a satisfying project for crochet lovers and a stunning final piece that’s both fashionable and timeless.
Crochet Mesh Sweater Pattern
Skill Level:
Intermediate to Advanced
Materials Required:
Yarn:
- Red yarn: 100% acrylic, approx. 100 grams (300 m) – You’ll need 70 grams.
- Blue yarn (or yarn for accent details): 100% acrylic, approx. 5–10 grams. You can use scraps from leftover projects.
- (Optional) Adjust yarn type based on personal preference; slightly thicker or thinner yarn works too.
Hook:
- 5 mm crochet hook (You may use one size larger than recommended, based on your tension).
Tools:
- Scissors
- Tapestry needle (for weaving in ends)
- Stitch markers (optional)
Gauge (for reference):
Not provided explicitly. Adjust starting chain length and stitch tension based on body size and personal preference.
Key Abbreviations (US Terminology):
- CH = Chain
- SC = Single Crochet
- DC = Double Crochet
- SL ST = Slip Stitch
- SP = Space
- ST = Stitch
Notes:
- The pattern is flexible: adjust based on your body size by modifying the starting chain (in odd numbers).
- The design employs a mesh/filet crochet pattern and incorporates color changes for detailing (optional).
- For beginners, simply omit shaping (decreases and increases) and crochet rectangular panels for simplicity.
Pattern Instructions
1. Starting with Chain Foundation (Front and Back Panels):
Step 1:
- Using red yarn, create a slip knot.
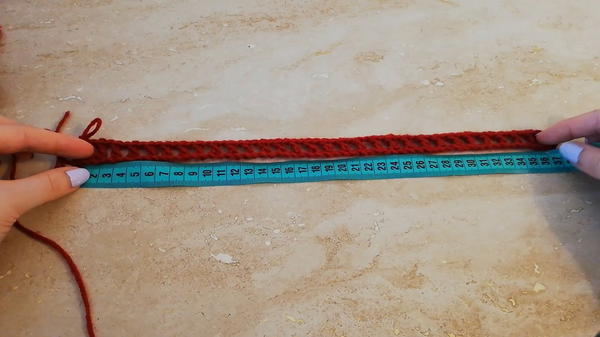
- CH 59 (or adjust as needed, using an odd number to match your measurements).
Step 2:
- Add 2 additional CHs to your foundation chain (acts as a turning chain).
2. Row 1: [Foundation Row]
- DC in the third chain from the hook.
- CH 1, skip 1 ST, DC in next ST. Repeat until the end of the row.
- At the end of the row, ensure 29 mesh spaces (or adjust to the number of CHs created).
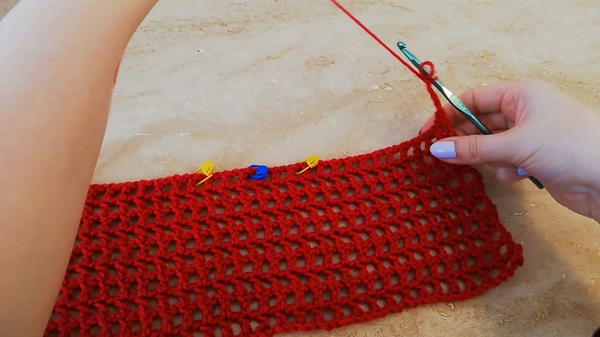
3. Row 2 onward: [Establishing Mesh Pattern]
- Turn. CH 4 (acts as a turning DC + CH 1).
- DC in each DC from the previous row, with 1 CH in between.
- Skip spaces, and only crochet in the DC stitches. (This creates the mesh pattern).
- Repeat this row for 10 rows.
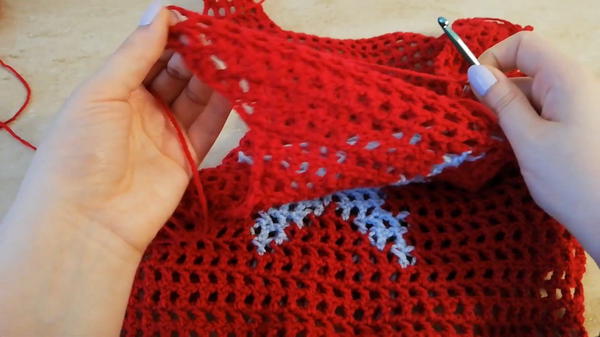
4. Add Star Motif (Optional):
Step 1:
- Count the center 7 spaces (from the total mesh spaces in the row). Use stitch markers to outline the placement of the motif.
Step 2:
- Begin incorporating the star motif using a contrasting yarn color (e.g., red with a blue star).
- Replace selected mesh squares within the star design area with solid DC clusters.
Step 3:
- For every color change, leave a long tail to weave in later.
5. Crochet Body to Armhole Decreases:
- After completing the motif and reaching 17 rows, begin shaping for the armholes.
Armhole Shaping (Row 18 onward):
- For decreases, SL ST into the first mesh space. CH 1, and continue the mesh pattern, leaving the first and last mesh spaces unworked.
- Decrease each side by 1 mesh space per row, working until you have 21 mesh spaces remaining.
Work Evenly for Armhole Rows:
- Once the armhole shaping is complete, continue for 5 rows without any increases or decreases.
6. Shoulder Straps:
- At the top of each panel, create shoulder straps using the mesh pattern.
Strap Instructions:
- CH 4 and work mesh pattern across 6 mesh spaces.
- Work evenly for 5 rows.
Joining Straps:
- Align the straps of the front panel to the corresponding straps of the back panel.
- Use a SL ST or SC to join.
7. Back Panel Instructions:
- The back panel is worked in the same way as the front panel but without the star motif.
- Work the starting chain with the same stitch count.
- Repeat the armhole shaping and shoulder straps to match the front panel.
8. Assembly:
Seam Sides Together:
- Align the front and back panels with the right sides facing each other. Use a SL ST or SC to seam the sides, leaving the arm openings unworked.
Weave in Loose Ends:
- Use a tapestry needle or smaller crochet hook to weave in all loose ends. Match yarn color to the mesh for a clean finish.
Final Measurements
- Width: 36 cm (14 inches)
- Height: 35 cm (13.8 inches)
- Strap Length: 8 cm (3 inches)
Conclusion:
This lightweight Patterned Mesh Crochet Sweater is stylish, breathable, and suitable for various seasons. Adding the star motif offers a personalized touch, but feel free to alter it with other motifs or leave it plain for simplicity. Customize the dimensions and colors to suit your size and preferences.
Pattern Corrections:
- While decreasing and shaping, beginners might face difficulty aligning stitches. Practice counting spaces to ensure symmetry.
- If using a thicker yarn, adjust the starting chain length and hook size to avoid stiffness.
Tips:
- Relax tension while working chains to avoid tight edges.
- Use stitch markers for accurate placement when creating motifs or shaping.
- Test-fit the panel against your body before seaming for a comfortable fit.
- For beginners, opt for solid color panels without motifs and avoid shaping for a straightforward rectangle design.