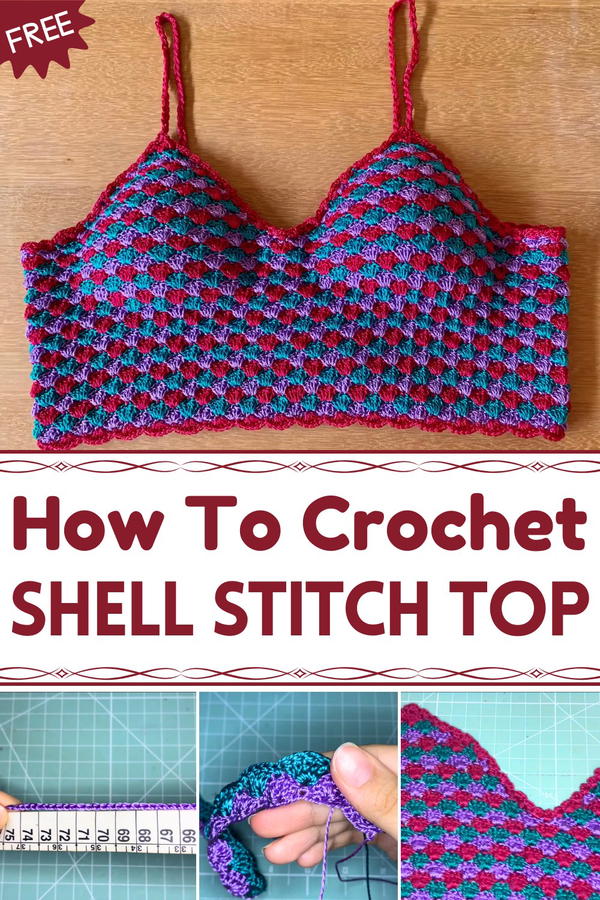
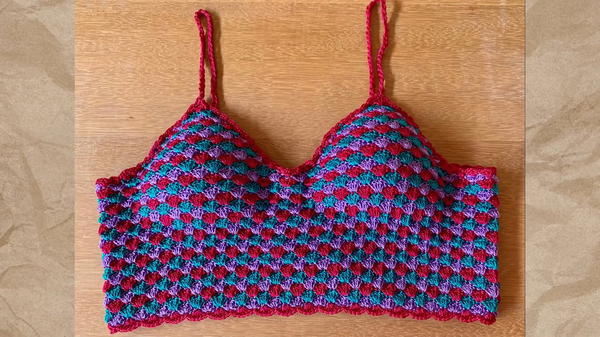
Feel the charm of the crochet shell stitch top pattern and a breezy, textured piece that brightens your warm-weather style instantly.
This lovely stitch creates a charming and wavy texture that looks just like seashells lined up in a row. Its soft, rounded shapes give any fabric a gentle, flowing beauty that catches the eye without being too busy. Perfect for warm weather, this stitch makes tops feel light and breezy, helping you stay cool while looking stylish. Whether worn at the beach, a casual outing, or even a relaxed party, garments made with this pattern always stand out because of their unique, handcrafted charm.
Simple Crochet Shell Stitch Top Pattern for Casual Looks
The repeating scallop shapes add a playful touch that feels both cozy and fresh. You’ll find this stitch easy to work with and fun to watch as it grows into something beautiful. Wearing or making clothes from this pattern brings joy and a touch of nature’s grace into everyday life. It’s a wonderful way to add simple yet elegant style to your wardrobe.
Crochet Shell Stitch Basic Top Pattern
Materials
- Princess Fashion polypropylene yarn in pink, violet, and pool blue (or similar yarn with Tex 288)
- Crochet hook size 2mm for main body
- Crochet hook size 3.5mm for triple yarn strap
- Tapestry needle for finishing
- Scissors
- Stitch markers or leftover yarn for marking
Special Features
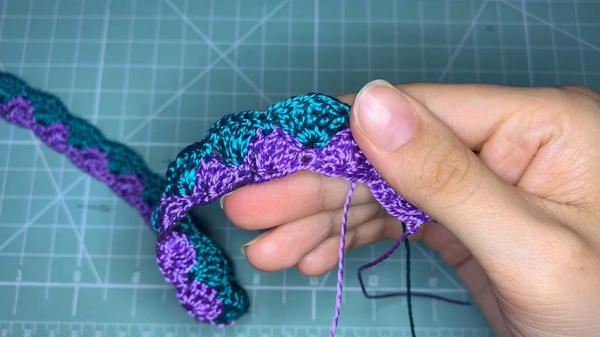
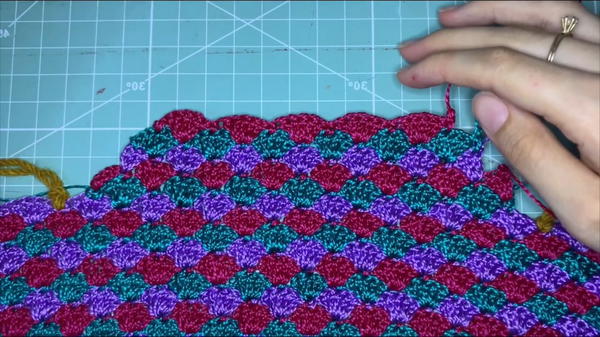
- Uses a shell stitch (blocks of 5 treble/double crochet stitches) that create a textured, fan-like pattern
- Adjustable size calculated based on bust circumference, ensuring a custom fit
- Simple shaping with two small bust triangles on front, and rectangle back panels
- Color changes optionally for stylish color blocking
- Durable yarn with great shine and no fading
- Finished with soft straps made from triple strands of yarn for comfort and strength
Level of Difficulty
Intermediate: Requires knowledge of chain stitch, single crochet, double and treble crochet, color changes, increasing/decreasing, joining, shaping, and finishing.
Step-by-Step Crochet Pattern
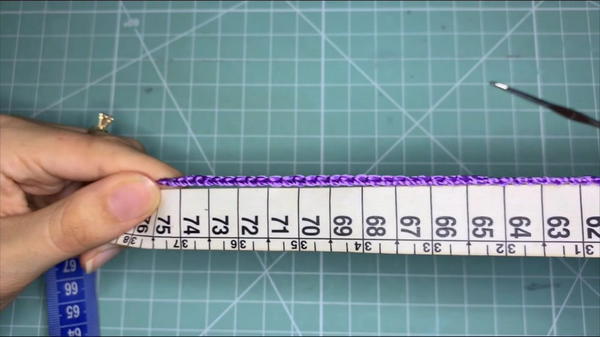
1. Calculate Foundation Chain Length
- Measure your bust circumference.
- Divide measurement by 4, then multiply by 3 to get chain length in centimeters (e.g., 75cm bust → 18.75 × 3 = 56.25 cm).
- Convert to chains ensuring it is a multiple of 6 plus 1 (e.g., 199 chains). Adjust slightly to fit this multiple. This allows the stitch pattern to line up perfectly.
- Example: For 75 cm bust, chain 199.
2. Foundation Row
- Chain the calculated number (multiple of 6 + 1).
- Chain 1 to start row height.
3. Row 1 – Shell Stitch Base
- Work one single crochet (sc) into the second chain from hook.
- Skip 2 chains, then in the third chain, work 5 double crochet (dc) stitches all in same space (this forms one shell).
- Skip 2 chains, then single crochet (sc) into next chain.
- Repeat the sequence across: skip 2 chains → 5 dc in next chain → skip 2 chains → sc in next chain.
- End row with a single crochet in last chain.
- Count shells and sc’s carefully; this creates the "fan" texture.
4. Rows 2 onward – Repeat Shell Stitch Pattern
- Chain 3 (counts as dc), turn.
- Work the same sequence above by placing your shells (5 dc in one stitch) and single crochets aligned vertically with row below.
- Shells go over the shells, and sc go over the sc’s.
- Continue pattern consistently for desired height until reaching under bust (21 rows recommended for a size G).
5. Mark Center for Bust Shaping
- Fold rectangle in half to locate center.
- Use leftover yarn or stitch markers to mark three points: center, and middles of each half—these marks indicate where shaping triangles will be made.
6. Bust Shaping – Triangle Formation
- Begin decreasing shells on each side of center mark to form two small triangle bust panels.
- This is done by reducing number of shells per row gradually (decreases done by omitting some shells and working more single crochets or half shells).
- Keep symmetry; decrease on both sides equally.
- Use half double crochet (hdc) stitches to close gaps and improve shaping.
- Continue shaping until three small shell groups remain on each side, forming neat triangular bust coverage.
7. Back Panels
- Work two rectangle panels for the back straps area.
- Use same shell stitch or simple sc/dc rows.
- Attach or crochet directly onto front/bust panel aligning edges perfectly for comfort and style.
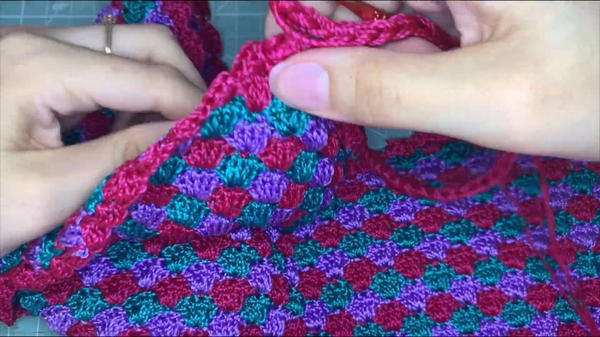
8. Side Finishing
- Crochet single crochet stitches neatly along side edges of the shell panels to finish and tidy rough edges.
- Aim for firmness and beauty in seam areas to ensure structural stability.
9. Straps
- Use triple strands of yarn held together to make sturdy, soft straps.
- Use a larger crochet hook (3.5mm) to work the triple yarn comfortably.
- Chain desired length for straps (e.g., 34 cm).
- Work multiple rows of single crochet to desired width and thickness.
- Sew/attach straps symmetrically on the top corners of front and back panels. Reinforce with extra stitches for durability.
Tutor’s Suggestions
- Use stitch markers to keep track of center and shaping points.
- Always count chains and stitches to maintain stitch multiples for pattern harmony.
- Finish ends as you go for clean results and less tangle.
- Blocking panels before assembly helps improve shape and stitch definition.
- Adjust strap length and width to personal comfort; triple yarn adds durability but stay mindful of weight.
- For color changes, carry yarn neatly avoiding bulky knots.
Uses
- Stylish, comfortable summer or casual top with flattering bust shaping.
- Versatile enough for layering or standalone wear.
- Great for experimenting with colors using color-block technique.
Tip
When closing the bust triangles, if you notice holes or loose gaps, use half double crochet stitches instead of double crochet to tighten and secure shaping seams better.
Conclusion
This crochet shell stitch top balances aesthetic appeal with functional shaping to create a flattering, durable garment. Following the pattern step-by-step and your personal sizing calculation, you’ll produce a gorgeous top that’s comfortable and chic.


