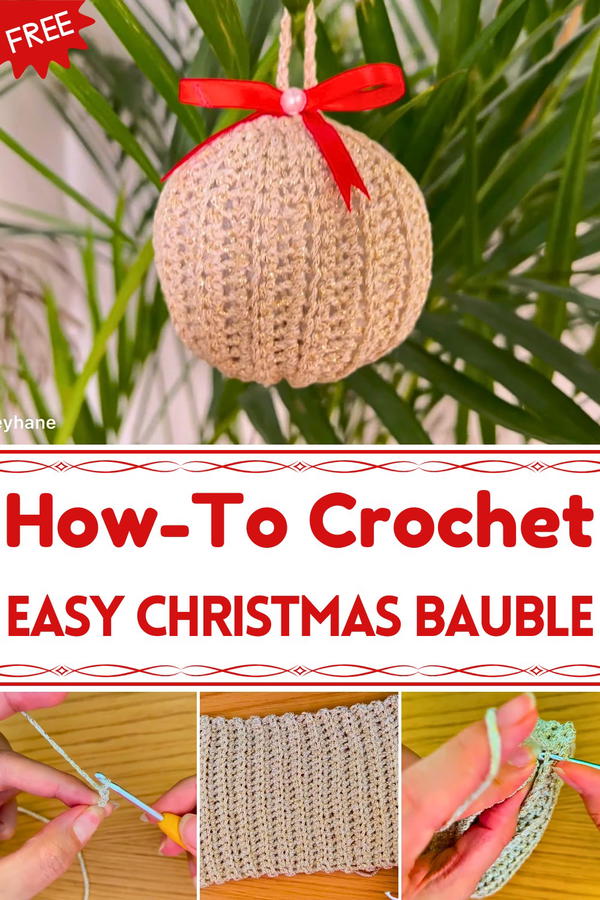
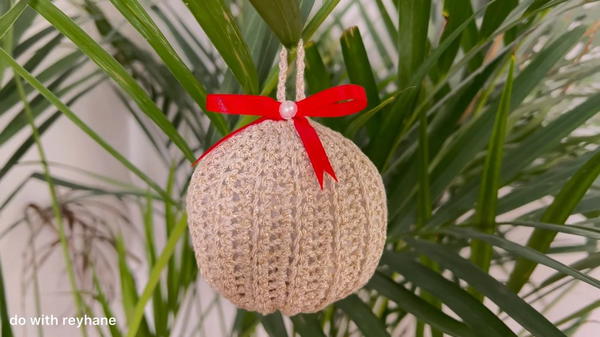
Deck your space with festive charm using this Free Crochet Christmas Bauble Pattern, perfect for adding handmade sparkle and cozy holiday cheer.
A cozy evening glow reflected off a sparkling tree, each ornament catching the light with a cheerful shimmer, while handcrafted baubles added a warm, personal touch. The Free Crochet Christmas Bauble pattern transforms simple yarn into charming, textured decorations that bring festive cheer to any space. These baubles are lightweight yet sturdy, making them perfect for hanging on trees, garlands, or even as playful accents on gifts and wreaths.
How to Crochet Christmas Bauble Pattern Step by Step
Their intricate crochet stitches create depth and character, turning ordinary decorations into unique, handmade highlights that capture attention and admiration. Beyond their visual appeal, making these baubles provides a calming, focused activity that allows hands to move rhythmically while producing tangible, joyful results. Finished pieces can be personalized with colors, beads, or small embellishments, giving each bauble its own personality.
Versatile, decorative, and fun to create, these crochet baubles combine practicality with festive charm, adding both texture and color to seasonal celebrations. The Free Crochet Christmas Bauble pattern offers a delightful way to bring creativity, warmth, and handmade elegance into holiday décor, turning simple yarn into treasured ornaments that make the season truly memorable.
Step-by-Step Guide to Crochet Christmas Baubles
Introduction
In this simple yet elegant tutorial, you’ll learn how to crochet 3D Christmas Baubles that are perfect for decorating your festive tree. These baubles are beginner-friendly, customizable in size and color, and can be completed in 1-2 hours. The design is versatile and allows you to add personal touches like pearls, ribbons, or a stylish bow. Let’s dive in and create a beautiful handmade Christmas ornament!
Materials Needed
- Yarn: Use any color or size yarn of your choice (preferably medium-weight yarn for better structure).
- Crochet Hook: 3 mm crochet hook (or a size suitable for your yarn).
- Polyester Fiber Fill: For stuffing and shaping the bauble.
- Pearls and Ribbon: For decoration (optional).
- Tapestry Needle: To weave in ends and close the bauble.
- Scissors: To trim yarn as needed.
Special Features
- Beginner-Friendly: The tutorial uses basic stitches (chains, single crochet, slip stitches).
- 3D Effect: The rows of single crochet form a textured, rounded design that mimics a professional look.
- Customizable: Adjust the yarn color, size, and decorations for a unique look.
- Fast Completion: The bauble can be finished within 1-2 hours, even by beginners.
Level of Difficulty
The skill level required for this tutorial is beginner. If you know how to make a slip knot, chain, single crochet, and slip stitch, you’ll find this project straightforward.
Step-by-Step Instructions
Step 1: Make the Foundation Chain
- Slip Knot: Begin by creating a slip knot on your crochet hook.
- Place the hook between the yarn, twist and pull through to form the knot.

- Place the hook between the yarn, twist and pull through to form the knot.
- Chain 23: Make a total of 23 chains.
- Tip: Hold the foundation chain loosely to keep it straight and easy to work into.
- Start Single Crochet: Insert your hook into the second chain from the hook, yarn over, and pull through. Then yarn over again and pull through both loops on the hook.
- This forms your first single crochet (sc) stitch.
Step 2: Work Single Crochet Across the Chain
- Continue making single crochet stitches in each chain.
- Work slowly to ensure each stitch is evenly spaced.
- Tip: Look for the “V-shape” on top of each chain to place your hook into.
- Reach the end of the chain, and you’ll have 22 single crochet stitches in total.
Step 3: Create the Next Rows for the 3D Effect
- Chain 1: At the end of the row, chain 1 and turn your work.
- Insert your hook into the middle of the V-shape of the first stitch and create another single crochet.
- Repeat single crochet across the row, inserting your hook into the middle of each V-shape.
- Continue repeating this process for 17 rows total.
- Note: The rows will begin to naturally shape the design into a slightly curved 3D effect. This is how the rounded bauble shape begins to form.
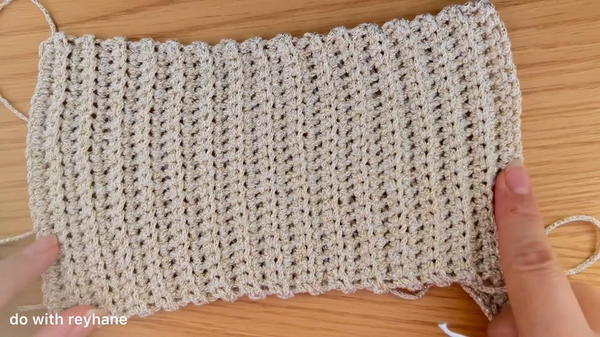
- Note: The rows will begin to naturally shape the design into a slightly curved 3D effect. This is how the rounded bauble shape begins to form.
Step 4: Close and Shape the Bauble
- Cut the Yarn: Once you’ve completed the rows, leave a long yarn tail for sewing.
- Use Tapestry Needle: Thread the needle with your yarn tail.
- Insert the needle in a zigzag pattern through the edges of one side of the rectangle.
- Pull Tight to Close: Gently pull the yarn to cinch the top edge shut. Secure with a knot.
- Repeat the zigzag sewing and cinching process for the opposite edge of the rectangle. Now you have a round crocheted shell.
Step 5: Fill the Bauble
- Stuff with Polyester Fiber Fill: Use a generous amount of fiberfill to form a fully rounded shape.
- Make sure the bauble is evenly stuffed, shaping it as you go.
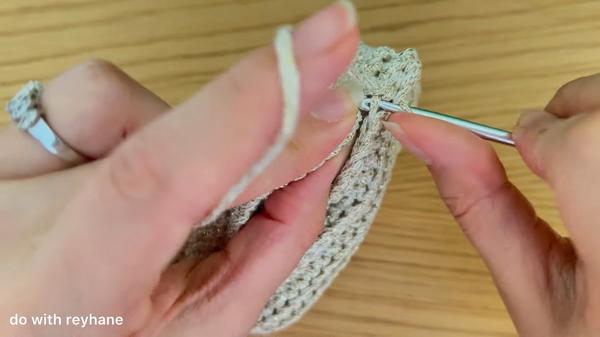
Step 6: Attach the Two Edges Together
- Fold the bauble in half and align the edges neatly.
- Use your crochet hook to create slip stitches along the edge:
- Insert the hook into both layers (one stitch from each side) and yarn over.
- Pull through all loops on the hook to make a slip stitch.
- Work across the entire edge, joining the two halves into a completed sphere.
Step 7: Create the Hanging Loop
- Insert your hook at the top of the bauble and attach a new piece of yarn.
- Chain 15 (or more, depending on your desired loop length).
- Attach the chain to the base with a slip stitch, forming a loop for hanging the bauble.
Tutor’s Suggestions
- Keep Stitches Even: To ensure a neat finish, maintain consistent tension throughout the project.
- Stuff Firmly: Overstuffing the bauble slightly will ensure it holds its shape over time.
- Personalize It: Add pearls, sequins, or bows to suit your holiday decor theme.
Uses for the Christmas Baubles
- Tree Decorations: Hang them on your Christmas tree for a festive look.
- Home Décor: Use them in garlands, as table centerpieces, or hang them by the window.
- Gifts: Customize baubles for friends, adding initials, embellishments, or thematic colors.
- Wreaths: Incorporate them into handmade holiday wreaths.
Pro Tip
When crocheting the foundation chain, keep it slightly loose to avoid tightness. This makes it easier to work back into the chain and ensures your bauble has a smooth, round texture.
Conclusion
Crocheting Christmas baubles is a fun and rewarding project that allows you to create personalized and festive ornaments for the holiday season. The process is simple yet magical, and the end result is sure to bring cheer to your home.


