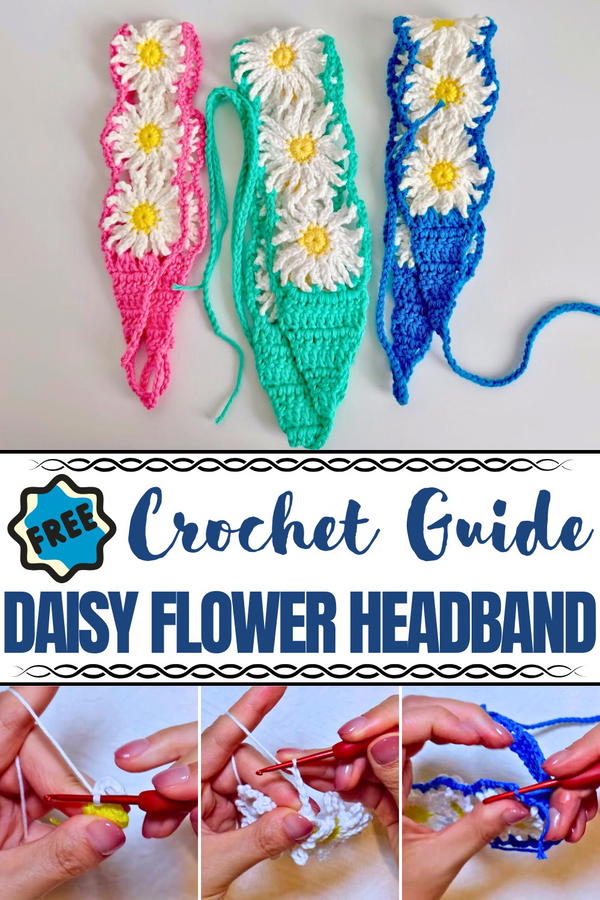
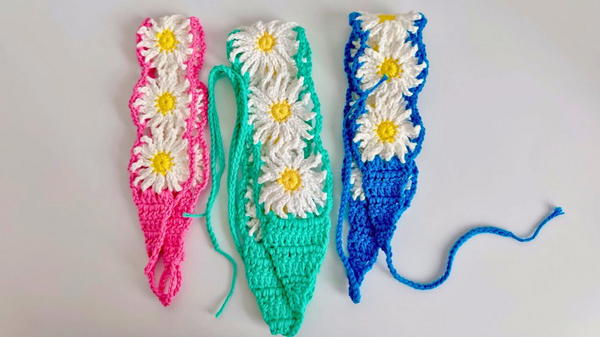
Sprinkle some flower-powered fun with the Crochet Daisy Flower Headband Pattern, an easy way to add charm, color, and smiles to your style.
In a quaint village teeming with artistry, women once gathered to weave tales and daisy chains, threading community into every stitch. Fast forward to today, the crochet daisy flower headband pattern echoes this enduring tradition but with a contemporary twist, becoming an emblem of timeless beauty and personal expression. This elegant accessory graces any hairstyle or ensemble, making it a versatile addition to your wardrobe. Combining simplicity with charm, the headband captures the essence of nature’s grace through delicate, interlinked petals that present a serene yet vibrant aesthetic. Ideal for both casual wear and special occasions, it’s a thoughtful, handmade gift that speaks volumes of love and care.
How To Crochet Your Perfect Daisy Flower Headband
The beauty lies in its adaptability: choose soft pastels for a subtle touch or bold hues for a striking statement. The lightweight design ensures comforts for daily wear, while its handcrafted quality adds a unique personal touch. For beginners, it’s a perfect, approachable project, boosting confidence in new skills while yielding a satisfying finished product.
Expert crocheters, meanwhile, find joy in the intricate detailing and creative opportunities. Truly, the crochet daisy flower headband is more than an accessory; it’s a link between the past and the present, weaving stories, traditions, and beauty with every thread.
Step-by-Step Instructions
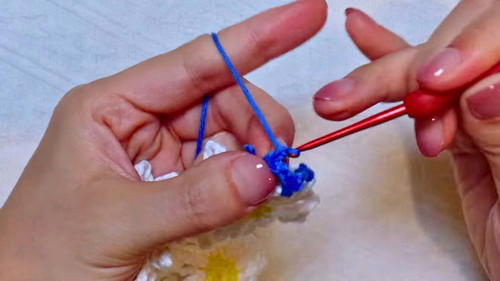
1. Creating the First Daisy Flower
- Step 1: Begin with a magic ring and chain one.
- Step 2: Work 12 single crochets into the ring.
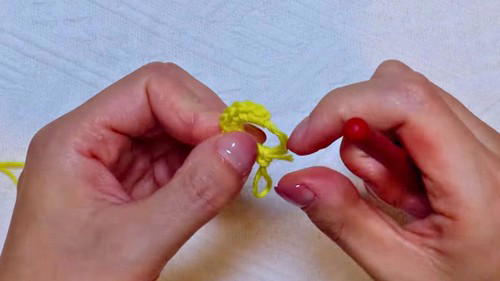
- Step 3: Slip stitch into the first single crochet to complete the first round.
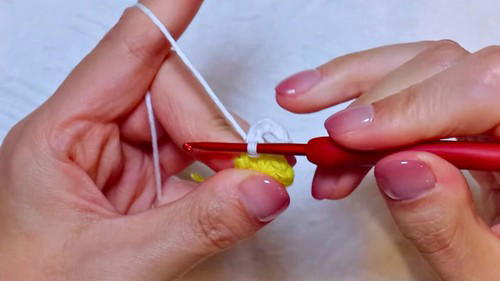
- Step 4: For the petals, start in any stitch, chain nine, and slip stitch into the next stitch.
- Step 5: Repeat this process until the daisy flower has a total of 12 petals.
2. Making and Connecting Additional Flowers
- Step 1: Create the second daisy flower following the same steps.
- Step 2: After completing the 10th petal of the second flower, join the two flowers:
- Chain 4 and pull the hook off the yarn.
- Insert the hook into a petal from the first flower.
- Chain 4 again and slip stitch into the next stitch of the second flower.
- Step 3: Connect additional flowers using the same method until you have six flowers.
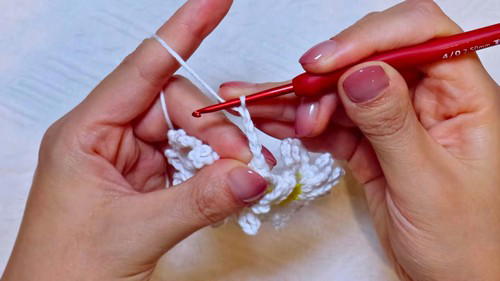
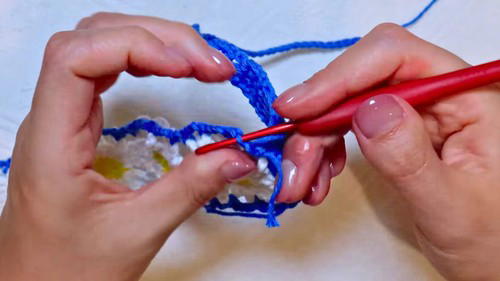
3. Connecting Petals for Added Detailing
- Step 1: Begin with the fourth petal of the first flower.
- Step 2: Chain one to start and work one single crochet.
- Step 3: Chain 3, work a single crochet into the next petal, and repeat for the remaining petals.
- Step 4: To connect between flowers, chain 2 and work a single crochet into the petal of the next flower.
- Step 5: Repeat this pattern to complete the connection.
4. Creating the Headband Band
- Step 1: Start with a single crochet stitch in any desired petal.
- Step 2: Chain 3, and work sets of 3 double crochets into the petals in sequence.
- Step 3: Progressively reduce double crochet stitches per row to form the narrow band.
- Step 4: Repeat this process on the opposite side to complete the headband.
Special Features
- Lightweight and customizable.
- Ideal for all seasons as an accessory or gift.
- Can be adapted to different color combinations depending on your preference.
Level of Difficulty
This project is beginner-friendly, with clear step-by-step instructions provided in the video. If you're familiar with basic crochet stitches (single crochet, chain, double crochet), you can complete this project with ease.
Tutor’s Tips and Suggestions
- Accuracy Matters: Pay close attention to stitch counts when forming petals for uniform results.
- Choose Comfortable Yarn: Use soft yarn for comfort when wearing as a headband.
- Experiment with Size: Feel free to adjust flower size or headband length for different age groups.
Uses of the Daisy Flower Headband
- Fashion Accessories: Add flair to an outfit or hairstyle.
- Gifts: Perfect handmade presents for friends and family.
- Home Décor: Use it as garland or wall art by weaving multiple flowers together.
Materials Needed
- Yarn: Lightweight yarn in your preferred color.
- Crochet Hook: Size appropriate for your yarn (check yarn label for recommendations).
- Scissors and Tapestry Needle: For cutting and weaving yarn ends.
Bonus Tip
Block the completed flowers lightly to enhance their shape and give the petals a clean, professional appearance.
Conclusion
This daisy flower headband is a versatile crochet project suitable for beginners and seasoned crocheters alike. With six connected flowers and a stylish narrow band, the result is a charming accessory that complements any outfit.


