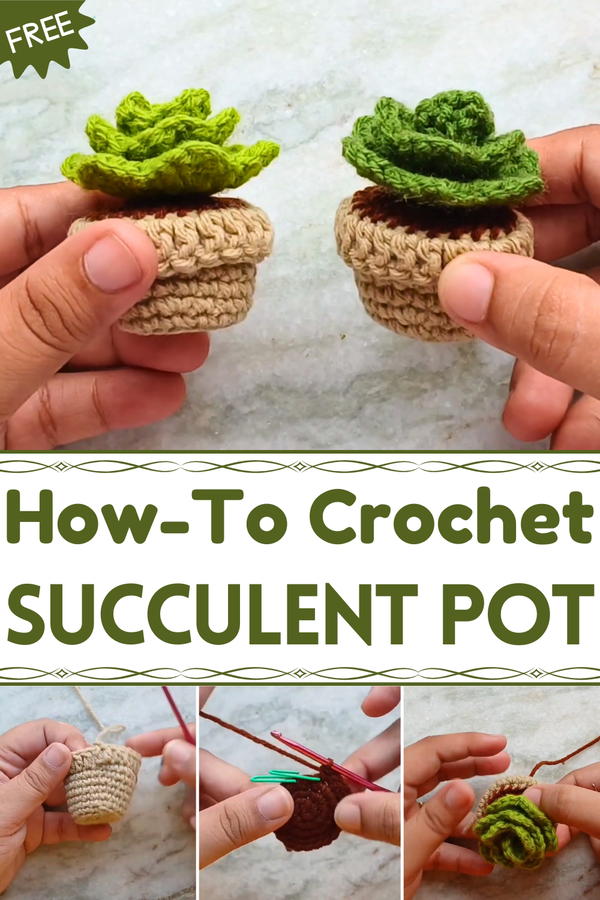
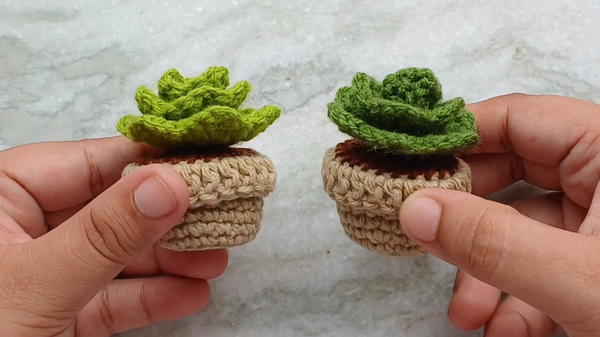
Bring a touch of charm to any space with this Free Crochet Succulent Pot Amigurumi Pattern, perfect for creating cute, handmade décor that lasts.
Many people find joy in bringing greenery indoors, yet not every space can accommodate real plants or the care they require. Artificial plants provide a lasting alternative, but soft, hand-crochetedd versions add warmth and personality that store-bought items often lack. The Free Crochet Succulent Pot Amigurumi Pattern transforms yarn into a charming, low-maintenance piece that brightens desks, shelves, or windowsills. These petite succulents capture the layered beauty of real plants, offering a playful yet elegant accent that can complement any décor style.
Crochet Succulent Pot Amigurumi Pattern That Brightens Any Room
Lightweight and durable, they require no watering or sunlight, making them ideal for apartments, offices, or children’s rooms. Each amigurumi piece encourages experimentation with colors, textures, and sizes, allowing crocheters to personalize arrangements according to taste or seasonal themes. Beyond aesthetic appeal, crocheting these succulents provides a mindful and rewarding experience, as the rhythmic stitching fosters focus, patience, and satisfaction.
Finished pieces are versatile, they can serve as gifts, home décor, or educational tools for teaching children about plant types and shapes. Combining practicality with charm, these crocheted succulents transform simple corners into delightful displays, proving that even miniature creations can bring lasting beauty, cheer, and a sense of accomplishment to everyday spaces.
Special Features
- Beginner-Friendly: Designed with simple stitches like single crochet and double crochet, making it accessible even to novice crocheters.
- Compact Design: The small size and straightforward design make it a quick project to finish.
- Three-Part Construction: The tutorial covers making three separate elements—the pot, soil, and plant—which are then sewn together to create the finished amigurumi.
- Versatile Gift: Perfect for gifting on any occasion, especially for plant lovers and fans of handmade creations.
- Customizable: You can modify the yarn colors and plant styles for unique designs.
Level of Difficulty
This project is suitable for beginners, though familiarity with basic crochet techniques like single crochet, double crochet, and working in continuous rounds is helpful. It also introduces intermediate concepts, such as magic circles, back-loop-only stitches, and assembling crocheted pieces.
Materials Required
To crochet the succulent pot amigurumi, you'll need:
- Yarn:
- Clay-colored yarn (pot)
- Dark brown yarn (soil)
- Green yarn (succulent)
- Pillow Fluff: For stuffing the pot.
- Crochet Hook: A 3mm crochet hook (smaller than the recommended hook size for tight stitches).
- Yarn Needle: For sewing pieces together and weaving in ends.
- Stitch Marker: A paperclip or specialty stitch marker for marking rounds.
- Scissors: For cutting yarn.
Tutor’s Suggestions
- Use Smaller Hook: The tutor recommends going down a couple of hook sizes for tighter stitches to ensure the stuffing does not show through.
- Mark Your Rounds: Always mark the last stitch of each round to keep track of your work, preventing accidental miscounts.
- Adjust Tension: Maintain even tension throughout to create neat stitches and symmetric spirals.
- Stuff Lightly: Avoid overstuffing the pot to prevent the bottom from bulging, ensuring it remains flat for stability.
- Follow Stitch Count: Pay close attention to the number of stitches for each round, especially during increases. If your count doesn't add up, recheck your work.
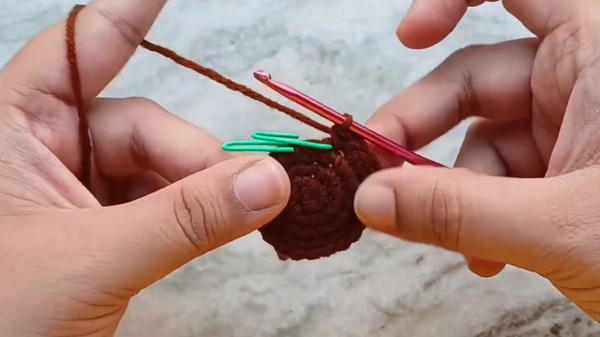
Step-by-Step Instructions
Part 1: The Pot
Magic Circle:
- Wrap clay-colored yarn around your finger to form a cross.
- Insert your hook underneath the cross, pull the yarn through, and yarn over again to pull through the loop on your hook.
- Chain 1 to secure.
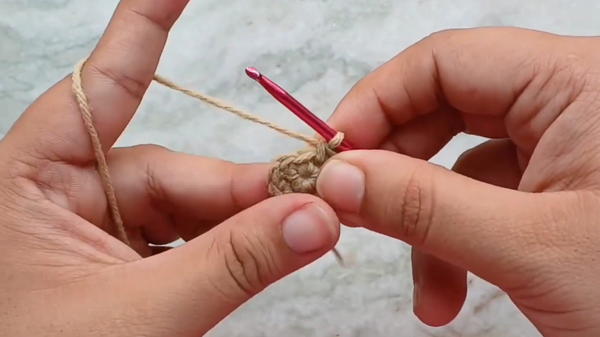
Round 1:
- Crochet 6 single crochets into the magic circle, then pull the tail to cinch it tight. Mark the last stitch with a paperclip or stitch marker.
Round 2:
- Make 2 single crochets (increase) in each stitch around for a total of 12 stitches.
Round 3:
- Alternate 1 single crochet with an increase (2 single crochets in one stitch) across the round, ending with 18 stitches.
Round 4:
- Work single crochets into the back loops only. This creates a flat base for the pot.
- Work single crochets into the back loops only. This creates a flat base for the pot.
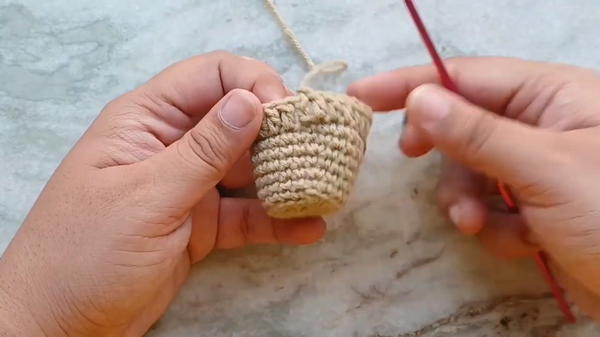
Remainder of the Pot:
- Follow increases and rounds as described to reach a count of 24 single crochets by Round 7.
- Continue with constant stitch counts for Rounds 8 and 9.
Lip of the Pot:
- Start Round 10 by slip stitching into the front loop of the next stitch.
- Work double crochets into the front loops of each stitch around.
- Slip stitch to the third chain of the chain-3 at the beginning, then cut the yarn and fasten off, leaving a tail for weaving ends.
Part 2: The Soil
Repeat the Pot’s First 3 Rounds:
- Follow the same initial process as the pot to create a soil base.
Round 4:
- Stagger increases every third stitch to prevent a hexagonal shape. Start with one single crochet in the first stitch, then increase in the next. Continue alternating.
- End with 24 single crochets.
Finalize:
- Slip stitch, cut the yarn, and leave a long tail for sewing the soil to the pot. The soil piece fits snugly atop the pot.
Part 3: The Succulent (Plant)
Chain Base:
- Using green yarn, make a slip knot and chain 29 stitches.
Row 1:
- Skip the first 4 chains, then work into the 5th chain to create a V-stitch (double crochet, chain 1, double crochet).
- Skip 1 chain and repeat the V-stitch pattern across.
Row 2 (Leaf Formation):
- Chain 1, turn.
- In the chain-1 space of each V-stitch, work 2 double crochets, chain 2, and 2 double crochets to form leaf shapes.
- Single crochet between V-stitches and repeat.

Assembly:
- Roll the completed piece tightly, forming a spiral. Use the yarn tail to secure the spiral by stitching through all layers.
Assembly
Attach the Plant to Soil:
- Sew the spiral plant securely to the soil piece using the tail left from the green yarn. Position it neatly around Round 2 of the soil piece.
Attach Soil to Pot:
- Stuff the pot lightly, ensuring stability.
- Sew the soil to the pot using the brown yarn tail, stitching through the soil’s front loop and the pot’s back loop for a clean finish.
Final Touches:
- Use the clay-colored yarn tail to pull the bottom of the pot inward slightly, creating a dimple for extra stability. Tie the yarn tails together, secure the knot, and hide it inside.
Uses
- Decorative Piece: Perfect for desks, shelves, or windowsills.
- Gift Item: Makes an ideal handmade present for plant lovers and crochet enthusiasts.
- Eco-Friendly Alternative: A cute, whimsical substitute for real plants that require care and maintenance.
Tip for Success
When working with V-stitches and leaves, ensure you don’t over-tighten your stitches in the green yarn, as this will impact the spiral plant's final shape. Take your time rolling it up for a neat and symmetric succulent spiral.
Conclusion
This pattern is a fantastic way to practice simple crochet techniques while crocheting a decorative and functional piece. The succulent pot amigurumi is not only a joy to make, but also an eye-catching project that showcases your creative skills.


