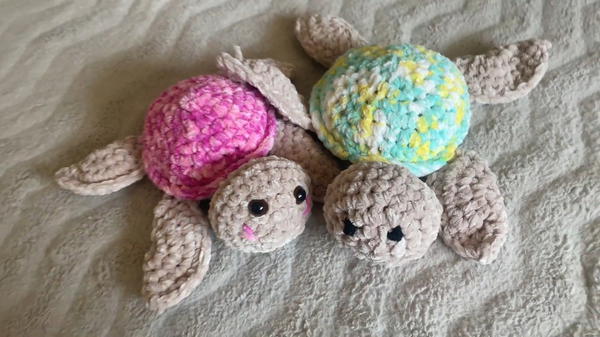
Bring charm into your crochet collection with this Free Crochet Turtle Plushie Pattern, perfect for thoughtful gifts or cozy, cheerful decor.
A single glance at a child's cherished plush turtle often reveals more than just stitches and stuffing, it holds memories, quiet comfort, and joyful squeals of affection. Whether tucked beside pillows or held tightly during sleepy afternoons, plushies become silent companions in countless childhood moments. The Free Crochet Turtle Plushie Pattern brings this warmth into every loop and detail, capturing charm in the curve of a shell and the gentle softness of flippers.
Crochet Turtle Plushie Pattern With Amigurumi
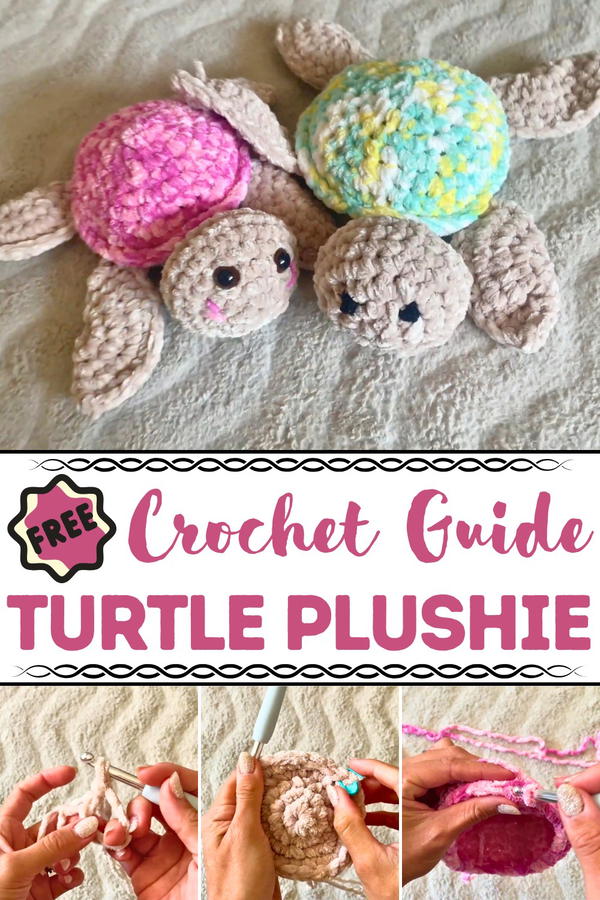
This plushie offers more than visual appeal, it’s a tactile experience, perfect for gifting, decorating nurseries, or even easing anxiety in little hands. The gentle, rounded structure and cuddly texture make it safe for all ages, while its whimsical appeal suits both modern and nostalgic spaces. The turtle’s playful personality adds life to shelves, baskets, or themed party settings.
Lightweight and compact, it’s ideal for travel or cozy corners alike. From seasonal gifting to daily comfort, it adds a thoughtful touch to any moment. Whether you’re adding charm to a child’s room or surprising someone with a soft token of care, this plush turtle brings heartfelt value in the simplest form. It’s proof that a few thoughtful details stitched with purpose can hold a lifetime of meaning.
Materials Needed
To make the crochet plushie turtle, you will need the following:
- Yarn: Two types/colors – one for the body and one for the shell. Emma uses Bella Baby Nippers yarn, but any soft and chunky yarn will work.
- Hook: A 7 mm crochet hook (or any size suitable for your yarn).
- Other Tools:
- Stitch marker
- Scissors
- Hobby fill/stuffing
- Optional: Black yarn or safety eyes for facial features.
Key Features of the Plushie
- Adorable Design: The turtle features a rounded shell, little fins, and customizable facial features (stitched or safety eyes, blush details).
- Soft Texture: The use of chenille or similarly soft yarn adds to the plushie's overall charm.
- Beginner-Friendly Structure: It doesn’t require advanced skills, making this a great entry project for new crocheters.
Step-by-Step Instructions
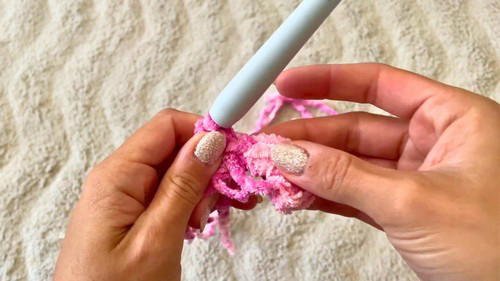
1. Creating the Head
- Begin with a magic ring and add six single crochets into the ring.
- Gradually increase the stitches:
- Row 2: 2 single crochets in each loop (12 stitches total).
- Row 3: Alternate between single crochet and 2 single crochets in the next stitch (18 stitches).
- Continue with further increases for defined rows, followed by rounds of single crochets with no increases to shape the head.
- Insert safety eyes or embroider eyes as desired before starting to decrease.
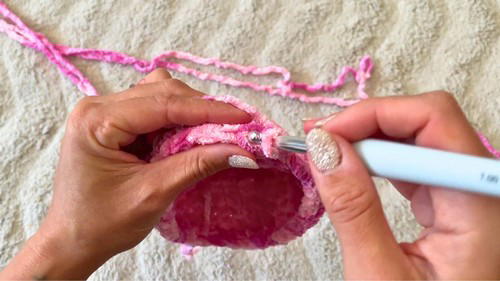
2. Decreasing and Closing the Head
- Once the larger portion of the head is complete, decrease using front-loop-only decreases:
- Start with 2 single crochets followed by a decrease.
- Continue decreasing gradually, stuffing the head with hobby fill as you go.
- Close the head by pulling the final stitches tight and tucking the remaining yarn inside.
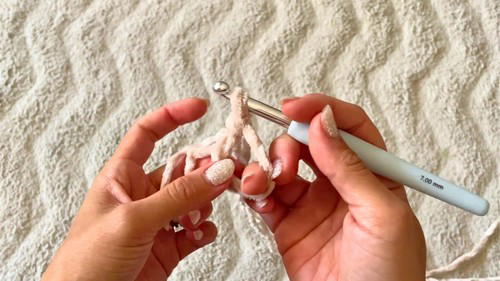
3. Making the Fins
- Use the body yarn to create four fins.
- Start with a magic ring, add 8 single crochets, and close the ring.
- Gradually increase the number of stitches in the first few rows.
- Once the fin’s shape forms, close the two sides together to create small “dumpling” shapes for the fins.
- Repeat this process to create all four fins.
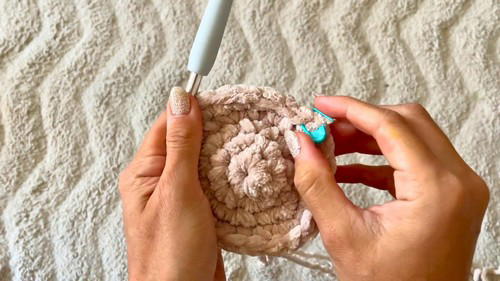
4. Creating the Shell
- Use the shell-colored yarn and start with a magic ring with 6 single crochets.
- Gradually build the shell’s size:
- Increase stitches row by row until the final size is achieved (working increases in every 4th or 5th stitch).
- Add a decorative edge by crocheting in the back loops only to form a ridge on the shell.
- Once complete, fasten off and turn the shell inside out to prepare for assembly.
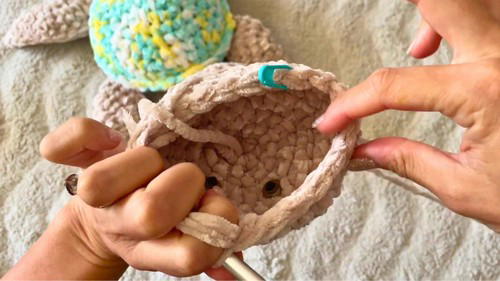
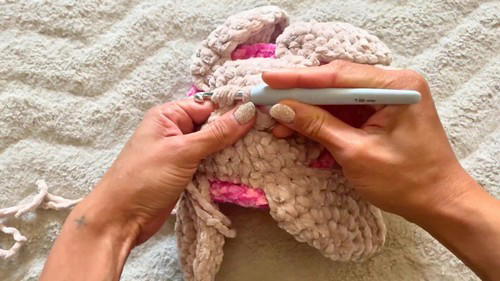
5. Attaching the Pieces
- Begin by attaching the head to the shell using body-colored yarn:
- Align the head to the shell so the rounded parts face outward.
- Sew or crochet each head stitch to the shell’s inside loop.
- Attach the fins symmetrically:
- Position the curved side of the fins toward the head for a natural look.
- Sew each fin to the body, spacing them evenly.
- Add a small tail:
- Chain four stitches in the middle of the back loops, then slip stitch back into the shell.
6. Stuffing and Finishing
- Stuff the body of the turtle securely but not overly tight.
- Begin decreasing the shell by mimicking the increasing process in reverse:
- Work consistent decreases in every round until you are left with a small opening.
- Use a finishing stitch to close the gap and weave in all remaining yarn ends.
Special Features
- Customizable Design:
- You can change the size by adjusting the yarn weight and hook size.
- Personalize the turtle with stitched or safety eyes, blush accents, or decorative patterns.
- Soft and Durable: The chenille yarn ensures a plush and sturdy toy.
- Versatile Uses: The turtle works well as a gift, a kid’s toy, or a keepsake.
Tutor’s Suggestions
- Emma, the tutor, emphasizes the importance of “chunky yarn” for this project. If you cannot find chunky yarn, you can use two strands of thinner chenille yarn held together.
- Stitch markers are helpful for keeping track of rounds and avoiding confusion amidst fluffy yarn textures.
- While assembling, align the turtle’s parts carefully for a balanced and neat final look.
Difficulty Level
- Beginner to Intermediate: The project mainly contains basic crochet stitches (e.g., single crochet, increases, and decreases). The chenille yarn and assembly steps may require patience for first-timers but are still manageable.
Final Assembly Tip:
When sewing or crocheting parts together, use the same color yarn for better blending. For example:
- Use body-colored yarn for attaching the head and fins.
- Use shell-colored yarn for details like the tail.
Conclusion
This step-by-step tutorial by Emma guides you toward crafting a cute and cuddly crochet turtle plushie. Its beginner-friendly instructions, combined with helpful tips and careful attention to detail, ensure that crocheters of all skill levels can enjoy making this toy.


