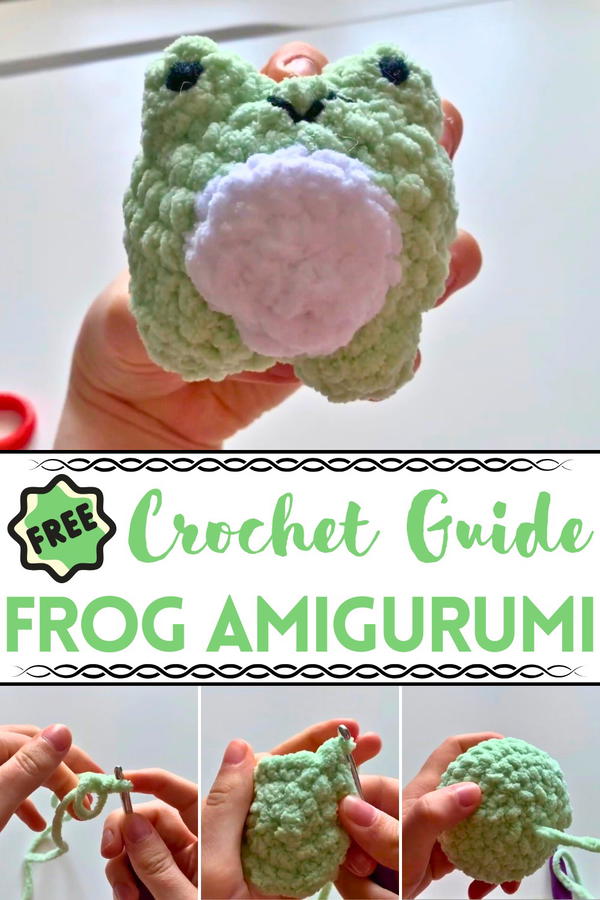
Hop into the joy of crochet with this Free Crochet Frog Amigurumi pattern, perfect for beginners looking to master every step with ease and creativity.
Crochet enthusiasts often find themselves captivated by the charm of amigurumi creations, and one delightful project that never fails to impress is the lovable frog. Perfect for beginners and seasoned crocheters alike, this step-by-step guide to a crochet frog amigurumi brings both simplicity and elegance to your next handmade masterpiece. Its cheerful character is brought to life through thoughtful details, from its balanced proportions to its charming limbs that invite endless admiration.
Not only does this crochet frog serve as a fun and engaging project, but it becomes a versatile companion. Use it as a playful gift for a loved one, an adorable décor for your desk, or even an imaginative addition to your crochet collection. Its beauty lies in its approachable instructions that guide each step, ensuring your frog achieves just the right amount of softness and stability.
This project doesn’t just offer a delightful result; it provides a moment of relaxation and satisfaction as each thoughtful stitch builds towards completion. The beauty of the design paired with the benefits of focused creativity make it a standout option for anyone wanting to try their hand at amigurumi. Ready your hooks and yarn, and step confidently towards creating something truly memorable.
Special Features of the Frog
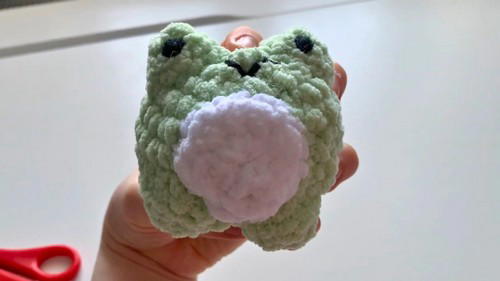
- Simplistic Design: The frog consists of a basic rounded body, a white belly patch, small legs, and bulging eyes.
- Adorable Appearance: Special attention is given to its expression, featuring a small smile and safety eyes for added cuteness.
- Customizable: The design allows you to adjust yarn color, stuffing firmness, and features for personalization.
Materials Needed
- Yarn (Two Colors):
- Green for the body, head, and limbs.
- White for the belly patch.
- Crochet Hook (appropriate size matching yarn).
- Safety Eyes for realistic, secure frog eyes.
- Polyfill Stuffing for the body.
- Tapestry Needle for sewing parts together.
- Optional stitch markers for tracking stitches.
Step-by-Step Instructions
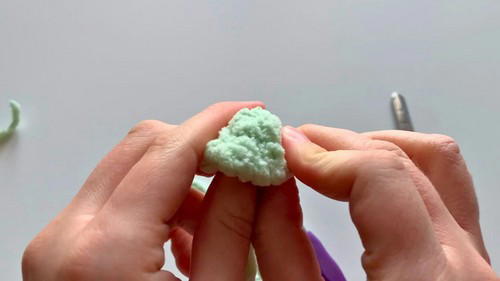
1. Body Creation
- Start with a magic ring using green yarn. If you're unfamiliar with magic rings, consult other tutorials.
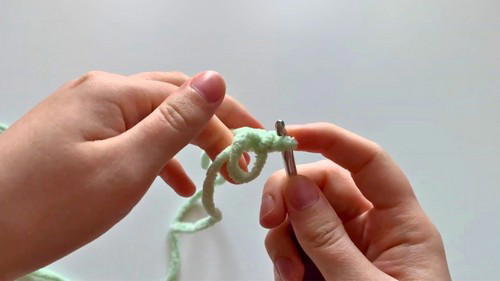
- Crochet 8 single crochets into the ring, tighten, and tie a double knot to secure.
- Increase stitches in every round:
- Round 2: Two single crochets in each stitch (16 stitches total).
- Round 3: Single crochet, increase (24 stitches).
- Round 4: Two single crochets, increase (32 stitches).
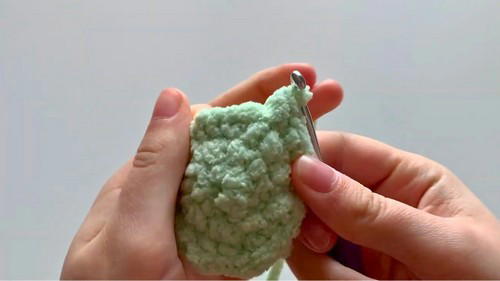
- Rounds 5-8: Crochet one single stitch per loop (no increases). This creates the curvature of the body.
- Start decreasing to close the top of the body:
- Two single crochets followed by an invisible decrease.
- Crochet and decrease further until a small hole remains.
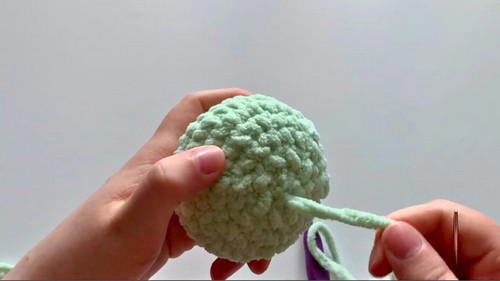
- Stuff the body with polyfill for desired firmness. Close the hole with a needle by picking up every remaining stitch and pulling tight.
2. Belly Patch
- Create a magic ring using white yarn and crochet 8 single crochets into it.
- Tighten the ring, tie a double knot, and slip stitch into the first stitch.
- Round 2: Crochet 2 single crochets in each stitch (16 stitches total).
- Leave a long tail for sewing, and position the belly patch in line with the curved part of the frog’s body. Sew it securely using your needle.
3. Eyes and Feet
- Eyes and Feet:
- Use the same process to create 4 identical pieces (magic ring with 6 single crochets, then increase into every stitch).
- Add safety eyes to 2 pieces for eyes, leaving the remaining 2 pieces for feet.
- Placement:
- Sew the eyes onto the top of the frog’s head such that the magic rings are appropriately spaced.
- Sew the feet beneath the belly, in line with the eyes.
4. Mouth
- Use black yarn to create a simple V-shaped mouth below the eyes.
- Pull the yarn tight to create a neat stitch. Secure the ends by threading them into the frog’s body using your needle.
Level of Difficulty
Beginner-Intermediate
While the techniques such as magic rings, single crochets, increases, and decreases are beginner-friendly, the assembly (attaching small parts like eyes and feet) may require patience and precision, making the project slightly challenging for complete beginners.
Tutor’s Suggestions
- Use Stitch Markers: It’s helpful to track progress, especially during rounds involving increases and decreases.
- Stuffing Firmness: Adjust polyfill based on preference for softer or firmer plushies.
- Practice for Fiddly Parts: Take extra time with sewing the parts securely, as these sections can be tricky for beginners.
Uses of the Crochet Frog
- A cute decoration for shelves, desks, or themed spaces.
- Perfect for handmade gifts for children, friends, or family.
- Great as a learning project to practice basic crochet and amigurumi techniques.
Tip for Success
When assembling the frog (eyes, belly, feet), pin the pieces in place temporarily with sewing pins to ensure everything is aligned before sewing. This saves time and reduces frustration during placement.
Conclusion
This crochet frog pattern provides step-by-step instructions to help you create a charming handmade amigurumi project. With basic materials, patience, and attention to detail, you can crochet a companion that is both adorable and unique.


