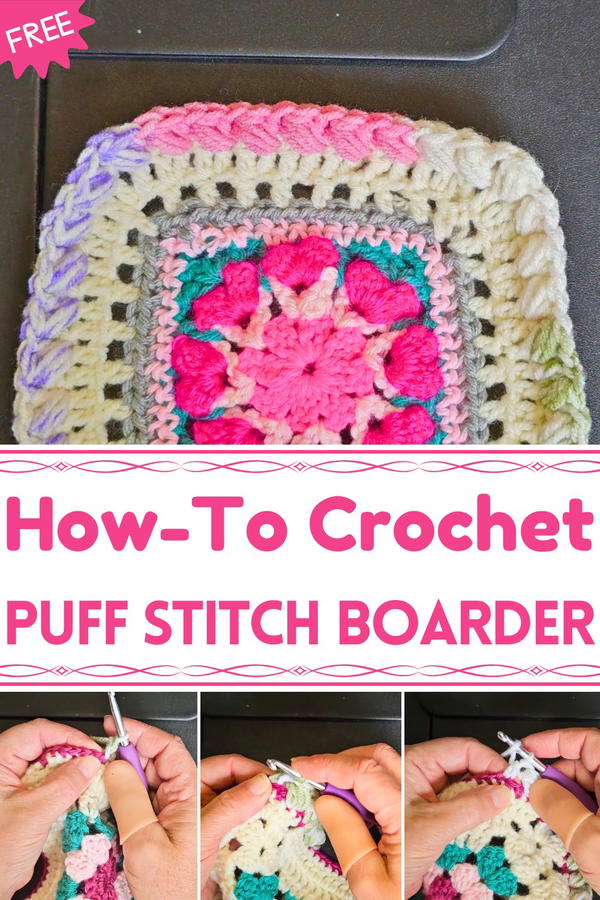
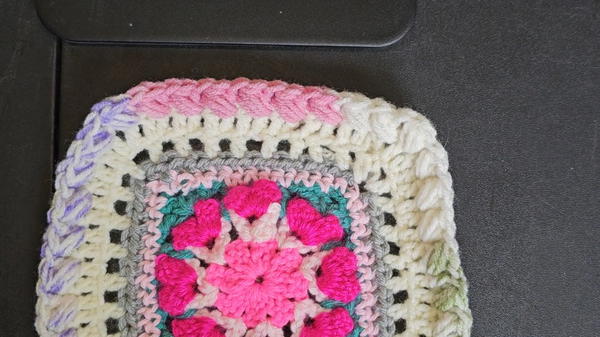
Frame your projects with charm using this Free Crochet Puff Stitch Border Pattern that adds textured elegance to blankets, scarves, and décor.
Textile borders have always played a key role in enhancing the visual appeal and structure of handmade pieces, turning simple creations into polished, detailed works. The Free Crochet Puff Stitch Border pattern brings this principle to life, adding depth, texture, and elegance to blankets, scarves, garments, and home décor items. Its raised puff stitches create a tactile surface that feels as delightful as it looks, giving every project a unique, refined edge.
Trendy Crochet Puff Stitch Border to Update Your Blankets
Beyond decoration, working with puff stitches provides a mindful and focused crocheting experience, helping improve hand-eye coordination and patience while delivering a satisfying sense of progress. The pattern’s versatility allows it to be used for reinforcing seams, finishing edges, or adding a charming accent that elevates the overall piece. Each stitch contributes to a carefully structured border, creating a professional and cohesive appearance while maintaining softness and flexibility.
Whether enhancing the edge of a cozy blanket or adding subtle flair to a scarf or shawl, this puff stitch border merges beauty with functionality. The process not only results in visually appealing creations but also provides makers with the rewarding experience of producing an item that is both practical and elegant, leaving behind a lasting impression of skill and care.
Special Features
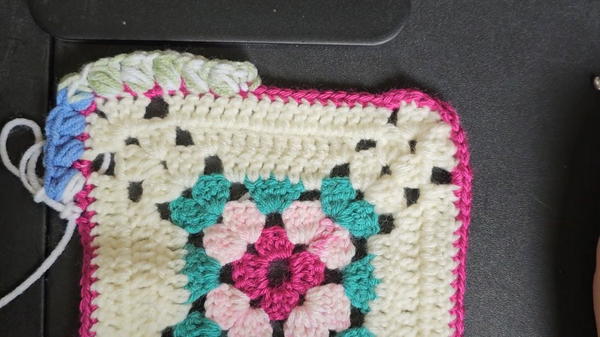
- Elegant Texture: The puff stitch creates a raised, decorative border that adds depth and visual interest to your project.
- Versatility: Can be applied to various projects, including baby blankets, granny squares, and finished edges on crochet pieces.
- Customization: Ronnie provides tips for modifying the border, such as adding chains to corners if needed for a smoother finish.
- Ease of Execution: Once the pattern is understood, the puff stitch border progresses quickly and allows for creative experimentation.
Materials Required
To follow this tutorial, you’ll need:
- Crochet Hook: Use the same hook size as you used for your project.
- Yarn: Ronnie uses Hobby Lobby yarn, including color-changing yarn. While the specific type is not labeled, any yarn of your choice will work.
- Scissors: To cut and tidy up loose ends.
- Your Project: Ensure your base project (e.g., baby blankets, granny squares) has a finished edge ready for the border.
Step-by-Step Process
1. Set Up Your Border
- Begin by selecting an edge of your project (avoid starting in a corner).
- Tie on your yarn securely and create a foundation chain stitch.
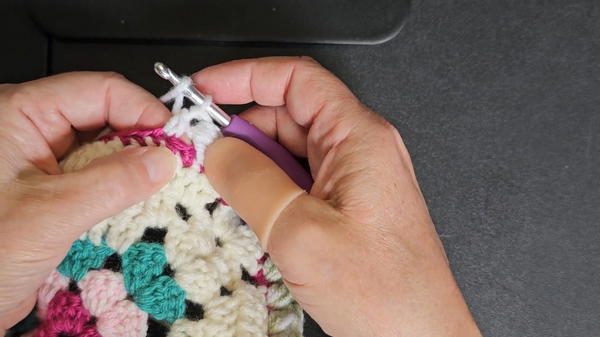
2. Create the Puff Stitch Border
Skip a Stitch: Start by skipping one stitch on your project.
Half Double Crochet:
- In the next stitch after the skipped one, make a half double crochet.
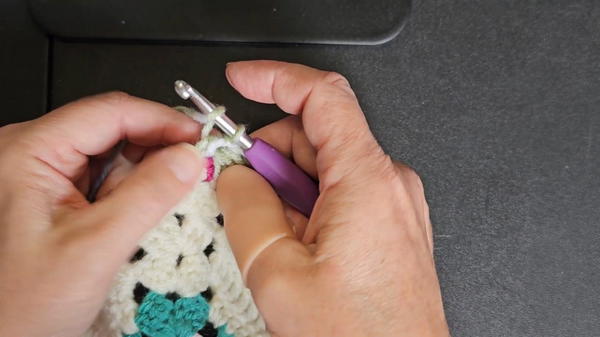
- In the next stitch after the skipped one, make a half double crochet.
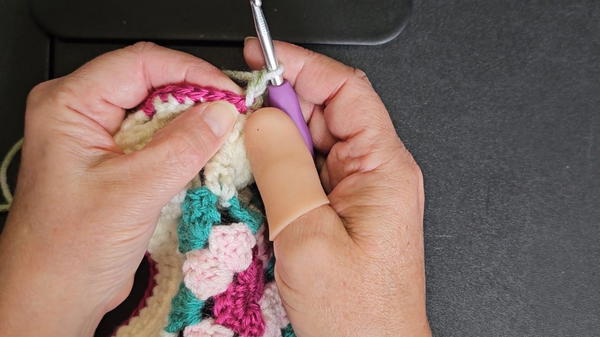
Puff Stitch:
- Wrap your hook and go back into the skipped stitch.
- Pull up yarn, wrap the hook, insert into the same skipped stitch again, and repeat these steps a total of three times.
- By the end, you’ll have seven loops on your hook. Wrap your hook one last time and pull through all seven loops to complete the puff stitch.
Repeat:
- Move to the next stitch on your project (skipping one stitch after the puff stitch) and make a half double crochet.
- Go back into the stitch you skipped and repeat the puff stitch process.
- Continue this sequence around the edge of your project.
3. Address Corners
- Without Adjustment: You can continue the puff stitch border around corners without adding changes if you prefer simplicity.
- Adding Chains: If your corner puckers or feels tight, add a chain stitch as you approach and work through the corner to ensure it lays flat.
Tutor’s Suggestions
- Match Hook to Project: Use the same hook size as the one used for the base project to maintain consistency in stitch density.
- Keep Tension Relaxed: Loose tension makes it easier to work through the puff stitch and prevents tight loops from causing difficulty.
- Experiment with Corners: You can choose to add chains around corners if you notice puckering, but this step is optional based on how the project behaves.
- Start in a Runway: Ronnie advises starting the border in a straight section rather than at a corner for smooth integration.
Level of Difficulty
- Beginner-Friendly to Intermediate: While the puff stitch requires attention to tension and looping, the border pattern is simple and repetitive, making it suitable for crocheters of all skill levels. Beginners can follow along with practice, and experienced crocheters will find it easy to master.
Uses for the Puff Stitch Border
- Baby Blankets: Add a soft and decorative border to comfort items.
- Granny Squares: Elevate the look of your squares by framing them with puff stitches.
- Finished Projects: Enhance edges on crochet pieces for a professional polished look.
- Home Décor: Use the border in projects like table runners or cushion covers to add texture and style.
Tip for Success
To maintain consistency and avoid uneven edges, work slowly as you progress around corners and ensure each puff stitch has exactly seven loops on the hook before pulling through. Using markers for corners can help you align stitches more smoothly.
Conclusion
The puff stitch border is a quick, easy, and beautiful way to add a decorative finish to your crochet projects. Ronnie from Whip and Chain offers a clear tutorial that ensures crocheters of all skill levels can follow along and create a stunning textured edge.


