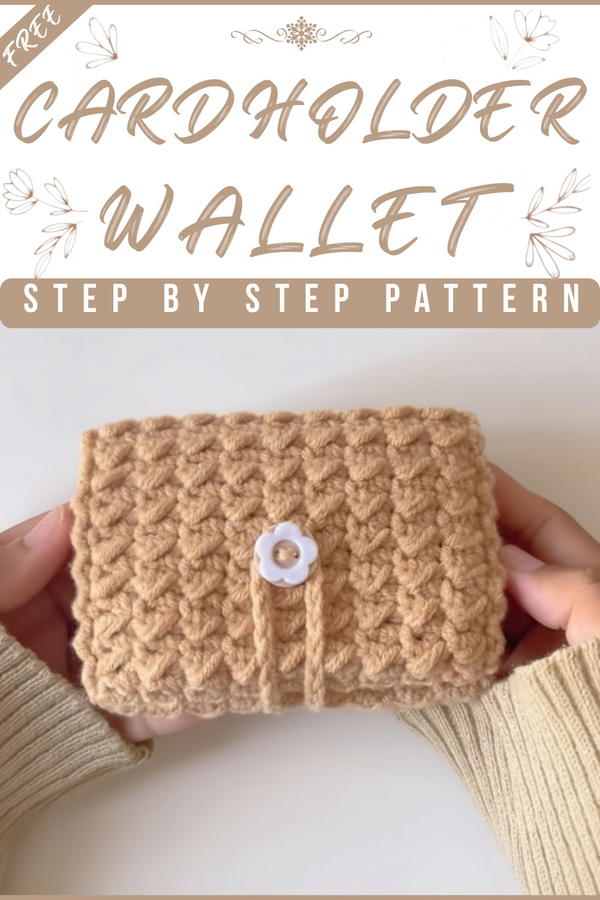
Snag this bright crochet card holder wallet that fits perfectly in your hand, keeps cards safe, and adds a pop of handmade charm to your day.
Yourself reaching into your bag and pulling out a neat, colorful little wallet that fits perfectly in your hand. This small treasure keeps your important cards safe and easy to find. A crochet card holder wallet pattern helps you create this handy item with soft yarn, making it both sturdy and lovely. The wallet’s simple stitches and charming colors give it a warm, handmade feel, making it a joy to carry every day.
Charming Crochet Card Wallet Pattern that Fits Every Pocket
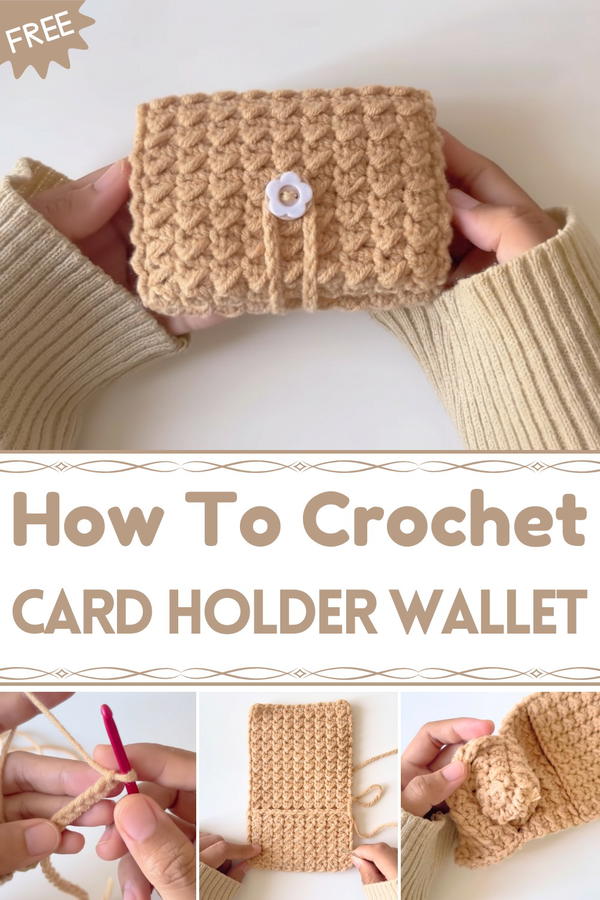
Not only does it hold credit cards, ID cards, or small notes, but it also helps keep your bag organized and light. Perfect for quick trips or daily use, this crochet card holder wallet fits snugly in pockets or purses. It’s easy to clean and durable, blending style with convenience. Making one yourself brings pride and adds a personal touch to something useful you carry everywhere.

Crochet Card Holder Pattern
Materials Needed
- Medium-weight yarn of your choice
- Crochet hook suitable for your yarn (commonly 4 to 5 mm)
- Sewing needle
- Button (for closure)
- Scissors
Step-by-Step Pattern
Step 1: Create a Slip Knot and Chain Foundation
- Make a slip knot on your hook.
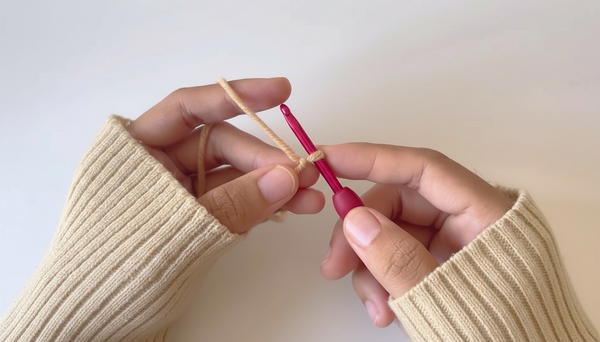
- Chain 20 stitches (or multiples of 2 if you want a longer holder; e.g., 22, 24, 26 etc.).
- This chain length forms the width of the holder.
Step 2: Work First Row with Back Loop Slip Stitch and HDC
- Instead of working into both loops, insert your hook into the back loop only of each chain.
- Start with a slip stitch (sl st) into the back loop of the second chain from hook.
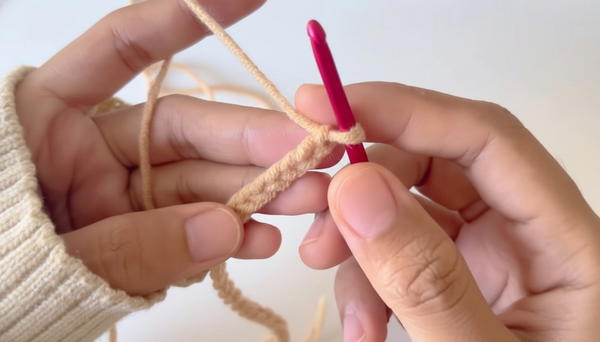
- Then alternate:
- slip stitch in back loop of next chain,
- half double crochet (HDC) in back loop of the next chain.
- Repeat this pattern (sl st, HDC, sl st, HDC) across the entire row until the last chain.
- The last stitch should be a slip stitch in back loop.
Step 3: Turn and Chain 1
- Chain 1 to start the next row.
- Turn your work to begin the next row.
Step 4: Repeat Rows with Slip Stitch and HDC in Back Loop
- For each subsequent row, continue the pattern:
- slip stitch in back loop,
- HDC in back loop,
- alternating until the row ends.
- Maintain the stitch count; there will be 19 stitches (holes) active after the foundation chain as some chain stitches are used as turning chains.
- Repeat rows until your piece reaches approximately 28-29cm long or your desired length.

Step 5: Finish Off the Piece
- After reaching the desired length, make one last chain 1 and cut the yarn, leaving a tail of about 1 meter for seaming.
- Pull the yarn through the last loop to fasten off.
- Weave in any loose ends.
Step 6: Fold and Sew the Holder
- Fold the crochet piece so that the sides align, shaping the pocket.
- Use a yarn needle and the tail left earlier to sew the sides carefully.
- Sew evenly so the holder stands straight and sturdy.
- Ensure you lock the stitches firmly.
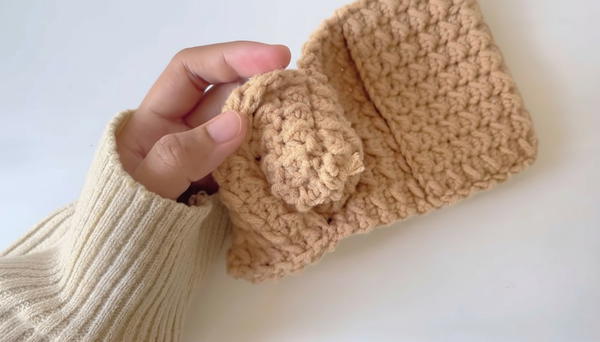
Step 7: Attach Closure Button
- Sew a button onto the flap part of the holder with a sewing needle.
- The button hole should align with the crochet holder opening for easy closure.
- Use thick thread or multiple strands for strong attachment.
Step 8: Create and Attach the Strap
- Make a slip knot to start a strap.
- Chain 40 stitches (~18 cm long).
- Cut the yarn leaving enough tail to attach.
- Sew the chain strap securely to the side or back corner of the holder.
- This strap can be used to hang the holder inside the card or carry it conveniently.
Special Features
- Uses slip stitch and half double crochet (HDC) worked in the back loops only, creating a neat ribbed texture that's durable and flexible.
- Easy to customize size by adjusting chain length and row count.
- Includes a functional button closure.
- Comes with a convenient strap for hanging or portability.
Level of Difficulty
Beginner
Requires basic knowledge of slip stitch, half double crochet, working in back loops, chaining, and sewing finishes.
Tutor's Suggestions
- Maintain consistent tension for an even fabric.
- Use a yarn smooth enough to easily slip the hook through back loops.
- When sewing, use strong thread or doubled thread for durability.
- Adjust chain and row numbers for desired dimensions.
- Use a sturdy button with a secure attachment to withstand frequent use.
Uses
- Organize small items in your card such as cards, receipts, or keys.
- Handy for travel or daily commutes.
- Customizable gift idea for crochet enthusiasts.
Pro Tip
To create a firmer structure, consider inserting a piece of cardboard or plastic sheet inside the bottom before sewing. This stabilizes the holder, preventing sagging.
Conclusion
This crochet card holder is an easy and practical project, perfect for beginners looking to create something useful and stylish. With a textured ribbed pattern and customizable size, it’s both functional and charming.