Soft, whimsical, and full of charm, this Crochet Amigurumi Squid pattern makes a delightful companion for any space or gift.
Glimmering beneath the gentle waves, the squid moves with a quiet elegance that has fascinated many for generations. This Crochet Amigurumi Squid pattern captures that elegance in a soft, huggable form, turning an ocean wonder into a charming yarn creation. Each piece features delicately shaped tentacles and a rounded, plush body, offering a tactile and visually appealing companion that delights both children and adults.
Quirky Crochet Amigurumi Squid for Ocean-Themed Spaces

Its versatility makes it more than just a decorative item. It can brighten nurseries, accent bookshelves, or serve as a playful companion for imaginative storytelling. The compact size ensures it fits effortlessly into cozy corners or travels easily as a unique gift. Attention to proportion and texture imbues the squid with a lifelike presence, reflecting the subtle beauty of marine life.
Beyond aesthetics, assembling the amigurumi encourages focus, dexterity, and patience, making it both a relaxing and rewarding pursuit. The combination of artistry and utility transforms a simple yarn project into a delightful keepsake. This Crochet Amigurumi Squid brings the serenity and charm of the sea into everyday life, offering a soft, endearing reminder of underwater grace and whimsical marine beauty.
Materials Needed
To make the crochet squid, gather the following:
- Yarn: Size #4 acrylic yarn of your choice (variety in colors for a creative touch).
- Crochet Hook: 3.25 mm hook (you can use a slightly smaller or larger hook for variations in size).
- Plastic Safety Eyes or Yarn: Safety eyes are optional—use yarn/thread to sew eyes for child-safe alternatives.
- Stuffing: Polyester fiberfill stuffing for the squid’s body.
- Stitch Marker: Highly recommended for keeping track of your rounds.
- Scissors: For cutting yarn.
- Yarn Needle: For weaving in ends.
- Optional Weight: Marbles or small weights for turning the squid into a paperweight.
- Hot Glue Gun: For securely attaching finishing details, such as eyes and the bottom piece.
Special Features
- Beginner-Friendly: The pattern is easy to follow for those just starting with crochet, though it teaches foundational techniques like working in rounds and creating increases and decreases.
- Customizable: The squid can be made in any color or combination of colors, allowing for creative expression.
- Child-Safe Option: Swap out plastic safety eyes for sewn-on yarn/thread eyes if gifting to a child.
- Multi-Purpose Use: Leave the plushie unweighted for a soft and cuddly toy, or add a few marbles inside for a fun, quirky paperweight.
Level of Difficulty
Beginner-Friendly to Intermediate:
- This project involves basic crochet stitches like single crochet, magic circle, and increases/decreases, making it great for beginners.
- The detailed process for proper shaping and finishing is best suited for those with some experience in using stitch markers and working in the round.
Step-by-Step Instructions
Part 1: Creating the Squid’s Head
1. Start with the Magic Circle
- Use a magic circle to form the base of the squid’s head.
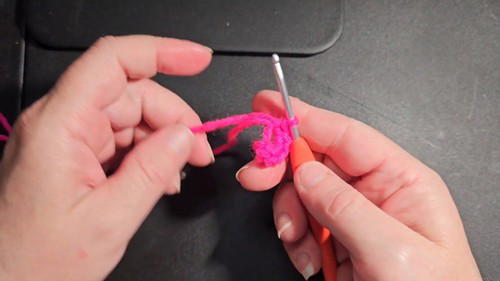
- If you’re struggling with a magic circle, chain 3, and slip stitch to the first chain to form a loop.
- Work 6 single crochets (SC) into the loop.
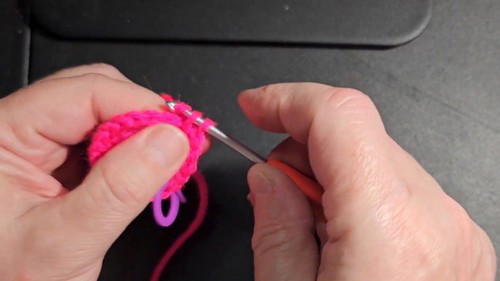
2. Work in Rounds and Increase Gradually
- From the magic circle, begin working the squid head in rounds:
- Round 2: Place 2 SC into each stitch (total: 12 stitches).
- Round 3: 1 SC in the first stitch, 2 SC in the next (repeat around). Increase starts to space out.
- Round 2: Place 2 SC into each stitch (total: 12 stitches).
- Continue round-by-round increments, increasing the number of single crochets between the 2-SC increases:
- Example: Round 4 – 1 increase, 1 SC in next 2 stitches.
- Proceed to Round 5 – 1 increase, 1 SC in next 3 stitches.
- Repeat this logic until you reach 7 single crochets between increases.
- Once the increases are done (54 stitches in total), crochet 10 rows without any increases (stitch-for-stitch). This forms the bulk of the squid’s rounded head.
2: Shaping the Bottom of the Head
1. Begin Decreasing
- Once you've completed the 10 rows of stitch-for-stitch:
- Round 1: 7 SC, then 1 invisible decrease (repeat).
- Round 2: 6 SC, then 1 invisible decrease (repeat).
- Continue decreasing in the same pattern until reaching 3 SC between each decrease.
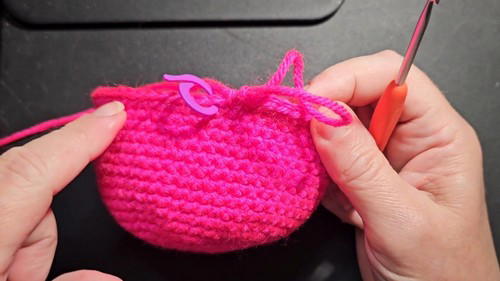
2. Stuff the Head
- Stuff the squid’s head with polyester fiberfill. Mold and shape it to achieve a smooth, round body. Ensure the head feels firm but not overfilled.
3: Creating the Tentacles
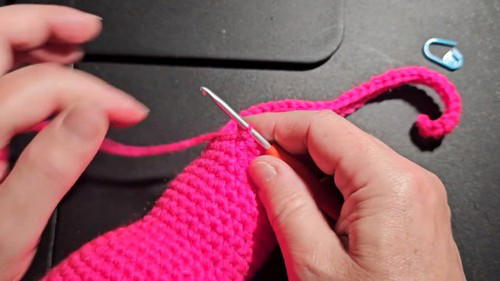
1. Chain the Tentacles
- After decreasing and stuffing the head, chain 45 for the first tentacle.
- In the 4th chain from the hook, make a half double crochet (HDC), and proceed to create HDCs in each chain back to the head.
2. Attach Tentacles
- Once you reach the head, slip stitch into the next stitch, chain another 45, and repeat the process.
- Continue this until the squid has 15 tentacles evenly spaced around the base.
4: Making and Attaching the Eyes
1. Crochet the Eyes
- Start with a magic circle:
- 6 SC into the ring (Round 1).
- Increase to 12 stitches by adding 2 SC into each stitch (Round 2).
- Use contrasting yarn colors (e.g., white and the squid’s body color) to enhance the eyes’ look.
- Switch to white yarn and SC around the edges for a round, visible frame.
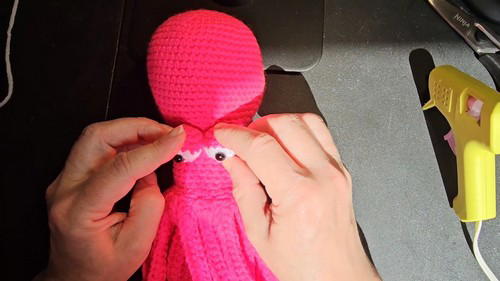
2. Add Safety Eyes (Optional)
- Add plastic safety eyes to the center of the eye pieces. For child-safe options, avoid plastic eyes and sew on black yarn or thread to create the eye's center.
3. Attach the Eyes
- Use hot glue to securely attach the eyes to the squid’s body, positioning them symmetrically on the head.
5: Finishing the Base
- To close the bottom of the head, crochet a flat circle using the same principles as the increases for the head (magic circle, 6 SC rounds increasing as needed).
- Use a hot glue gun to attach this base to the bottom of the squid’s head, securely enclosing the stuffing.
Tutor’s Suggestions
- Experiment with Colors: Use rainbow or pastel yarn for a fun look, or go for darker, monochromatic tones for a more dramatic effect.
- Child-Safe Adjustments: Always sew eyes with yarn/thread when gifting to children; avoid plastic safety eyes.
- Control Tightness: Use a smaller crochet hook for tight stitches to create a clean and smooth look.
- Use Scraps Wisely: This project works well with leftover yarn bits, making it a great scrap yarn project.
Uses of the Crochet Squid
- Plush Toy: A cute gift for kids or adults who love soft toys.
- Paperweight: Add marbles or weights to the body for functionality.
- Décor: Display the squid as an adorable and quirky décor item.
- Handmade Gift: Perfect for birthdays, holidays, or as a thank-you present.
Tip for Success
Take your time creating the eyes—they are the most expressive part of the squid and really bring the piece to life. Be cautious with stuffing to avoid gaps, and ensure symmetry when placing the tentacles.
Conclusion
The crochet squid project is a delightful mix of creativity and technique that offers the chance to create a whimsical and functional plushie. Whether you’re making it for yourself, as a gift, or as home décor, this versatile project is rewarding and fun to make. Exploring different yarn colors and customizations makes it even more exciting. Get ready to crochet your own squid and let it bring a splash of fun to your collection.


