Spread festive cheer with this Free Crochet Santa Claus Square Pattern, featuring merry textures and cozy details for joyful holiday projects.
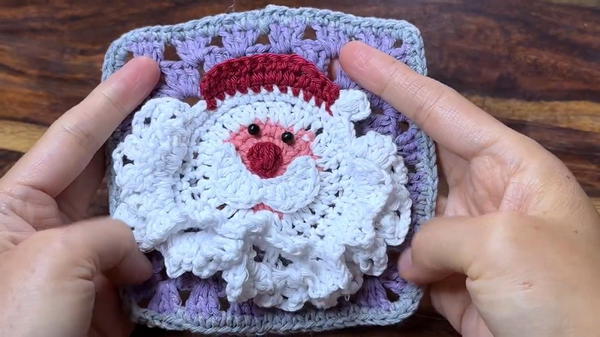
Festive cheer often begins with small handmade touches that fill the season with warmth and nostalgia. The Free Crochet Santa Claus Square pattern brings that joyful feeling to life through a charming combination of texture, color, and detail. Each square features Santa’s familiar face—complete with a soft beard, rosy cheeks, and his classic red hat—making it a delightful addition to holiday decorations.
Delight Crochet Santa Claus Square to Spread Cheer

The raised stitches give the square a dimensional look, adding depth and character that make it stand out on blankets, wall hangings, or seasonal pillows. Lightweight yet durable, it holds its shape beautifully while remaining soft to the touch. The color contrast between red, white, and beige enhances its festive charm, instantly bringing a touch of Christmas spirit to any space.
Its versatile structure allows easy joining with other squares, letting you assemble unique holiday projects or use each piece individually. Beyond decoration, it serves as a thoughtful handmade gift that carries warmth and joy. The gentle rhythm of stitching adds calm and satisfaction, making it a meaningful project for the season. With its cheerful appeal, durability, and holiday brightness, this crochet Santa Claus square captures the heart of Christmas through comfort, color, and creativity.
Special Features
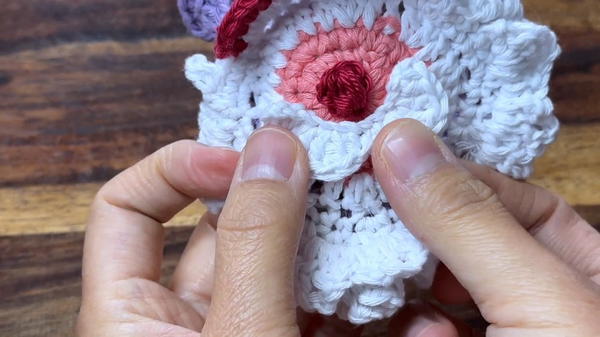
- Holiday Theme: The granny square features Santa Claus with a three-dimensional textured hat and beard.
- Textured Beard and Hat: Adds realistic details to Santa’s face through layered stitches.
- Versatile Use: Once completed, the square can be used in blankets, decorations, or Christmas gifts.
- Multicolor Design: Incorporates red, white, and skin-tone yarn for a festive appearance.
- Stash-Friendly: Great for using leftover yarn from previous projects.
Level of Difficulty
This project is intermediate level. It requires knowledge of basic crochet stitches such as single crochet, double crochet, and slip stitches, as well as more advanced techniques like popcorn stitches, the magic ring, and working in the front and back loops. Beginners can attempt this project but may find it easier if they are already familiar with the granny square concept.
Materials Needed
- Yarn:
- Red yarn (for Santa’s hat).
- White yarn (for Santa’s beard and hat details).
- Skin-tone yarn (for Santa’s face).
- Crochet Hook: Choose a hook that suits the weight of your yarn (commonly 4 mm – 5 mm).
- Scissors: For cutting yarn as needed.
- Darning Needle: To weave in ends and join elements.
- Hot Glue (Optional): To attach the final beard securely.
Step-by-Step Details
1. Creating Santa’s Face (Round 1)
- Make the Magic Ring: Wrap your yarn twice around your fingers, pull through the loop, and chain one to secure.
- Chain Three: This chain will count as your first double crochet.
- Work 15 Double Crochets into the Ring: Create a total of 16 double crochets, including the starting chain of three.
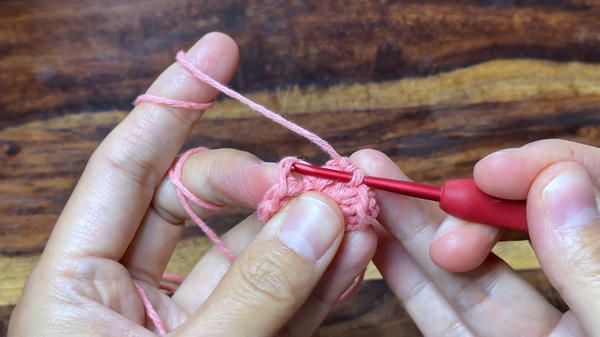
- Tighten the Circle: Pull the yarn tail snugly to close the magic ring.
- Slip Stitch to Join: Insert your hook into the third chain from the starting chain and join the round with a slip stitch.
2. Adding Texture to Santa’s Face (Round 2)
- Chain One in the New Round: (Does not count as a stitch.)
- Single Crochet and Increase Alternately:
- In the first stitch, make a single crochet.
- For the next stitch, make two single crochets (increase).
- Repeat this pattern (1 single crochet, then 2 single crochets) around the circle.
- At the end of the round, you should have 24 stitches.
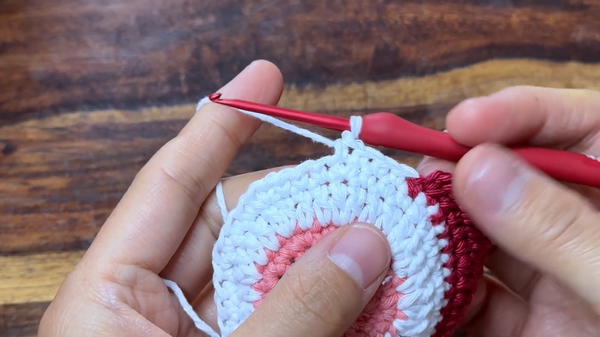
3. Creating Santa’s Hat (Round 3)
- Switch to Red Yarn: Begin the next part of the design for Santa’s hat.
- Work with Single Crochets:
- Make 10 single crochets in red yarn.
- Continue working seamlessly over the white yarn tail.
- Switch Back to White Yarn:
- Create 4 single crochets in white yarn to form the trim of Santa’s hat.
- Create 4 single crochets in white yarn to form the trim of Santa’s hat.
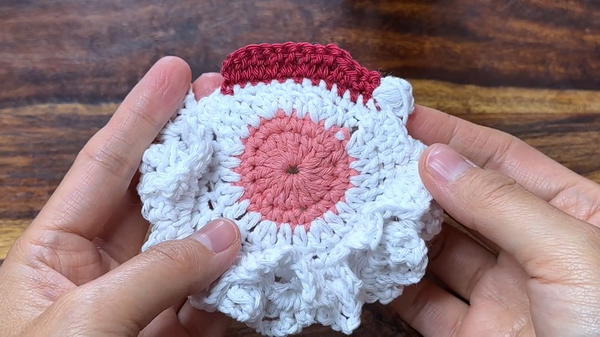
4. Building Santa’s Hat and Beard Details
- Create the Height of the Hat:
- Insert the hook into the stitch and pull up a loop.
- Chain three and turn your work.
- This chain counts as a double crochet.
- Build the Hat Shape:
- Add different stitch heights: double crochets, half-double crochets, and single crochets.
- Beard Loops:
- Chain five, skip a stitch, and make a single crochet to form loops where the beard will attach.
- You will need a total of 11 loops/chain spaces for the beard.
5. Forming the Granny Square Around Santa’s Head
- Work in Front and Back Loops:
- Insert your hook into the front loops for textured stitches.
- Leave the back loops for later when the granny square is formed.
- Create the Square:
- Insert a combination of three double crochets with chain spaces to create granny square corners.
- Work single crochets and chain spaces evenly to maintain the square’s shape.
6. Constructing the Beard
- First Layer of the Beard:
- Use the white yarn. Chain and build treble and double crochets within the chain loops you created earlier.
- Work two treble crochets, chain three, and finish with two more treble crochets for a fluffy effect.
- Second Beard Layer:
- Turn your work to the wrong side. Repeat the beard process on a second row to give the beard a layered, voluminous look.
7. Final Touches
- Add Decoration to the Hat:
- Create a popcorn stitch pom-pom for the top of the hat by chaining three and inserting popcorn stitches into the same stitch.
- Chain three to finish the pop-pom and stitch it securely.
- Work the Border:
- Border the square with a final round of white single crochets to tie the design together.
- Optional Hot Glue Decorations: Attach the smaller beard pieces and final pom-pom securely to the finished Santa for an extra polished look.
Tutor’s Suggestions
- Take Your Time with Magic Rings: Practicing this step can help ensure a tight, neat finish.
- Customize Colors: Feel free to play with the colors of Santa's face and hat for a more whimsical or stylized look.
- Carefully Handle Yarn Overlaps: When changing colors, carry yarn tails smoothly to prevent a bulky look.
Uses of the Santa Claus Granny Square
- Blankets or Throws: Join multiple squares to create a holiday-themed blanket.
- Holiday Decorations: Place finished squares on garlands, tree skirts, or wall hangings.
- Christmas Coasters or Potholders: Add a reinforced backing to transform the square into fun tableware.
- Gift Embellishments: Use the square as a topper for a gift or greeting card.
Tip
When transitioning between colors, make sure to carry your yarn tails neatly under the stitches. This will avoid tangled yarn and ensure a smooth transition between color changes.
Conclusion
This Santa Claus granny square is a fun and festive project that allows you to explore advanced crochet techniques while creating a versatile decorative piece. With detailed instructions from Tiny Elephant and your own personal touches, you can craft a delightful holiday design that spreads cheer everywhere it’s displayed.


