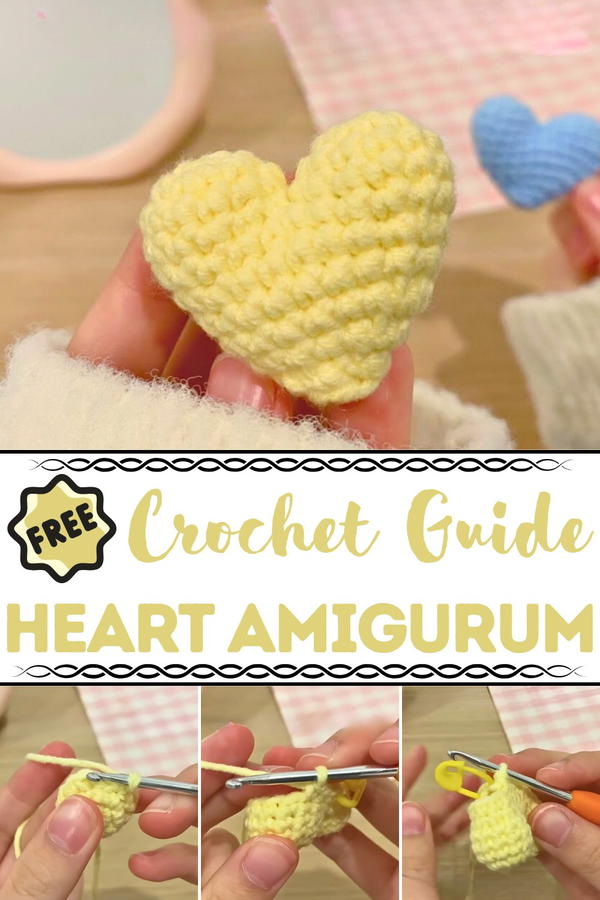
Share love and warmth with the Free Crochet Heart Amigurumi Pattern that brings adorable charm, cozy style, and a delightful touch to any space.
Gifts that carry a personal touch often leave the deepest impression, turning small gestures into lasting memories. The Free Crochet Heart Amigurumi Pattern brings this sentiment to life, transforming simple yarn into a soft, lovable heart that radiates warmth and charm. Perfect for home décor, keychains, or as a heartfelt keepsake, this amigurumi adds a delicate, handcrafted touch wherever it’s placed.
Bright Crochet Heart Amigurumi Pattern Ideal for Home Decor
Its plush texture makes it ideal for children, loved ones, or even as a comforting desk companion, offering a tangible reminder of affection and care. Lightweight yet durable, it holds its shape while maintaining a soft, huggable feel. The Free Crochet Heart Amigurumi Pattern also allows for creative personalization, letting makers experiment with color, size, and stitching techniques to produce a truly unique piece.
Quick to complete, it delivers immediate satisfaction while resulting in a functional, decorative item that can be cherished for years. Beyond its aesthetic appeal, working on this project provides a soothing, mindful experience, turning each stitch into an expression of patience, creativity, and attention. Every handmade heart becomes more than an object, it embodies thoughtfulness, warmth, and the joy of giving, making it a delightful addition to any handmade collection.
Special Features
- Compact 3D Design: The heart is built layer by layer, creating a plump and three-dimensional effect.
- Portable & Practical: Makes for a lightweight and customizable keychain accessory or decoration.
- Skill Development: Focuses on key techniques like the magic ring, increases, decreases, and stitch marker usage.
Level of Difficulty
- Intermediate Beginner: While simple stitches are used (single crochet), the tutorial includes techniques like making the magic ring and connecting two halves, which may require clear instructions and practice.
Materials Needed
- Yarn: 5-ply milk cotton yarn
- Hook: 3 mm crochet hook
- Stuffing: For the plush effect inside the heart
- Darning Needle: For finishing and hiding yarn tails
- Scissors: To trim ends
- Stitch Markers: To track the first stitch of each round
Step-by-Step Instructions
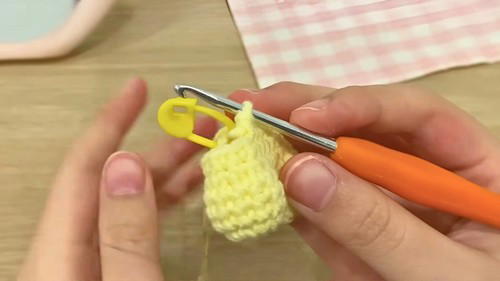
Step 1: Starting with the Magic Ring
Begin with a magic ring:
- Wrap the yarn around two fingers, creating crisscrossed loops.
- Insert your hook under the first loop and pull the second loop through.
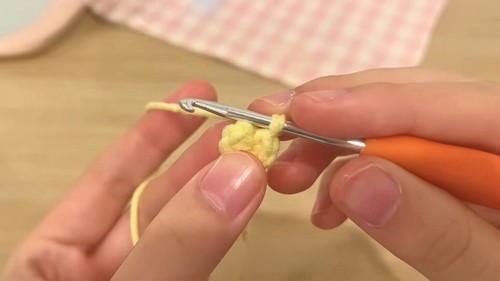
- Yarn over and pull through the loop on your hook to secure a ring.
- Adjust the size of the magic ring by pulling the yarn tail.
Round 1:
- Make 6 single crochet stitches (SCs) into the magic ring.
- For each stitch:
- Insert the hook into the ring.
- Yarn over, pull through the ring, yarn over again, and pull through both loops.
- Place a stitch marker in the first stitch.
Close the Round:
- Pull the tail to cinch the magic ring into a tight circle.
- Slip stitch into the first stitch of the round to secure it.
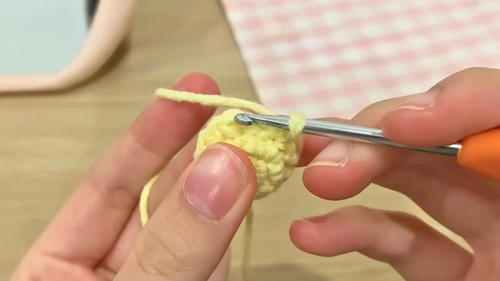
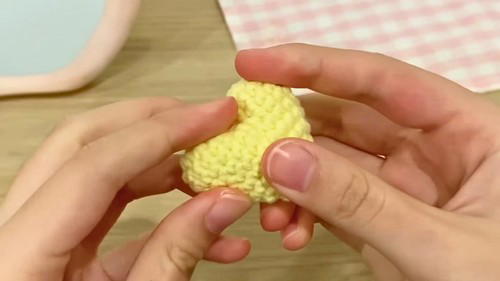
Step 2: Expanding the Circle
Round 2:
- Chain 1 to give height to the next row.
- Increase each stitch (place 2 SCs in every stitch from the previous round for a total of 12 stitches).
- Use stitch markers to keep track.
Round 3:
- Chain 1 and work 1 SC in each stitch (no increases). You will still have 12 stitches.
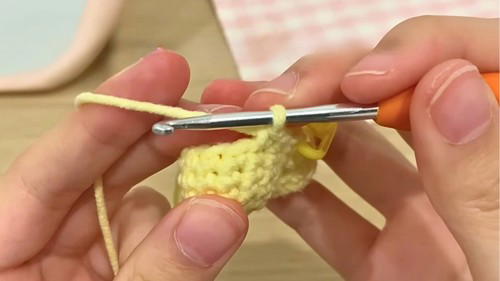
- Secure the round with a slip stitch back to the first stitch.
- Chain 1 and work 1 SC in each stitch (no increases). You will still have 12 stitches.
Step 3: Connecting the Two Halves
- Crochet a second identical piece, stopping before cutting the yarn tail.
- Align the two halves and slip stitch to connect them:
- Insert the hook into any stitch on the second piece.
- Work 1 SC into each stitch of both connected pieces, ensuring proper alignment.
Step 4: Shaping the Bottom of the Heart
- Decreasing Rounds:
- Use single crochet decreases to shape the heart's bottom into a pointed V.
- Step for Decrease:
- Insert your hook into the front loop of the first stitch, then the front loop of the second stitch.
- Yarn over and pull through both loops. Yarn over again and pull through the final two loops on your hook.
- Alternate decreases with normal single crochet stitches to achieve symmetry.
Step 5: Finishing
- Stuff the heart firmly but evenly.
- Close the heart with a final round of decreases until no gaps remain.
- Fasten off by chaining one, cutting a tail, and pulling it tight.
- Use a darning needle to hide the tail by threading it through random stitches.
Tutor's Suggestions
- Magic Ring Care: Don’t be intimidated; slow and steady practice will help master this fundamental skill.
- Stitch Counting: Avoid extra stitches by consistently counting and using stitch markers.
- Tighten Slip Stitches: Always pull tight to prevent false stitches from forming.
- Tail Management: Stuff excess tails gently into the heart before the final decrease round.
Possible Uses
- Keychain: Add a small ring or clasp to create a personalized accessory.
- Decor: Use the heart as a hanging ornament or embellishment for gifts.
- Gift: Customize colors and yarn type for special occasions like Valentine’s Day.
Pro Tip
- Always pause to count your stitches at the end of each round. This helps avoid frustration and ensures your heart shape remains symmetrical.
Conclusion
This 3D heart crochet keychain is a delightful and rewarding project, offering practical skill-building opportunities while creating something eye-catching and functional. With proper materials, patience, and attention to detail, you’ll end up with a beautiful handmade accessory.


