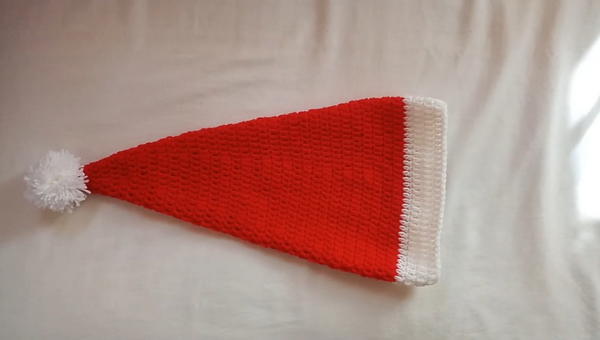
Top off the festivities with this Free Crochet Christmas Santa Hat Pattern, adding joyful charm and classic holiday spirit to your seasonal style.
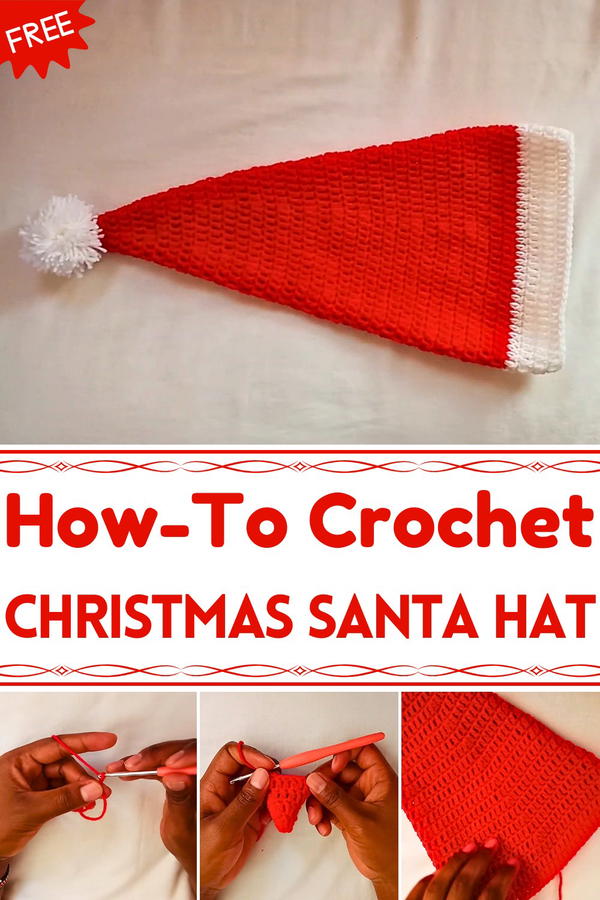
Its beauty lies in simplicity, easy to wear, light to carry, and instantly recognizable as a holiday classic. The specialty of this hat rests in its versatility, as it suits everyone from toddlers to adults and can be customized with different textures or pom-pom styles. Ideal for parties, family photos, or gifting, it turns any winter day into a festive moment.
Beyond its cheerful appearance, it offers practical warmth during chilly gatherings while adding a playful twist to seasonal outfits. The lightweight structure ensures comfort, making it easy to wear for long hours without feeling heavy. More than just an accessory, it symbolizes joy, laughter, and the shared traditions that make the holidays memorable. This Santa hat captures the heart of the season, simple, timeless, and wonderfully full of cheer.
Materials Needed
- Yarn:
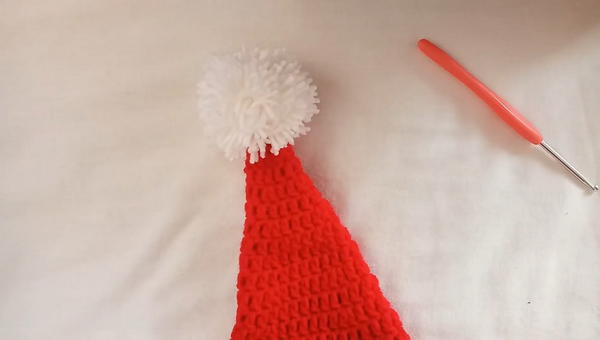
- Red yarn for the main part of the hat.
- White yarn for the brim and pom-pom.
- Hook Size: 3.5mm crochet hook.
- Other Items:
- Scissors.
- Yarn needle (for sewing in the ends).
- Pom-Pom Maker (optional): Or make a pom-pom by hand.
Special Features of the Santa Hat
- Customizable Sizing: Craft this hat to fit any size from toddlers to adults!
- Classic Holiday Look: The bold red and white design is iconic and perfect for Christmas celebrations.
- Simple Pattern: Repeats rows, alternating between increases and solid rows of double crochets, making it beginner-friendly.
- Quick to Make: This project works up fast, so you can make multiple hats in no time for your family and friends.
Step-by-Step Instructions
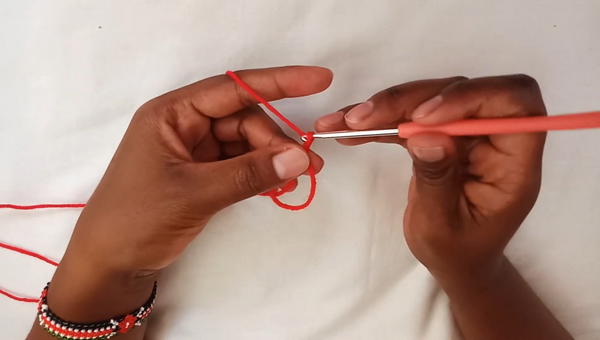
1: Start with the Magic Ring (Round 1)
Create the Magic Ring:
- Wrap the yarn around your fingers and pull the loop through to start your magic ring.
- Chain 2 (this chain counts as the first double crochet).
Inside the Ring:
- Work 8 double crochets (DC), including the initial chain 2.
- Pull the yarn tail to close the ring, and join the round with a slip stitch on top of the chain 2.
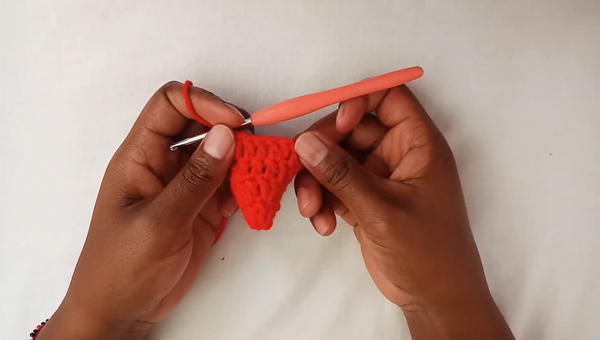
2: Begin the Hat with Increases (Round 2)
Chain 2:
- Counts as the first DC of the row.
Increase Pattern:
- In the next stitch, work 2 double crochets in the same stitch (this forms the first increase).
- Alternate between 1 DC in the next stitch and 2 DC in the following stitch.
- Repeat this pattern all the way around.
End the Round:
- At the end of the row, make a final increase in the starting stitch and join with a slip stitch.
3: Add Solid Rows Without Increases
Chain 2:
- Start the next row with a chain 2.
- Work 1 double crochet in each stitch around for a solid row (no increases).
Alternate Between Increase Rows and Solid Rows:
- Continue with alternating rows of increases and solid rows.
- Increases: Add 1 extra stitch between increases each time (e.g., 1 DC between increases in Round 2, 2 DC between increases in Round 4, 3 DC between increases in Round 6, and so on).
- Solid Rows: Create rows of double crochets without any increases after each increase row.

Adjust to Fit:
- Stop increasing once you’ve achieved the desired hat size. For the tutorial, the hat is crafted to include 15 double crochets between increases.
4: Complete the Body of the Hat
Crochet Without Increases:
- Once the correct diameter for the hat is achieved, work 3 additional rows of solid double crochets. This creates the body and defines the shape of the hat.
Join and Secure:
- Join the last row with a slip stitch, chain 1, and fasten off the red yarn.
5: Add the White Brim (Bottom Part)
Change to White Yarn:
- Attach the white yarn by making a slip knot and joining it at the base of the hat.
Create the Brim:
- Chain 2 and work double crochets in every stitch around the bottom of the hat.
- Repeat this process for 3-4 rows to create a wide and fluffy brim.
Finish Off:
- Join the final row with a slip stitch, fasten off the yarn, and secure the ends with a yarn needle.
6: Add the White Pom-Pom
Make the Pom-Pom:
- Use a pom-pom maker or manually wrap white yarn around your fingers, tie it at the center, and cut the loops to form a fluffy ball.
Attach to the Hat:
- Use your yarn needle to sew the pom-pom securely to the top of the hat.
Hide the Ends:
- Weave in any remaining yarn ends with the yarn needle for a clean finish.
- Weave in any remaining yarn ends with the yarn needle for a clean finish.
Tutor’s Suggestions
Yarn Choice:
- Choose soft and slightly stretchy yarn for better comfort when wearing the hat.
Pom-Pom Tip:
- Use additional layers of yarn when making the pom-pom for extra fluff and volume.
Measuring the Hat:
- Use the wearer’s head circumference as a guide to determine when to stop increasing rows.
Level of Difficulty
Beginner to Intermediate: The hat mainly involves basic stitches (magic ring, double crochet, slip stitch), making it suitable for beginners. The only challenge might be maintaining stitch counts during the increase rows.
Uses of the Santa Hat
- Holiday party accessory or costume.
- Perfect for Christmas photoshoots and family gatherings.
- Handmade gifts or stocking fillers for the festive season.
- Children’s school or holiday events.
Tip for Success
To achieve a seamless look, always make sure to count your stitches at the end of each row. This helps prevent any errors in the increase rows, which might distort the shape of the hat.
Conclusion
This Santa hat is an easy and fun project to get into the holiday spirit. With its customizable size, festive colors, and simple design, it’s perfect for crocheters of all skill levels. Whether you’re making one for yourself, as a gift, or part of your holiday décor, this project will leave you feeling merry and accomplished.


