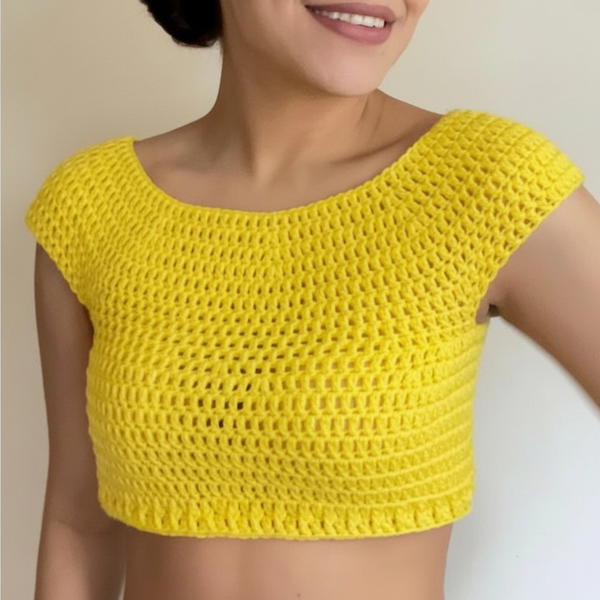
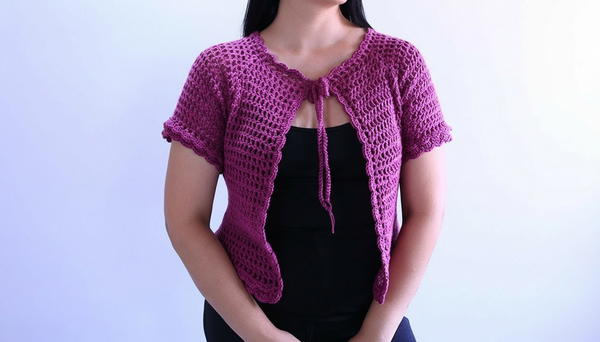
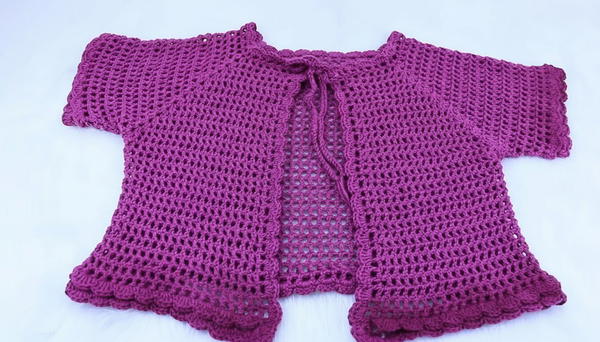
Wrap yourself in style and comfort with a soft, cozy piece that adds charm to any outfit. A crochet shrug pattern offers a lovely way to make lightweight or warm layers for any occasion. These shrugs are often open-front designs with unique textures and captivating shapes, making them both practical and beautiful. Whether you need something elegant for a casual outing or a quick accessory to brighten up your wardrobe, crochet shrugs bring versatility and charm to your look.
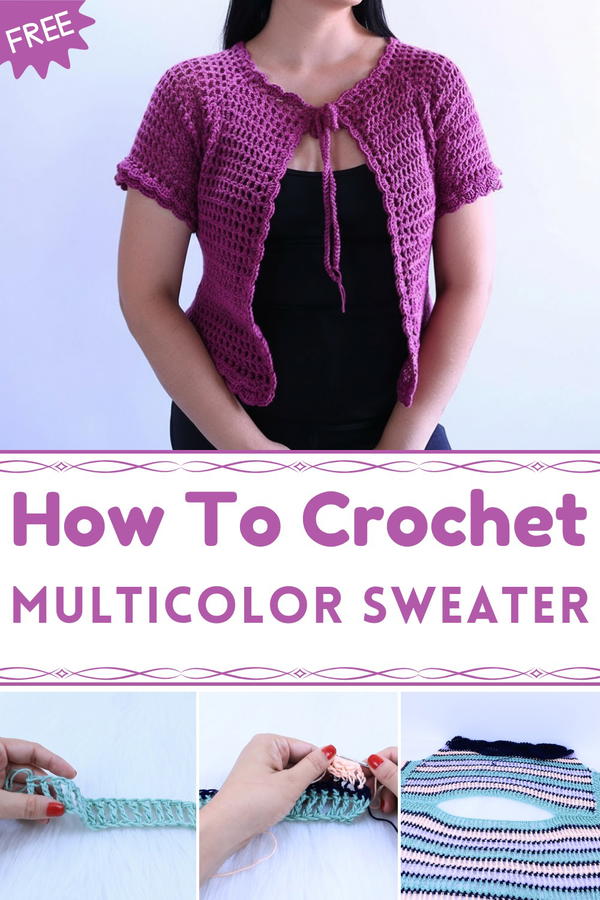
Crochet Shrugs That Turn Heads Everywhere
They can be made in soft, breathable yarns for summer or thicker, warmer materials for chilly evenings. The delicate stitches and flowing designs create an eye-catching touch that suits all body types. Perfect for pairing with dresses, jeans, or even loungewear, they blend functionality with fashion. Easy to personalize in colors and patterns, this timeless shrug will quickly become your favorite piece to wear every season.
Materials Needed
Yarn and Tools
- Yarn: Thick yarn; 100% acrylic is recommended (choose the color of your preference).
- Crochet Hook: 5 mm hook (adjust hook size based on tension).
- Measuring Tape: To take body measurements.
- Tapestry Needle: For weaving in ends and sewing closures.
- Scissors: To cut yarn.
Measurements Required
- Head Circumference: Measure the entire circumference of the head.
- Bust Measurement: Wrap the tape around the largest part of the bust (ensure you take a deep breath for accuracy).
- Length: Measure from the top of the shoulder to the desired length of the Shrug.
Important Points
This bullfighter Shrug consists of multiple segments:
- Rectangular Yoke (Foundation)
- Joining the Yoke for Armholes
- Body Construction
- Sleeves (short or long options available)
- Edging (Sleeve, Hem, and Neckline)
- Tie Closures for the Neck
- Optional blocking to shape the garment.
Pattern Instructions
1. Creating the Rectangular Yoke (Foundation)
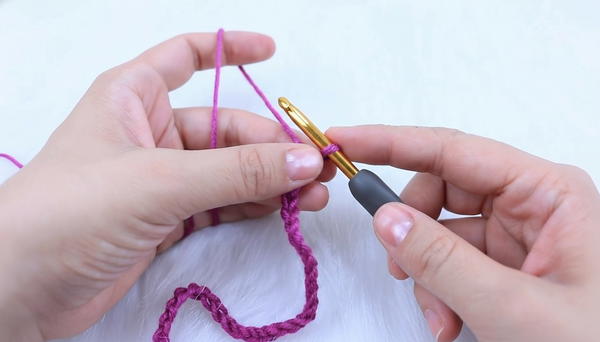
(a) Chain Foundation:
Using the head circumference, calculate and crochet an initial strip of chains.
- Example: For a size XL head circumference of 56 cm, you should crochet approximately 90 chains (or a number that matches your yarn tension).
- Overlap the chain ends to ensure they measure correctly without stretching them.
Additional Chains Adjustment: If adjustments are needed based on size calculations:
- XL size: 56 cm → 90 chains.
- Reference for other measurements is provided in the transcription to adjust for S, M, or L sizes.
(b) Distributing Chains for Yoke Structure:
The rectangular yoke is divided into 5 sections:
- 2 Shoulders
- 1 Back Section
- 2 Chest Sections
To determine the chain allocation:
Take the total number of chains (
Tc) and divide as follows:- Shoulders =
Tc ÷ 5(for both shoulders combined). - Back and Chest =
(Tc ÷ 2) - Shoulder Chains.
- Shoulders =
Distribute chains as proportions:
- Example:
- Total Chains (for XL) = 90.
- Shoulders = 18 chains.
- Back =
45 - 18 = 27 chains. - Each chest section (divided in two):
27 ÷ 2 = 13.5 ≈ 15 chains per side (adjusted to the nearest odd number).
- Example:
(c) Starting the Yoke:
Chain 95 (adjusted length for XL).
Begin the first round in house stitch as follows:
- Work double crochet (dc) stitches separated by chain 1 in groups, ensuring odd-numbered counts for all sections (shoulders, back, chest).
- Create corners with the following pattern:
- (2 dc, ch 2, 2 dc) in the same space.
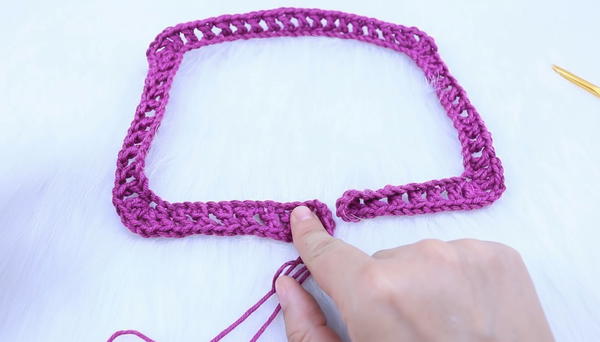
- (2 dc, ch 2, 2 dc) in the same space.
Continue in this way, separated by 1 chain for gaps.
Repeat rows to lengthen the yoke for the armhole depth:
- For XL, work a total of 14 rounds, reaching 18 cm yoke length.
- Reference measurements (armhole depth):
- S = 16 cm, M = 17 cm, L = 18 cm, XL = 18+ cm.
Note: Ensure the armhole accommodates your size by holding the ends of the rectangle together to confirm the fit.
2. Joining the Yoke for Armholes
If the armhole sections do not fully touch, create a bridge with chains to complete the connection:
Armhole Adjustment: Add chains to close the gap between the two ends.
- Example: If 2-3 cm are missing on each side, add 3 chains to both sides and join with slip stitches.
Secure the yoke and ensure symmetry for both sleeves.
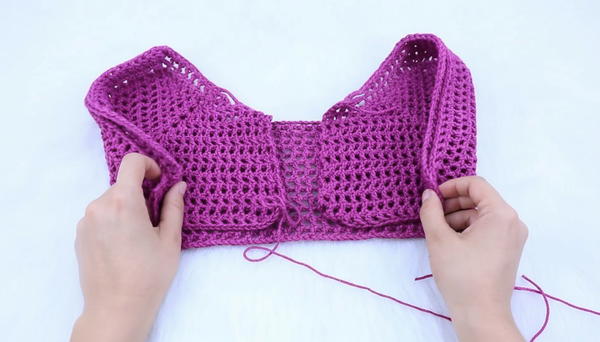
3. Body Construction
- Begin working in the round from the joined yoke down.
- Continue in house stitch pattern (dc, ch 1) rows to form the body of the bullfighter Shrug:
- Repeat stitches until the desired Shrug length is achieved.
- For a typical bullfighter Shrug, work body rows for approximately 40 cm (or stop 3 cm shorter for final edging).
4. Sleeves (Short or Long)
(a) Short Sleeve Instructions:
From the yoke armholes, attach yarn and begin the round in house stitch (dc, ch 1).
For a snug fit:
- Work decreases by combining two dc stitches into one under the armpit every alternate row.
Work 5 rounds in house stitch:
- Alternate decrease every other row to achieve a tapered fit around the arm. No decreases are needed if you prefer a looser sleeve.
(b) Long Sleeve Option:
Continue from the short sleeve instructions:
- Alternate decrease rows for a tapered fit until desired arm length is reached.
Add edging at the sleeve hem (fan design or other decorative stitch).
5. Edging
(a) For Bottom Hem:
- Work a fan pattern in the round:
- (1 sc, 4 dc) in the first square followed by a single crochet in the next.
- Repeat until the edge is complete.
- Add relief stitches using front and back post double crochets to add texture.
(b) Sleeve Edging:
Follows the same fan pattern as hem edging.
(c) Neckline Closure:
- Attach yarn at the center back corner of the neckline.
- Create a braided tie:
- Work about 62 chains (~42 cm long) for tie closures on each side of the neckline.
6. Blocking and Finishing
To shape the garment (especially the hem edge):
- Damp the edges using water and lightly press them flat.
- Let dry to set the shape.
Weave in all loose ends using a tapestry needle.
Customization Options
- Use lighter or brighter yarns for a more airy feel.
- Experiment with longer sleeves or even add decorative cuffs.
- For a fitted design, add more decreases around the body or taper the sleeves further.
Conclusion
Congratulations on completing your bullfighter Shrug! This versatile design can be worn casually or dressed up with accessories—perfect for any occasion. Share your results or experiment with the Shrug length, fit, and colors to make it uniquely yours.
Bullfighter Sweater Crochet Pattern
This guide outlines detailed instructions for creating a beautiful and loose bullfighter crochet Shrug, also referred to as a bolero-style sweater. The design is value-driven, exceptionally versatile for different body types, and incredibly easy to follow, even for beginners. The pattern includes custom measurements for the head circumference, bust, and length, ensuring a personalized fit for each maker.