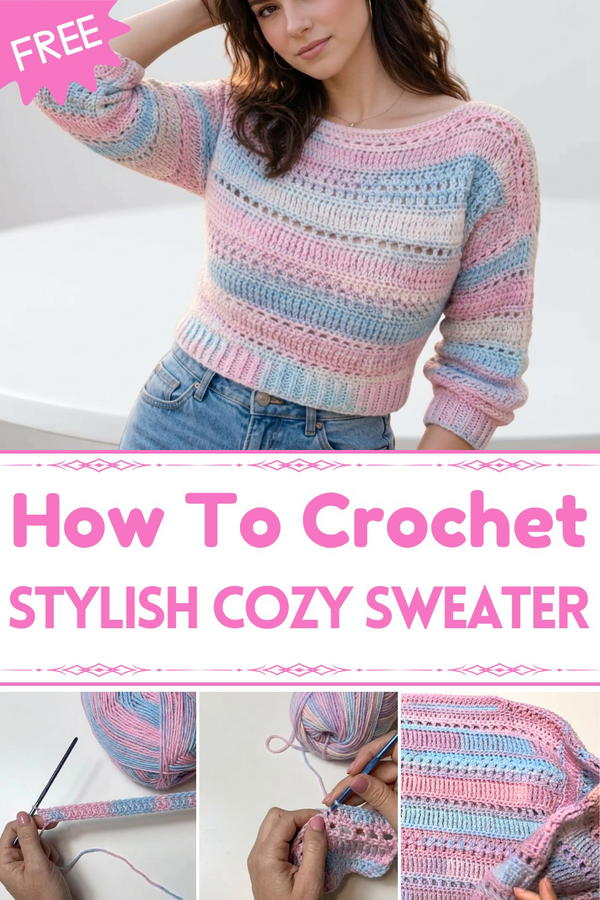
Enjoy a cozy and stylish crochet sweater that is soft, comfortable, and perfect for casual wear, offering charm and a timeless look for all occasions.
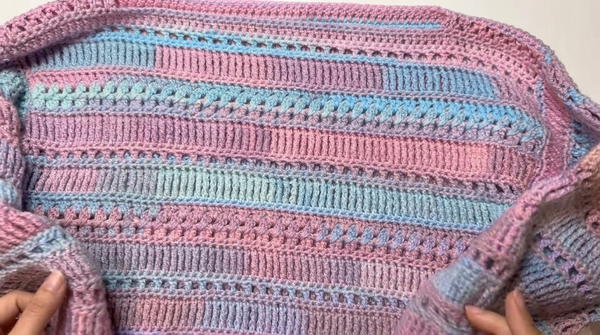
Soft textures and delicate designs come together to offer a piece of clothing that feels both cozy and stylish. Perfect for cool weather, it gently hugs the skin and keeps you warm without feeling heavy. Its charm lies in the intricate detail and variety of colors, allowing it to match effortlessly with jeans, skirts, or layered over dresses. Whether for a casual outing or a relaxed evening, it blends comfort and elegance seamlessly.
Elegant Free Crochet Sweater Patterns for Year-Round Wear
The thoughtful appearance and handcrocheted-like quality make it feel special, standing out from typical, everyday clothing. It’s not just practical for chilly days but also an eye-catching piece that works as a meaningful gift for someone close. Lightweight yet warm, its simplicity and beauty bring a timeless touch to your wardrobe, ensuring both ease and sophistication wherever you go.
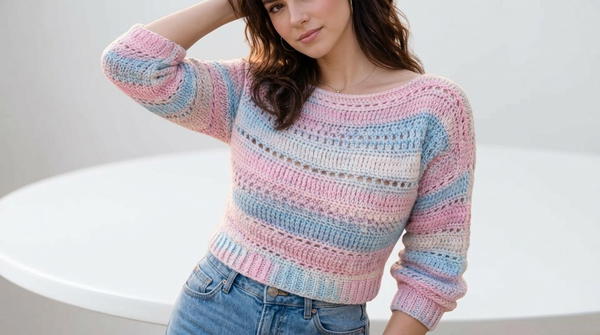
Step-by-Step "Rainbow Sweater" Pattern
Finished Size
This sweater is designed for medium standard sizing (approximately 38-40). You can adjust panel dimensions for other sizes following the customization notes later in this tutorial.
Materials Needed
Yarn:
- Van Gogh Batik (Mystery Cofilati) yarn or equivalent with similar properties and softness:
- Composition: Microfiber (~100 g/400 meters per ball).
- Quantity: 2 balls of yarn (approximately 800 meters).
Crochet Hook:
- 4.5 mm crochet hook (European standard).
Knitting Needles (Optional):
- Size 5 mm knitting needles for optional ribbing details on cuffs and hem.
Additional Tools:
- Stitch markers
- Pair of scissors
- Tapestry needle (for sewing panels and weaving ends)
- Measuring tape or ruler
Gauge
Gauge is not explicitly mentioned but is approximately:
- 55 single crochet stitches over 7 rounds provides 10 cm (4 inches) width.
Before starting, it is highly recommended to work up a small swatch to ensure final measurements align with your preferences.
Special Techniques and Stitch Overview
- Triple Treble Crochet (TRTR): Wrap yarn three times around the hook, pull through the loop, and complete four successive pull-throughs for this elongated stitch.
- Crossed Double Crochet (X-DC): Alternated forward and backward double crochets create a crossed effect.
- Optional Ribbing for Cuffs and Hem: Use a 2x2 rib stitch (two knit, two purl) with needles.
Rainbow Sweater Pattern Instructions
The sweater is comprised of four separate panels:
- Two body panels (front and back)
- Two sleeve panels
Each piece is worked bottom-up and assembled to create the finished garment.
1. Body Panels (Front and Back)
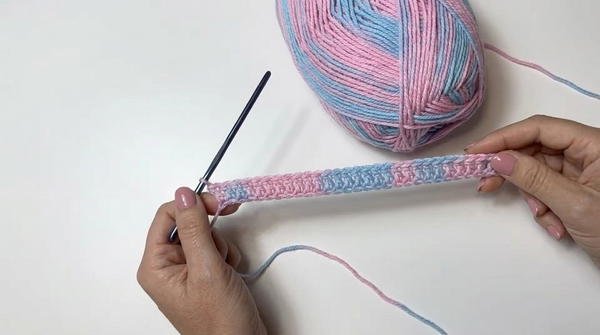
Step 1: Foundation Chain
- Chain 73 stitches plus 3 additional chains for the first double crochet at the start of the row.
Step 2: Base Double Crochet Row
- Row 1: Begin your first row by crocheting double crochet (DC) into each stitch across the foundation chain.
- Note: Replace the first DC with 3 chains at the start of the row.
- Total stitches: 73 DC
Step 3: Single Crochet Row
- Row 2: Chain 1, turn. Work single crochet (SC) into each DC from the previous row.
- Total stitches: 73 SC
Step 4: Triple Treble Crochet Row
- Row 3: Chain 5 (replaces first TRTR), turn. Work triple treble crochet (TRTR) into each single crochet stitch from the previous row.
- Technique: Wrap yarn three times around the hook. Pull through the stitch and complete step-by-step pull-throughs (four in total).
- Result: Creates a braided effect across the row.
Step 5: Single Crochet Row
- Row 4: Chain 1, turn. Work single crochet (SC) into each TRTR stitch from Row 3.
- Total stitches: 73 SC
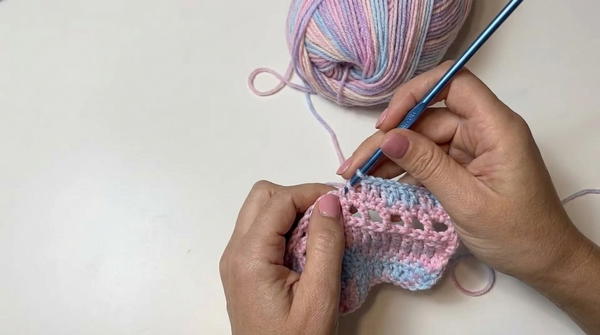
Step 6: Chain Hole Pattern (Mesh Effect)
- Row 5: Chain 3 (replaces first DC), turn.
- Work 1 DC, chain 1, skip the next stitch, and work 1 DC in the next stitch.
- Repeat this sequence (DC, chain, skip a stitch) across the row to form a mesh-like effect.
Step 7: Repeated Stitch Pattern
Repeat Rows 2 to 5 in alternating progression:
- Base rows: Single crochet (SC).
- Decorative rows: Triple Treble Crochet (TRTR) and chain hole patterns.
Panel Length:
- Work these alternating rows until the panel measures desired height (approximately 55 cm for medium).
2. Sleeves
Step 1: Sleeve Foundation
- For each sleeve panel, chain 55 stitches plus 3 for the first DC.
Step 2: Alternating Stitches for Sleeve Texture
Repeat the same stitch sequence as the body panels:
- Mesh effect, triple treble crochet, and crossed double crochet patterns, interspersed with single crochet rows.
Step 3: Sleeve Length:
For a ¾ sleeve, work panels to a length of 40-45 cm or adjust based on personal preference.
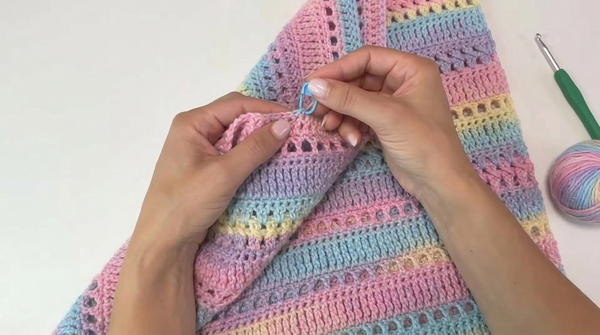
3. Assembly
Step 1: Shoulder Seam
- Place front and back body panels together with right sides facing inward. Ensure the flat stitches (right side) are matched.
- Mark 15 single crochet stitches for the shoulder seam using stitch markers on each panel. Use a tapestry needle or crochet single crochet stitches to join evenly.
Step 2: Side Seams
- Align edges of the body panels with the sleeves in a straight fold. Sew sleeve seams and underarm seams carefully using the same method (single crochet or whip stitch).
Step 3: Neckline Adjustments (Optional):
- If desired, work single crochet rows around the neckline for a smooth finish.
4. Optional Finishing (Ribbing for Cuffs and Hem)
Procedure:
- Using 5 mm knitting needles, pick up stitches along the sleeve edge and sweater hem.
- Work 2x2 rib (knit 2, purl 2) in rounds for 10–12 rows to create elasticity.
- Finish with tubular bind-off for seamless closure.
Final Words
This exquisite sweater combines texture, alternating stitch patterns, and vibrant colors to provide a cozy yet elegant garment. Whether you opt for the optional ribbing or keep the crochet-only design, this versatile tutorial adapts flawlessly to your creativity.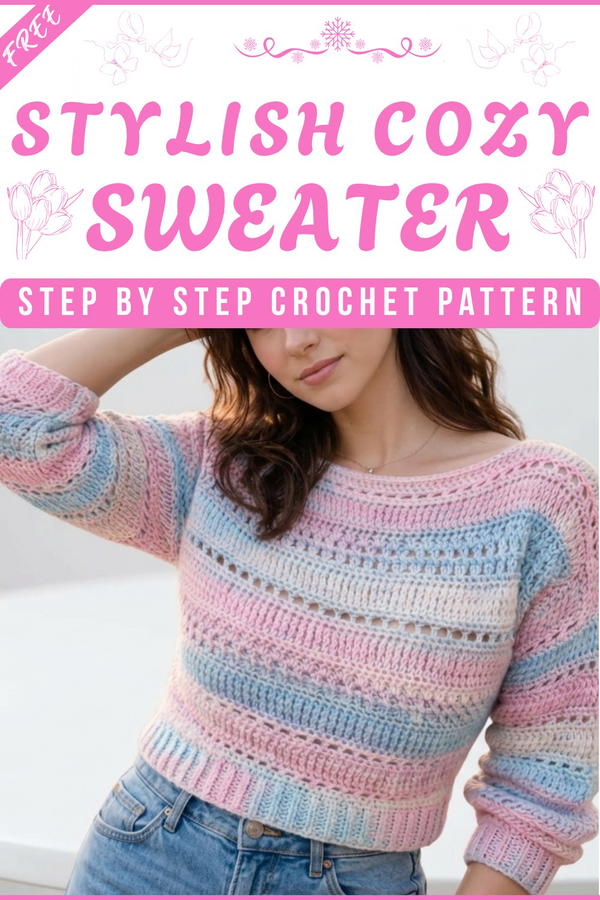
Tips for Maintaining the Pattern
- Gauge Swatch: Always create a swatch before beginning to ensure your finished size.
- Blocking: Block the sweater after completion for better drape and uniformity.
- Yarn Care: Use gentle cycle machine washing or handwash for microfiber yarns.