Bring holiday cheer to life with this Crochet Noel Baby Mushroom Pattern featuring cute details festive colors and a playful design perfect for gifting or décor.
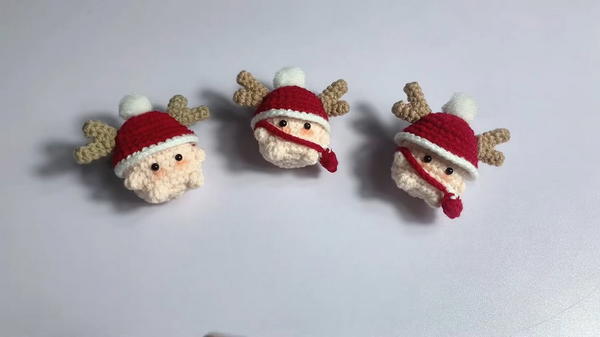
A tiny mushroom straight out of a magical forest, soft and squishy, ready to become your baby’s new best friend! This cute little crochet mushroom is not just a toy—it’s a fun, huggable buddy full of charm and personality. With its round cap dotted with playful spots and cozy, gentle colors, it’s like a smile you can hold in your hands.
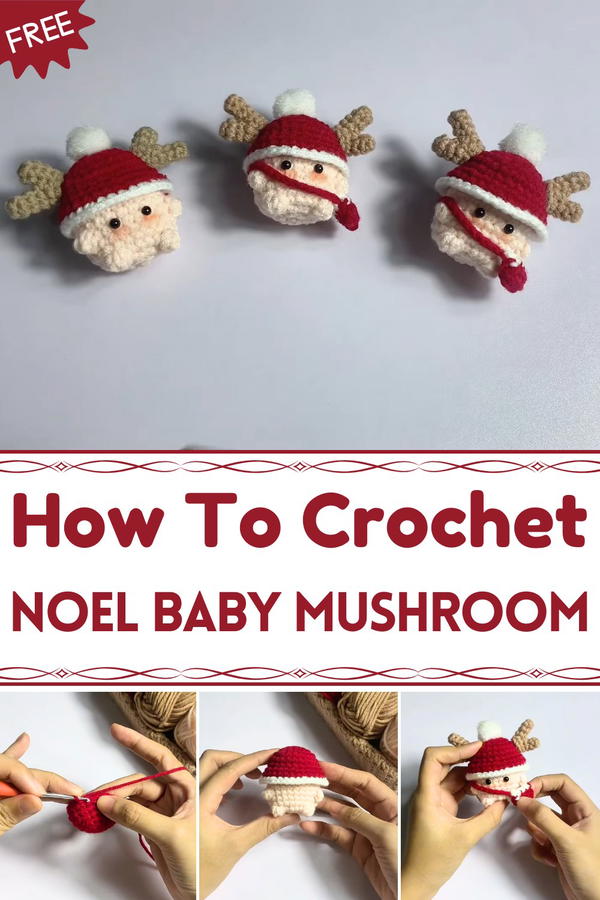
Easy Crochet Noel Baby Mushroom Pattern for Festive Fun
Perfect for cuddles, nursery decor, or even as a cheerful gift, this mushroom brings a sprinkle of joy wherever it goes. Made with love and soft yarn, it’s safe for tiny fingers and big imaginations alike.
Brighten up playtime or add a splash of whimsy to your baby’s world with this cheerful little crochet mushroom—because every day deserves a little magic and a lot of fun. 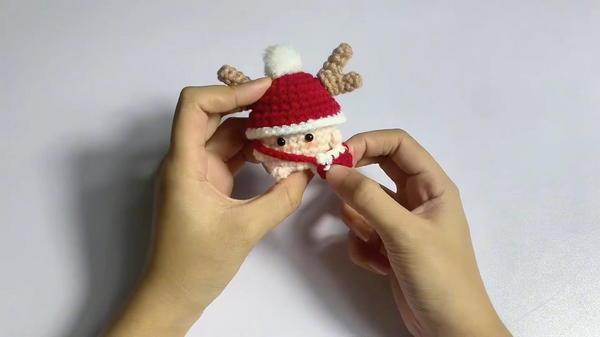
Crochet Noel Baby Mushroom Amigurumi Pattern
Special Features
- Compact, cute amigurumi design
- Vibrant Christmas colors
- Adorable details like pom-pom, eyes, and reindeer antlers
- Versatile use as keychain or decoration
- Small and quick project ideal for gifting
Difficulty Level
Intermediate – Requires basic amigurumi techniques such as magic ring, single crochet (sc), increases, decreases, working in rounds, and sewing small parts.
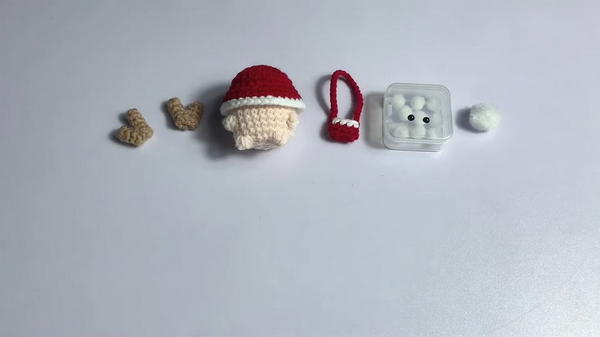
Materials Needed
- Crochet hook size 2.5 mm
- Scissors
- Yarn in red, white, brown, and accent colors
- Pom pom (20 mm) or homemade substitute
- Stuffing (cotton or fiberfill)
- Yarn needle for sewing and finishing
Step-by-Step Instructions
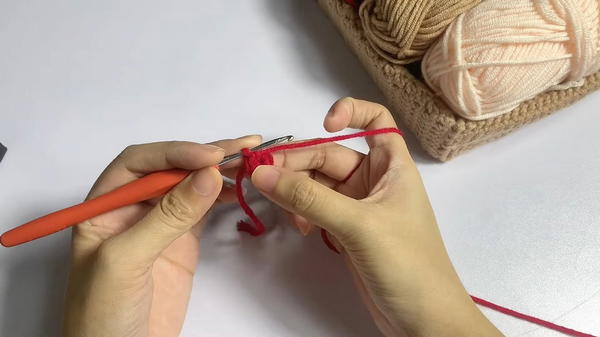
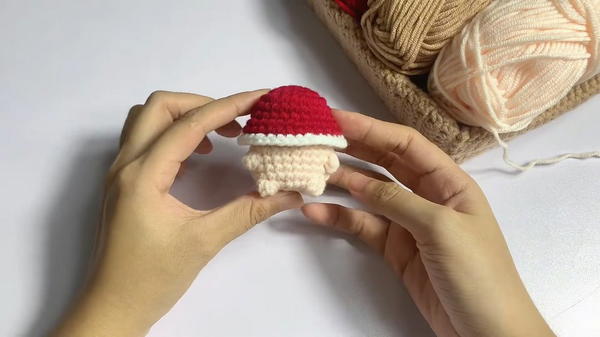
Mushroom Cap
- Round 1: Using red yarn, create a magic ring and work 6 single crochet (sc) inside it. Pull tight to close the circle.
- Round 2: Work 2 sc in each stitch around (total 12 sc).
- Round 3: Alternate 1 sc, then 2 sc in the next stitch; repeat 6 times (total 18 sc).
- Round 4: Alternate 1 sc, 1 sc, then 2 sc in next stitch; repeat 6 times (total 24 sc).

- Rounds 5-6: Work evenly with 1 sc in each stitch (24 stitches per round).
- Round 7: Alternate 3 sc, then 2 sc in next stitch; repeat 6 times (total 30 sc).
- Round 8: Work 1 sc in each stitch (30 sc).
- Finish Round 8, cut yarn.
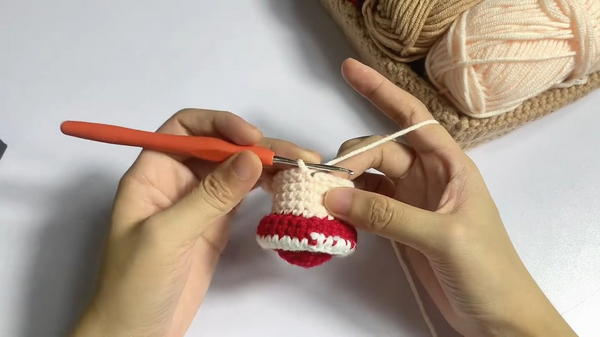
Mushroom Cap White Strand (Edge)
- Switch to white yarn, holding two strands of yarn together.
- Round 9: Work the mesh pattern: 1 sc, skip 1 stitch, 1 sc in the next; repeat around.
- Complete Round 9.
Mushroom Stem
- Using white yarn, start with a magic circle and work 6 sc inside.
- Rounds 2-4: Work 1 sc in each stitch (6 sc per round).
- Rounds 5-7: Increase by 6 stitches gradually to widen (follow increasing pattern accordingly).
- From round 8 onward, work even rounds until stem measures desired length.
- Finish and stuff lightly with cotton before closing.
Reindeer Antlers
- Using brown yarn, create a magic ring and crochet 4 sc (small horn).
- For the larger antlers, start with a magic ring and 6 sc then increase gradually for desired size.
- Finish both antlers and sew securely onto mushroom cap.
Facial Details and Assembly
- Attach pom-pom on top of the cap for the mushroom's "head".
- Use yarn or safety eyes and a small blush detail for facial features approximately on round 13 of the cap.
- Sew mushroom stem onto underside of cap securely.
- Sew antlers onto sides of mushroom top.
Tutor’s Suggestions
- Use stitch markers to keep track of rounds if necessary.
- Hold two yarn strands together for sturdier, bulkier stitches as indicated.
- Stuff lightly to keep the shape fluffy but firm.
- Check your tension — amigurumi works best with firm but smooth stitches.
- Sew parts tightly to avoid loose attachments.
Uses
- Christmas decorations (tree, doorway, shelves)
- Cute keychains or bag charms
- Gift toppers for holiday presents
- Fun, quick crocheted gifts and holiday crafts
Crochet Tip
For a clean, seamless look, weave in your ends as you go instead of at the end. It will keep the mushroom neat and your work easier.
Conclusion
Crocheting this delightful Christmas Mushroom brings charm and holiday spirit to your handmade gifts or decorations. Its fun stitch pattern and bright colors make it a joy to craft for beginners and intermediate crocheters alike.