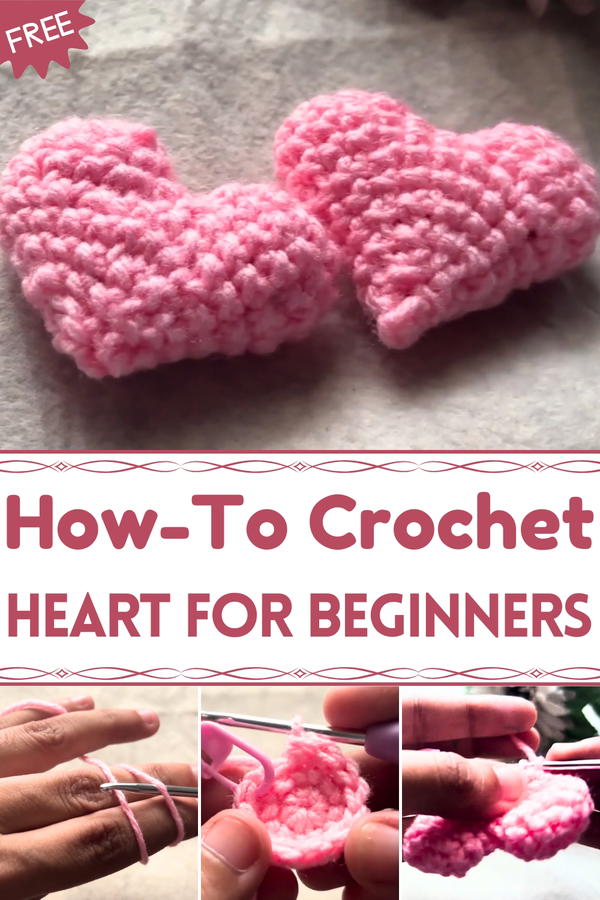
Spread love with the Free Crochet Heart Pattern, adding a sweet and charming touch to gifts, décor, accessories, or playful handmade creations.
A simple symbol can carry deep meaning, appearing in moments of affection, celebration, or remembrance. The Free Crochet Heart pattern transforms this timeless emblem into a charming accessory that combines warmth and visual appeal, making it ideal for gifts, décor, and personal accents. This heart is crocheted with soft, durable thread, resulting in a lightweight piece that maintains its shape while remaining flexible enough for various applications.
Easy Crochet Heart Pattern Beginners Will Love to Try
It can be attached to keychains, bookmarks, clothing, or even framed as a decorative element, bringing a gentle, heartfelt touch to everyday items. Its compact size and striking form make it suitable for both subtle adornments and statement embellishments. By choosing different yarn colors, each heart can reflect individual style, seasonal themes, or emotional sentiment, enhancing its versatility.
The Free Crochet Heart pattern offers practical benefits alongside its aesthetic charm. It encourages mindfulness through hands-on crafting, provides a personal and unique way to convey affection, and adds a handmade quality that store-bought items cannot replicate. Perfect for quick projects or layering into larger creations, this heart becomes more than a motif—it’s a meaningful accent that brightens spaces, gifts, and personal accessories. Small yet impactful, it demonstrates how a simple crochet creation can communicate care, style, and personality in everyday life.
Special Features
- Cost-Effective: Made entirely from leftover yarn, this project won’t cost you anything extra.
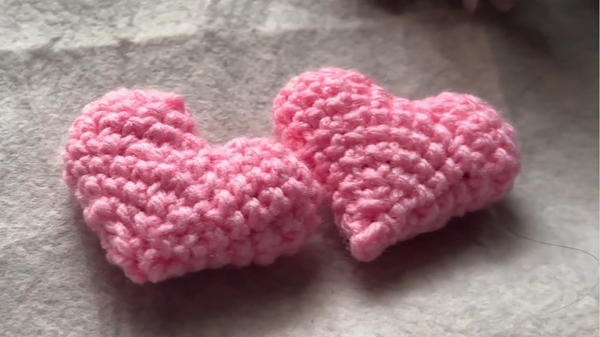
- 3D Heart Design: A soft and stuffed heart shape that’s unique and attractive.
- Beginner-Friendly: The steps are slow-paced, and each technique is explained thoroughly, perfect for first-time crocheters.
- Customizable: You can adjust the size, color, and texture of the yarn to suit your style.
- Multi-Purpose: Once complete, the 3D heart can be used in numerous ways, including as a keychain, phone accessory, or decorative ornament.
Materials Needed
- Yarn: Leftover yarn in a light color is recommended, as it’s easier to see the stitches.
- Crochet Hook: A 3mm crochet hook.
- Stuffing: For creating the 3D shape of the heart.
- Yarn Needle: For stitching parts together and hiding yarn ends.
- Scissors: For cutting the yarn.
- Stitch Markers: To keep track of the first stitch in each round.
Step-by-Step Instructions
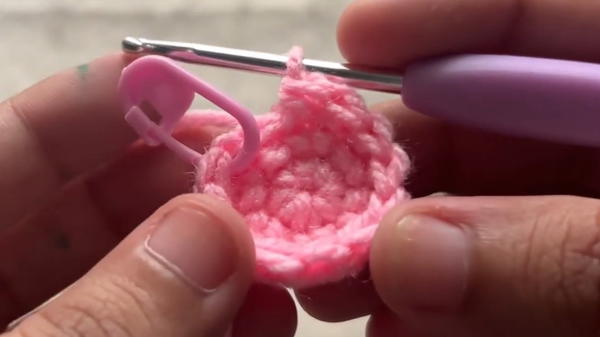
1. Making the First Top Part
This will be one of the heart’s top curves.
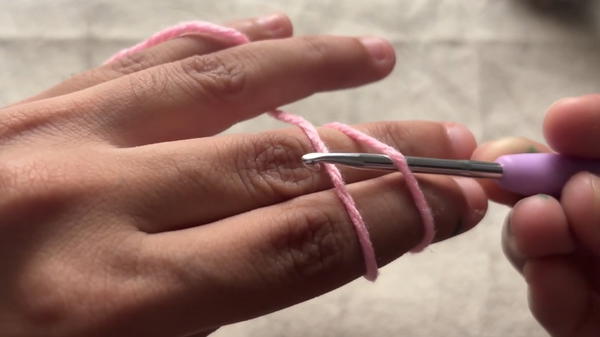
Create the Magic Ring:
- Wrap the yarn around your fingers to form a loop.
- Use your hook to pass under the first yarn strand, pull the second yarn strand through, and twist the hook to secure the loop.
- Pull a loop using the working yarn to complete the magic ring.
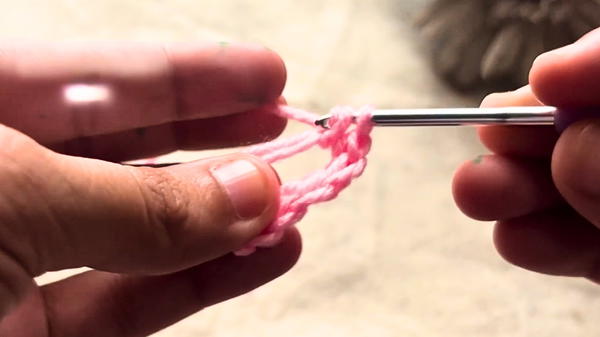
Round 1: Inside the magic ring:
- Make 6 single crochets (sc).
- Join the last stitch to the first stitch with a slip stitch (ss), and pull the tail to tighten the ring.
Round 2: Increase to 12 stitches:
- Chain 1.
- Make 2 single crochets in each stitch (6 increases in total).
- After completing, slip stitch into the first stitch to join.
Round 3: Single crochet around:
- Chain 1.
- Work 1 single crochet in each stitch (12 total).
- Slip stitch to close the round, fasten off, and leave a tail for later sewing.
2. Making the Second Top Part
- Repeat the exact process from Step 1 to make a second, identical top curve.
- However, do not cut the yarn for the second piece, as it will be used to join the two parts.
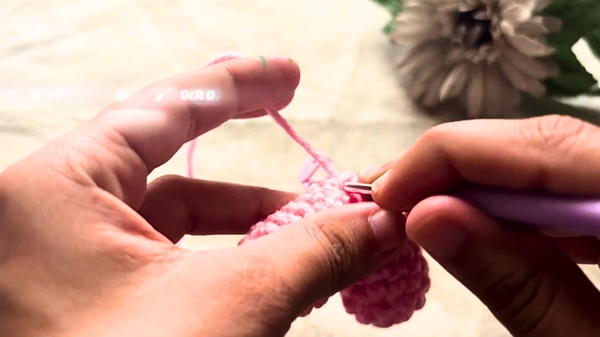
3. Connecting the Top Parts and Forming the Heart Body
Join the Top Parts:
- Place the first part next to the second part.
- Insert the hook into a random stitch from the first part and make a single crochet (sc) to join the two pieces.
Work Around Both Parts:
- Crochet 12 single crochets on the first top part.
- Continue with another 12 single crochets around the second top part.
- You will now have 24 stitches in total.
4. Shaping the Heart
Begin decreasing the stitches to form the tapering point of the heart.
Round 5: Start decreasing:
- Chain 1, then work:
- 4 single crochets.
- 2 decreases (dc) using front loop decreases.
- Repeat this pattern around (4 sc, 2 decreases).
- Slip stitch to join the round.
- Chain 1, then work:
Round 6: Single crochets only:
- Chain 1, then work 1 single crochet in each stitch.
- Slip stitch to join.
Round 7: Continue tapering:
- Chain 1, then alternate between:
- 3 single crochets and 2 decreases.
- Slip stitch to join.
- Chain 1, then alternate between:
Round 8: Final decreases:
- Chain 1, then alternate between:
- 2 single crochets and 2 decreases.
- Add stuffing to the heart before closing further.
- Chain 1, then alternate between:
Round 9: Close the heart:
- Chain 1.
- Work 6 decreases around the remaining stitches.
- Slip stitch to close, and fasten off the yarn.
5. Finishing Touches
- Use a darning needle to weave in and hide the yarn ends.
- Shape the heart with your hands for an even finish.
Tutor’s Suggestions
- Use Light Yarn: Beginners are advised to use light-colored yarn to see each stitch clearly.
- Take Your Time: The video is paced slowly for easy learning, so follow each step carefully.
- Use Stitch Markers: These will help you track the first stitch in every round, preventing confusion.
- Count Your Stitches: Always count your stitches at the end of each round to ensure accuracy.
Level of Difficulty
This project is beginner-friendly. Even if you’ve never held a crochet hook before, the detailed explanation and slow pace of the tutorial make it simple to follow. Techniques like the magic ring, single crochet, slip stitch, and decreases are explained thoroughly, allowing first-time crocheters to succeed.
Uses
- Keychains: Attach a small keyring to create adorable keychains.
- Bag Charms: Hang the heart on a bag for a cute, personalized touch.
- Decorations: Use as a Valentine’s Day or party decor item.
- Gifts: Hand out these handmade hearts as meaningful, cost-effective gifts.
- Phone Accessories: Create a phone charm by attaching a loop for hanging.
Tip
When stuffing the heart, use small amounts at a time and evenly shape it. Overstuffing can distort the heart, while under-stuffing may result in a flat look.
Conclusion
Crocheting a 3D heart is a fun, creative, and satisfying project that is suitable for beginners and experts alike. This handmade, budget-friendly heart is not only a thoughtful gift but also a versatile decoration for many occasions.


