Drape elegance effortlessly with this Crochet Chevron Hug Shrug pattern, a cozy piece that brings warmth, charm, and versatility to any outfit.
There is a certain charm in clothing that feels both comforting and stylish, and the Crochet Chevron Hug Shrug pattern captures that balance beautifully. With its flowing chevron texture and graceful fit, this shrug offers a unique way to stay cozy while looking effortlessly elegant. The striking zigzag stitches form a rhythmic pattern that draws the eye, adding depth and movement to the fabric without overwhelming its simplicity. Soft and lightweight, it drapes gently across the shoulders, giving the feeling of a warm hug while still allowing freedom of movement.
Delicate Crochet Chevron Hug Shrug for Feminine Outfits
![]()
What makes this shrug special is its versatility—it pairs seamlessly with casual outfits for everyday wear yet holds enough sophistication to complement evening attire. The open-front structure makes it easy to slip on, adding a layer of warmth without heaviness, perfect for transitional weather or cool nights. Its breathable stitchwork ensures comfort across seasons, whether worn in spring, autumn, or as a stylish accent in winter.
Beyond its practical use, the shrug radiates beauty in its texture and thoughtful construction, making it more than just a garment—it’s a statement of elegance and comfort. A timeless piece, it brings warmth, charm, and individuality to every wardrobe.
Materials Needed
Yarn:
- Funfair Swirl DK: 450m, 100% premium acrylic.
- Lion Brand Shawl in a Ball: 473m, medium-weight (though thin for its category), 58% cotton, 39% acrylic.
- Yarns can be substituted with similar weights and types depending on preference or availability.
Crochet Hook:
- 4.5mm hook.
Additional Tools:
- Scissors.
- Darning needle (for weaving in loose ends).
- Stitch markers (for pinning sections and maintaining stitch count).
![]()
Special Features
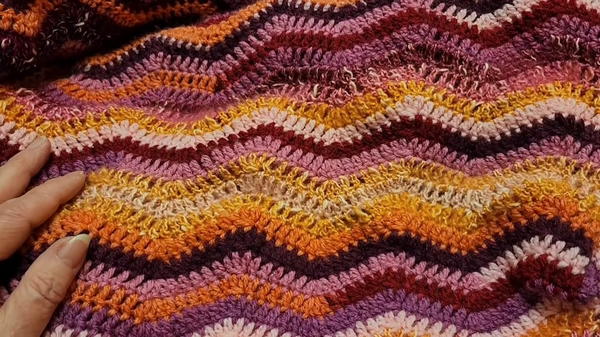
Striking Stripe Orientation:
- The back features horizontal stripes, while the front highlights vertical stripes, creating an eye-catching contrast.
Customizable Design:
- The shrug can be tailored for different sleeve lengths, widths, and sizes.
Versatile Yarn Choices:
- Darla uses two contrasting yarns, "Funfair Swirl DK" and "Lion Brand Shawl in a Ball," creating alternating rows with complementary colors.
Beginner-Friendly Stitch:
- A repeated one-row pattern makes the project approachable, even for those new to crochet.
Practical Construction:
- The shrug starts as a simple rectangle that's folded, pinned, and sewn to achieve the sleeve openings.
Level of Difficulty
Beginner to Intermediate:
The project features simple stitches (double crochet and single crochet variations) and manageable techniques for shaping, making it suitable for beginners who are ready to take on a slightly more structured project. Beginners may need extra focus during the sewing and folding for sleeve creation.
Step-by-Step Guide
Step 1: Create the Base Rectangle
- Begin with a foundation chain based on the desired width of the shrug.
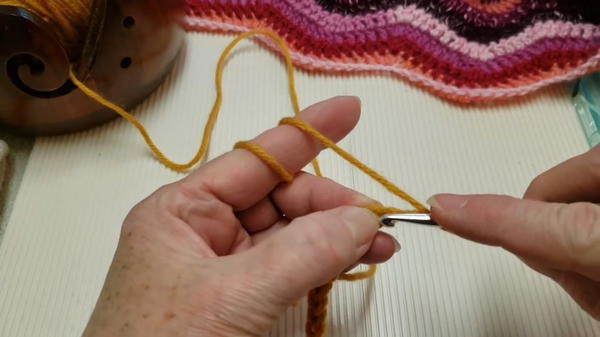
- Darla uses 168 + 4 chains for a shrug measuring approximately 39.2 inches wide (100 cm).
- Work double crochets into the fourth chain from the hook, creating rows with alternating peaks (three double crochets in one stitch) and valleys (clusters using four loops pulled together).
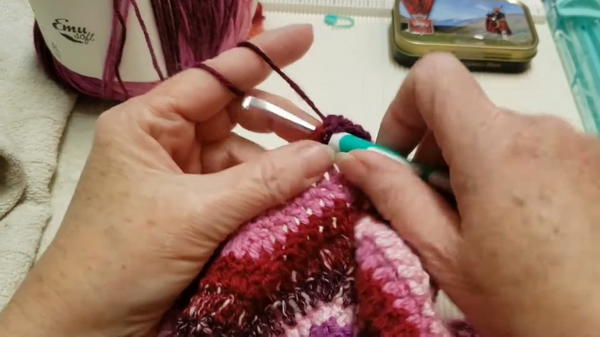
2: Repeat the Row Pattern
- Each row starts and ends with seven double crochets.
- Alternate valleys and peaks throughout the row, with five double crochets between each feature.
- Continue building rows until the rectangle reaches the desired length and size. Darla works a total of 70 rows for her shrug.

Step 3: Shape the Sleeves
- Fold the rectangle lengthwise.
- Pin the ends to create sleeve openings, ensuring the fabric fits comfortably around your arms. Adjust sleeve width as necessary.
- Use the mattress stitch (a back-and-forth sewing technique) to sew the underside of each sleeve, securing the construction.
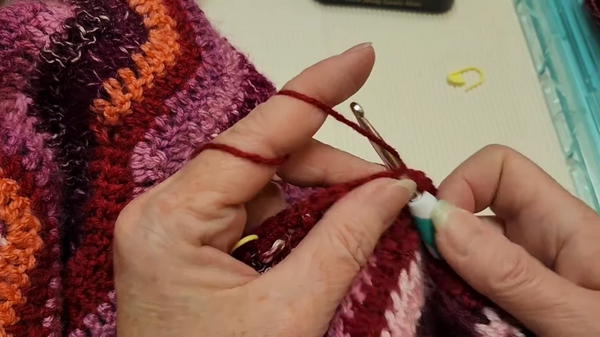
4: Add the Front Edging
- Attach yarn to the underarm area near a peak from the row below.
- Work rows of double crochet peaks and valleys around the front opening, ensuring any mismatched stitch counts under the arms are adjusted smoothly ("fudging").
- Continue until you achieve a polished border for the front.
5: Add Cuffs to the Sleeves
- Work single crochets around the edges of each sleeve opening, ensuring multiples of 14 stitches for consistency.
- Begin the zigzag pattern using peaks and valleys, identical to the body’s design. Darla recommends two rows but encourages adding more rows for a longer cuff.
6: Finishing
- Weave in all loose ends using a darning needle.
- Optional: Add a border to the bottom or other edges of the shrug for additional decoration.
Tutor’s Suggestions
Yarn Substitution:
- You can use any yarn weight and type, making this project highly flexible and customizable.
Sleeve Fit:
- Ensure the folded rectangle leaves enough room for comfortable arm movement. Darla recommends trying on the pinned shrug to confirm before sewing.
Adjust Rows for Length:
- Add or reduce rows based on the desired size and fit.
Color Pairing:
- Alternate rows of two contrasting yarns to add depth and vibrancy to the finished design.
Uses and Benefits
- Versatile Accessory:
- Ideal for layering over casual or formal outfits during cooler months.
- Customization:
- Easily adapts to various styles, sizes, and colors.
- Gift-worthy:
- Makes a thoughtful handmade present for friends or family.
Tip
For clean edges and consistent sizing, mark stitch intervals with stitch markers, especially for the sleeve edges and front opening. This helps ensure symmetry and an overall polished look.
Conclusion
This crochet shrug pattern offers an accessible yet elegant project for all skill levels. Through its simple construction—a folded rectangle—it transforms into a chic layering piece that combines comfort and individuality. Featuring a striking zigzag pattern of peaks and valleys, it’s not only functional but stylish. With room for creativity in yarn choices and colors, this shrug is a versatile garment suited for many occasions or as a heartfelt gift.


