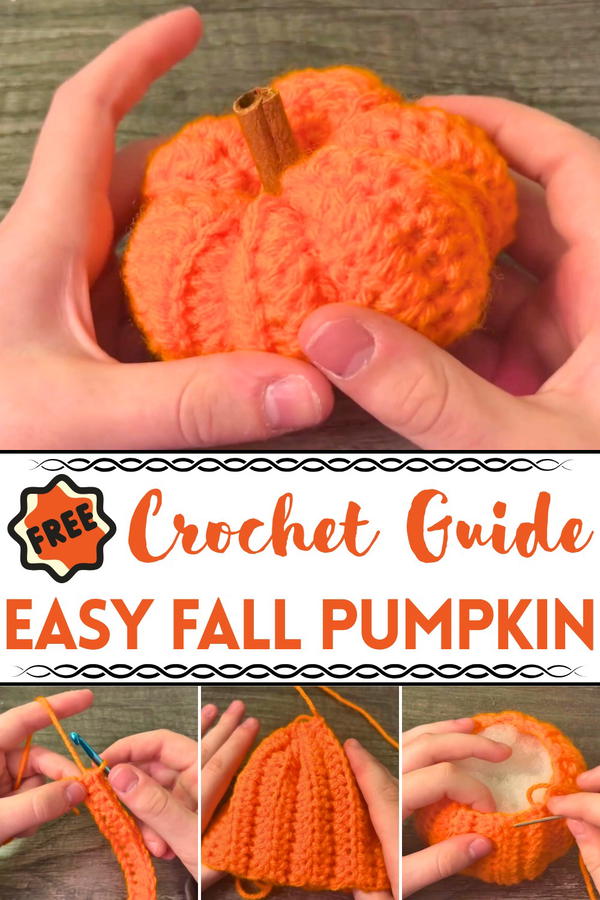
Celebrate autumn vibes with this Crochet Fall Pumpkin pattern, a charming design to add cozy seasonal warmth to your décor or handmade gifts.
The arrival of autumn is often marked by the sight of pumpkins, a symbol of harvest, warmth, and seasonal charm that fills homes with comfort. The Crochet Fall Pumpkin pattern captures this timeless imagery in a lasting and delightful way, turning yarn into a cozy treasure that celebrates the beauty of fall. Each pumpkin is shaped with rounded curves, detailed ridges, and a sturdy stem, offering a lifelike yet whimsical presence that never fades.
Enchanting Touch Crochet Fall Pumpkin with Autumn Charm
Unlike real pumpkins that eventually spoil, this version remains vibrant year after year, making it a reliable decoration for the season. Its lightweight form allows it to rest gracefully on mantels, shelves, or dining tables, and it can be arranged in groups for a festive centerpiece. Beyond personal décor, it makes a thoughtful handmade gift, carrying the warmth of autumn to friends and loved ones.
The soft texture of yarn adds depth and charm, enhancing the cozy feel of seasonal celebrations. Versatile enough to complement rustic farmhouse style or modern décor, it adapts effortlessly to any home setting. With durability, beauty, and symbolic meaning woven together, the Crochet Fall Pumpkin pattern stands as a timeless keepsake that keeps autumn’s spirit alive year after year.
Materials Needed
Yarn:
- Orange Yarn (or any desired pumpkin color).
Hook Size: 5.0 mm crochet hook.
Stuffing: Fiberfill or other stuffing material for shaping.
Cinnamon Stick: The stem of the pumpkin (use half of a stick).
(Optional: You can crochet your stem if you don’t want to use cinnamon.)
Hot Glue Gun: To attach the stem securely.
Needle: Crochet needle for stitching the pumpkin and adding shaping details.
Scissors: For cutting yarn.
Special Features of the Crochet Pumpkin
- Beginner-Friendly Design: Uses straightforward techniques such as half-double crochet (HDC), slip stitches, and sewing.
- Highly Customizable: You can choose your desired yarn color and type of stem (e.g., cinnamon stick, crocheted stem, or twigs).
- Textured Pattern: The pumpkin incorporates HDC in the back loops to create a ribbed and realistic texture.
- Seasonal and Decorative: Works as autumn décor, party decorations, or handmade gifts for loved ones.
- Natural Appeal: The optional use of a cinnamon stick adds a cozy, fragrant, and rustic touch to the pumpkin.
Level of Difficulty
This project is ideal for beginners who are familiar with basic crochet techniques. The pattern primarily involves half-double crochets, working in back loops, slip stitches, and simple sewing. The shaping is straightforward, but beginners may need to be patient with closing and shaping the pumpkin.
Step-by-Step Instructions
1. Crocheting the Pumpkin Body
Start with a Slip Knot: Leave a long tail for sewing later.
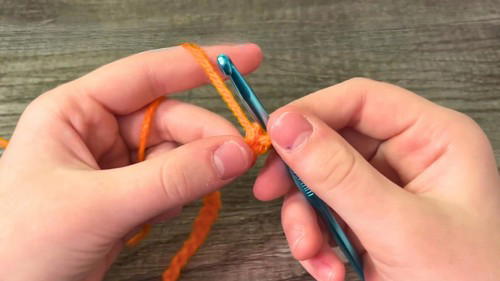
Create Foundation Chains: Chain 18 stitches.
- This will determine the width of the pumpkin.
Row 1: Work a half-double crochet (HDC) in the second chain from the hook and in every chain across.
- You should have 17 stitches at the end.
- You should have 17 stitches at the end.
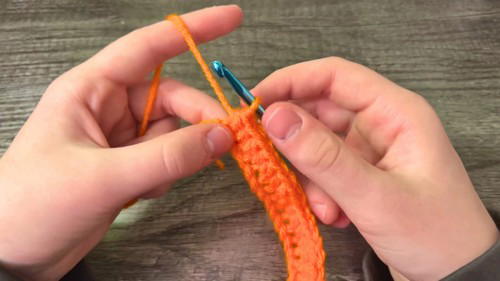
Row 2 (Back Loop HDC):
- Chain 1, turn your work.
- Work HDC into the back loop only of each stitch across.
Rows 3–21:
- Repeat Row 2, creating a total of 21 rows.
- The texture of the pumpkin comes from working exclusively in the back loops.
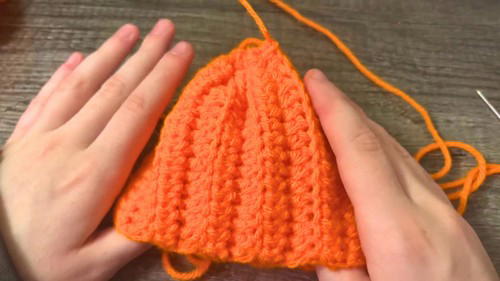
2. Closing the Pumpkin Body
Fold the Rectangle: At the end of 21 rows, fold your work in half so the shorter edges meet.
Join Edges with Slip Stitches:
- Use the long tail or start a new strand.
- Insert the hook into the back loops of both edges and work slip stitches to join the sides.
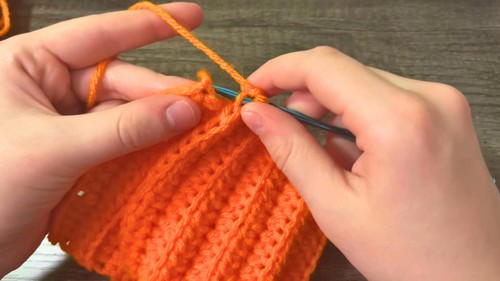
- You can use a needle and sew the edges if preferred.
Finish the Seam: Tie off the yarn, leaving another long tail for sewing.
3. Closing One End of the Pumpkin
Sew the Bottom:
- Thread the long tail through your crochet needle.
- Work running stitches around the bottom edge of your pumpkin.
- Pull the yarn tightly to gather and close the bottom.
Secure the Bottom:
- Sew back and forth a few times across the gathered edge to ensure it stays tight.
- Knot the yarn securely and trim any excess.
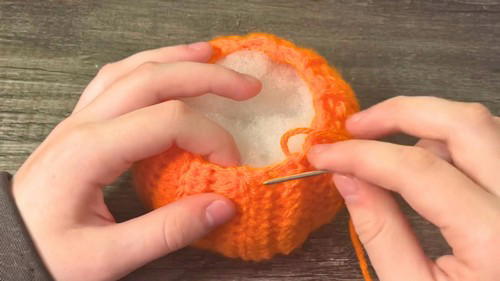
4. Stuffing and Shaping the Pumpkin
- Turn the Work Inside Out: Flip the pumpkin so the seams are on the inside.
- Add Stuffing: Stuff the pumpkin with fiberfill until it is firm but not overfilled.
- Leave the top open for now.
5. Closing the Top of the Pumpkin
Sew the Top:
- Repeat the same gathering technique on the top edge as you did for the bottom, but don’t close it completely.
- Leave a small opening for inserting the stem.
Secure the Opening:
- Tighten the yarn around the top but leave enough room for the stem.
- Knot the yarn securely and hide the excess by weaving it through the pumpkin.
6. Shaping the Pumpkin
- Define the Segments:
- Thread the remaining tail through the center of the pumpkin. Pull it tight to create indentations (like pumpkin sections).
- Repeat this process 5–6 times around the pumpkin’s body, spacing the sections evenly.
- Final Knot: Tie off the yarn securely and trim the excess.
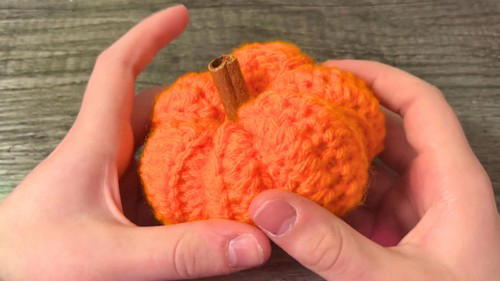
7. Adding the Stem
- Use a Cinnamon Stick: Cut the stick in half if it’s too long for the pumpkin’s scale.
- Attach the Stem:
- Use hot glue to secure the cinnamon stick into the top opening.
- Hold it firmly in place until the glue sets.
Tutor’s Suggestions
- Start with Long Tails: Ensure your starting and ending yarn tails are long so you have plenty of material for sewing and shaping.
- Prevent Overstuffing: Stuff the pumpkin firmly but not so much that the stitches stretch; this will maintain the texture.
- Experiment with Sizes: Adjust the initial chain length and number of rows to create smaller or larger pumpkins.
Uses of the Crochet Pumpkin
- Halloween Décor: Place them around your home as centerpieces, window displays, or festive additions to your Halloween décor.
- Seasonal Gifts: Handmade pumpkins make thoughtful autumnal gifts.
- Classroom or Event Decorations: They’re a cute way to decorate libraries, classrooms, or party venues.
- Rustic Touch: Adding cinnamon sticks provides both style and a cozy fragrance.
Pro Tip
Use different yarn textures and colors to create a pumpkin patch with a variety of looks (e.g., chunky yarn for larger pumpkins or velvet yarn for a luxurious touch).
Conclusion
Crocheting a Halloween pumpkin is a fun and simple project that adds a festive touch to the season. By following Alexia's step-by-step pattern , you can create a delightful and customizable piece perfect for Halloween, Thanksgiving, or autumn in general. Whether you display your pumpkin as holiday décor or gift it to someone special, this project is sure to bring warmth and creativity to the season.


