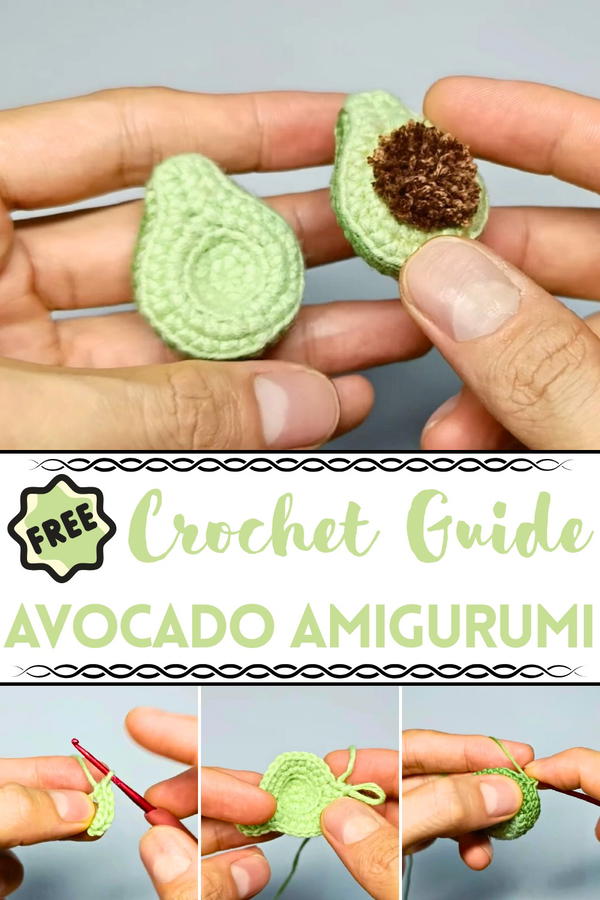
Celebrate the joy of handmade charm with this Free Crochet Avocado Amigurumi Pattern, perfect for adding a whimsical touch to your crochet collection.
Known for its creamy texture and health benefits, the avocado has become a global icon far beyond the kitchen, inspiring everything from fashion to toys. This Crochet Avocado Amigurumi captures that playful spirit in the form of a soft, cheerful amigurumi, complete with a signature pit belly and a friendly smile. Whether it’s resting on a shelf or nestled in a child’s arms, it brings a pop of charm and personality to any setting.
How To Crochet Avocado Amigurumi With This Free Step-by-step Pattern
This free pattern turns basic stitches into something joyful and functional. Lightweight, compact, and squishy, it makes for a perfect handmade gift, nursery decoration, or stress-relieving desk buddy. With simple construction and beginner-friendly instructions, it’s an ideal project for new crocheters or a quick win for experienced hands looking for something sweet. The color combinations can be personalized, adding your own touch of whimsy or realism.
Beyond its delightful looks, this little avocado can spark smiles in everyday moments, tucked into gift baskets, used as a playful teaching aid, or carried as a soft pocket companion. It celebrates the fun in handmade charm and proves that even the smallest projects can deliver comfort, character, and creativity with every stitch.
Crochet Avocado Pattern: Step-by-Step Guide
1. Materials Needed
- Yarn:
- Light green or creamy green for the avocado base.
- A darker green for the avocado skin (shell).
- Brown for the seed.
- Crochet Hook: Use small hooks to achieve the given size, or opt for larger hooks for bigger pieces.
- Stuffing: Fiberfill or similar material to shape the avocado's filling.
- Hot glue or silicone glue for securing the base.
- Needle: Yarn needle for finishing and shaping.
- Optional: A skewer stick (to help with stuffing), keychain rings, or accessories for additional uses.
2. Crochet Abbreviations in the Pattern
- SC: Single Crochet
- INC: Increase
- SL ST: Slip Stitch
- Dec: Decrease
These abbreviations simplify the instructions and are crucial for following the pattern.
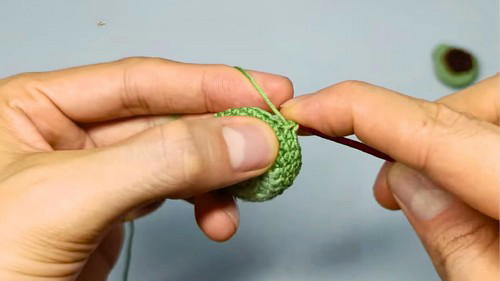
3. Crochet Steps
- Avocado Base:
- Round 1: Create a magic ring with 6 single crochets.
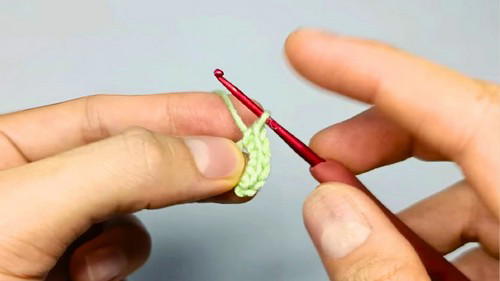
- Round 2: Create only increases, ensuring there are 12 stitches by the end.

- Round 3: Crochet 12 stitches in a single round (no increases or decreases).
- Round 4: Work in the back chain only, creating 5 increases evenly spaced. Ensure the total is 26 single crochets.
- Make 3 chains and attach them to create a “lip” for the seed’s hollow. Add silicone glue here to secure the shape as you proceed.
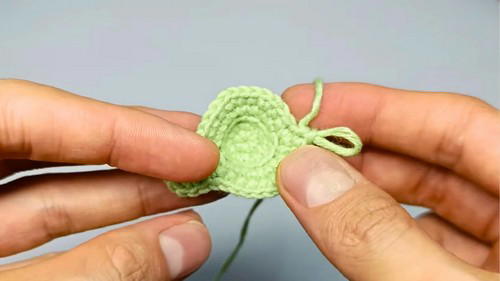
- Make 3 chains and attach them to create a “lip” for the seed’s hollow. Add silicone glue here to secure the shape as you proceed.
- Round 5: Continue increasing in sequences of 2 stitches and 1 increase, followed by 6 single stitches and 2 triple increases at either side of the base. You should have 34 stitches by the end.
- Avocado Shell (Green Color):
- Round 6: Switch to a darker green yarn. Crochet 34 stitches working through the back chains to give the fold and shape to the avocado skin.
- Round 7 & 8: Continue with full stitches. On round 8, start shaping by including four decreases along the curved back section to finish with 30 stitches.
- Round 9: Add 10 single crochets and 6 decreases for shaping. Finish with 24 stitches.
- Round 10: Alternate between 1 single crochet and 1 decrease to end up with 12 stitches.
- Round 11: Begin closing with 1 single crochet followed by a decrease.
- Round 12 (Final Round): Make 3 final decreases, cut the yarn, leave an 8 cm tail, and close with a yarn needle.
4. The Seed
- Use brown yarn to mimic the pit.
- Wrap yarn 25–30 times around two fingers (adjust if the yarn is thicker or thinner).
- Remove the ring of yarn from your fingers, flatten it, and tie it tightly in the middle with an 8–10 cm yarn strand.
- Cut through the loops to create individual threads.
- Use hot glue to attach the seed to the hollow in the avocado. Let it cool before shaping it.
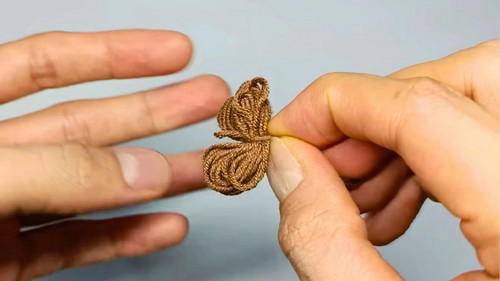
- Trim the ends to make the seed round and neat.
Special Features
- Compact Size: Perfect for earrings, keychains, or tiny appliques, measuring 3 cm by 2 cm.
- Customizable: Use thinner or thicker yarn and hooks to adjust the size.
- Seed Variation: Create an avocado pair—a whimsical set with one avocado having a seed and the other without.
Level of Difficulty
- Beginner Level: No prior experience with advanced techniques is required. The tutorial uses simple stitches like SCs, increases, and decreases, making it accessible for those new to crocheting.
John's Suggestions
- Customization: For smaller avocados, use thinner yarn and hooks. For larger ones, opt for thicker threads or chenille yarn.
- Glue Use: Using hot silicone allows for secure assembly and a clean finish. Let it cool before working on cuts or shaping.
- Counting Stitches: Always count stitches at the end of each round to maintain the correct shape.
Uses
- As Earrings: Their small size makes them perfect for wearable art.
- As Keychains: Add a ring for a fun accessory.
- As Pins or Brooches: Attach a pin at the back.
- Decorations: Use them on bags, clothing, or as home decor items.
- Creative Gifts: Make sets of avocado pairs to give to loved ones.
Conclusion
Congratulations! You’ve learned how to crochet a delightful pair of mini avocados. These adorable creations are beginner-friendly and allow for endless creativity in usage and customization. Don’t forget to count your stitches, maintain symmetry, and experiment with different yarns and hooks to make them your own. Happy crocheting!
Bonus Tip
To achieve a professional finish, shape the seed to align perfectly with the hollow without exceeding the borders of the avocado base. A skewer stick helps with precise filling and shaping.