Complete your outfit effortlessly with this Free Crochet Bow Headband Pattern that offers soft texture, flexible fit, and a sweet handmade look.
A simple accessory can sometimes do more than complete an outfit, it can brighten your mood, tie your look together, and offer comfort in one neat detail. This Free Crochet Bow Headband Pattern does exactly that with charm and ease. Whether you're running errands, heading to a casual outing, or just looking to tame your hair in a cute way, this headband offers a soft, stylish solution that suits any season.
How To Style Your Hair With Bow Headband
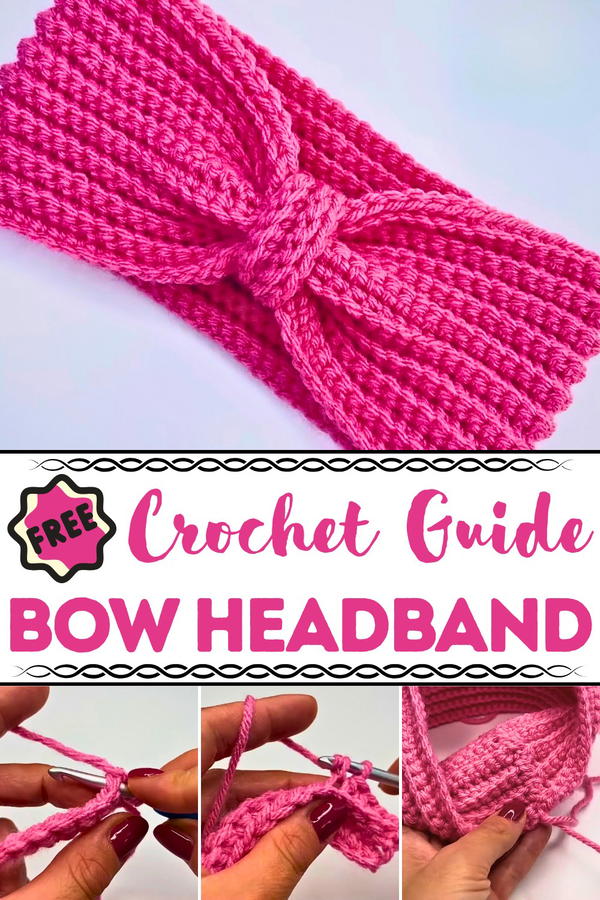
The bow adds a playful yet polished touch, striking the perfect balance between sweet and sophisticated. Made with minimal yarn and time, it’s a wonderful option for quick gifts or thoughtful keepsakes. The stretchy fit ensures it stays comfortably in place without being too tight, while the texture gives it visual appeal that works well with loose hair, ponytails, or messy buns. It’s lightweight enough for warmer days yet cozy enough for cooler weather, making it a year-round favorite.
Whether worn by kids, teens, or adults, the finished piece feels personal and timeless. You can adjust the size easily or try it in multiple colors to match different looks. More than just a headband, it’s a small, stylish gesture that brings personality to everyday moments.
Special Features
- Beginner-Friendly: The project is ideal for beginners, showcasing basic stitches and a simple structure.
- Adjustable Sizes: You can customize it for babies, children, teenagers, or adults by adjusting chain lengths.
- Elegant Design: The back-loop single crochet stitch creates a clean, textured appearance.
- Quick Work-Up: The project can be completed in just a few hours.
- Versatile: A small band wrap shapes the bow, making it optional for a simpler headband look.
Difficulty Level
- Beginner: Perfect for those new to crochet, using simple techniques like the slip knot, chain stitch, single crochet, and sewing.
Materials Needed
- Crochet Hook: 5 mm crochet hook.
- Yarn: Stylecraft Special Chunky Yarn (acrylic and soft; any color can be used).
- Scissors: For cutting yarn.
- Yarn Needle: Used for sewing the headband closed and shaping the bow.
Step-by-Step Instructions
1: Crochet Chains
- Begin with a slip knot.
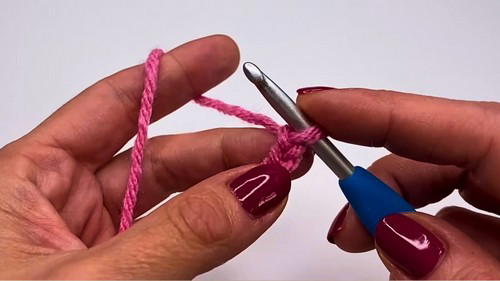
- Crochet chains based on the size:
- Child: 70 chains.
- Adult: 80–85 chains.
- Ensure the chain length fits snugly around the head—not too loose or tight.
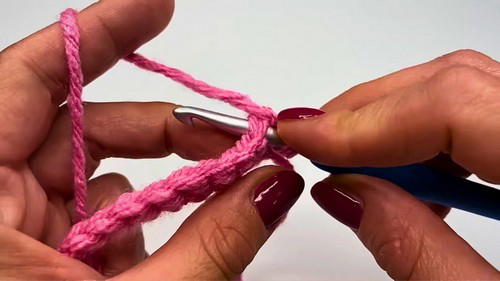
2: Row 1 – Single Crochet
- Begin in the second chain from the hook.
- Work a single crochet in every stitch across the row.
- Continue until the end of the row.
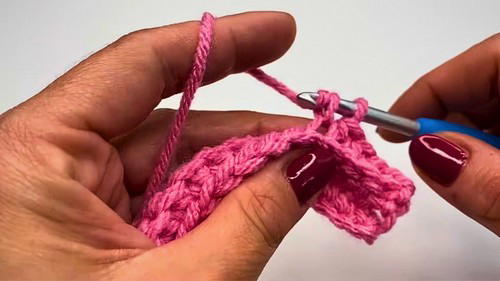
3: Repeat Row (Row 2 Onwards)
- Chain 1 and turn your work.
- Work single crochet stitches in the back loops only for a textured effect.
- Repeat this row until reaching the desired width for the headband:
- Adults: Approximately 19 rows.
- Children: About 14–15 rows.
- Try the headband on during this stage to ensure an ideal fit.
4: Finishing the Headband
- After completing the final row, chain 1, pull tight, and leave a yarn tail for sewing.
- Cut the yarn and use the yarn needle to sew the ends together neatly.
- Secure all yarn ends, ensuring they are hidden.
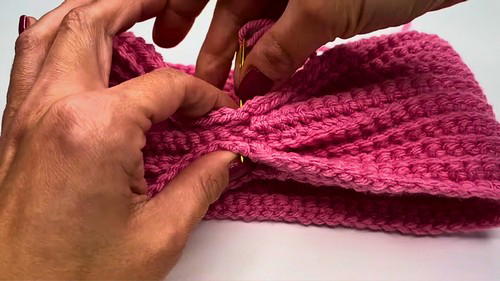
5: Shaping the Bow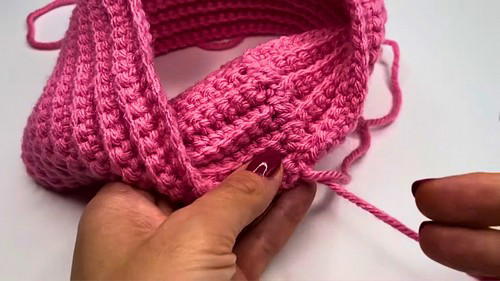
- Fold the headband at the stitched seam—adjust front and back as desired.
- With a yarn needle, sew the layers together (fold the top and bottom into the middle) to form the bow’s ripple effect.
6: Making the Bow Band
- Crochet a small band to secure the bow:
- Start with a slip knot and create 15 chains.
- Work single crochet stitches (back loop only) for 4 rows.
- Sew the band’s ends together and wrap it around the bow’s center to secure the shape.
- Hide and cut all yarn ends.
Tutor's Suggestions
- Adjust chain length to fit snugly but comfortably.
- Test-fit the headband during crocheting to ensure an accurate size.
- Select soft and durable yarn for maximum comfort.
Uses
- Fashion Accessory: Perfect for enhancing casual or formal outfits.
- Customization: Great gift idea tailored to individual preferences.
- Cold Weather Wear: A cozy option for head coverings in colder climates.
Additional Tip
Use contrasting colors for the bow band and headband to add a dynamic and stylish effect!
Conclusion
Creating this bow headband is a fun and rewarding project for all skill levels. The simplicity of the stitches combined with creative customization opportunities makes this tutorial an engaging crochet that beginners and experienced crocheters alike can enjoy.


