Spice up your Halloween vibes with this Free Crochet Kawaii Skull Keyring Pattern that's fun to stitch, irresistibly cute, and perfect for handmade charm lovers.
It’s fascinating how even the smallest decorations can add charm and personality to daily life, and the kawaii skull keyring delivers on both fronts. Perfect for Halloween or year-round fun, this crochet project combines functionality with a touch of whimsy, resulting in a versatile and compact accessory. One of the standout benefits of this project is its accessibility and sustainability.
Free Crochet Skull Keyring Pattern That’s Creepy-Chic
The design accommodates small amounts of leftover yarn, making it ideal for reducing waste and repurposing scraps from previous projects. Additionally, the ability to adjust the size and texture with different yarn weights adds customization opportunities. For those new to crochet, the step-by-step instructions simplify the process into manageable sections, while experienced crocheters will appreciate how easily they can complete it within a brief crocheting session.
Beyond its usefulness, the kawaii skull keyring promotes creativity and personalization, allowing crocheters to experiment with colors and features. Whether serving as a daily accessory, a Halloween decoration, or even a small gift for loved ones, its charm lies in its simplicity. Fun, functional, and beginner-friendly, this crochet project is bound to bring a smile while showcasing the joy of handmade creativity.
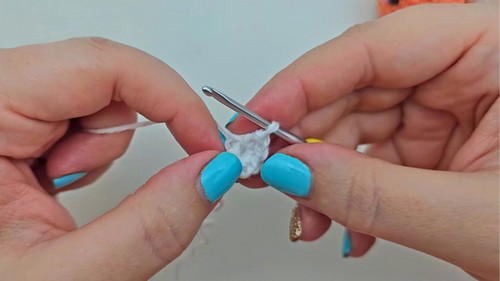
The process begins with the magic ring technique, a fundamental crochet skill used to form the center of the project while ensuring an even base. Using single and double crochet stitches, the pattern gradually takes shape, forming the oval skull structure. As the early rounds progress, simple increases expand the skull’s dimensions, while clear stitch counts guide every step to ensure accuracy.

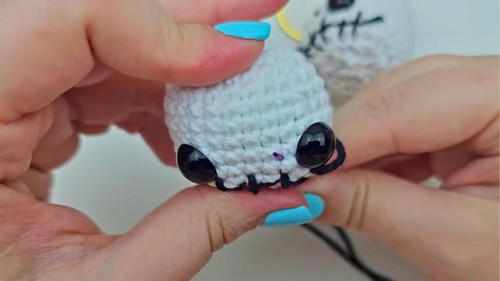
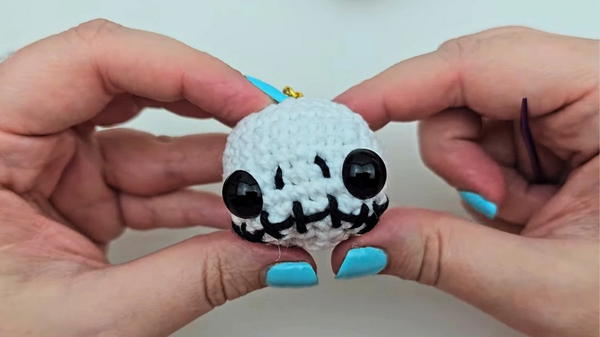
In the middle phase, safety eyes are added to bring life to the character, followed by small embroidered details to complete the kawaii aesthetic—adding a gentle smile and nose that achieve an expressive yet minimalistic style. The final steps involve securing the yarn seamlessly and attaching the keyring hardware for practical use.
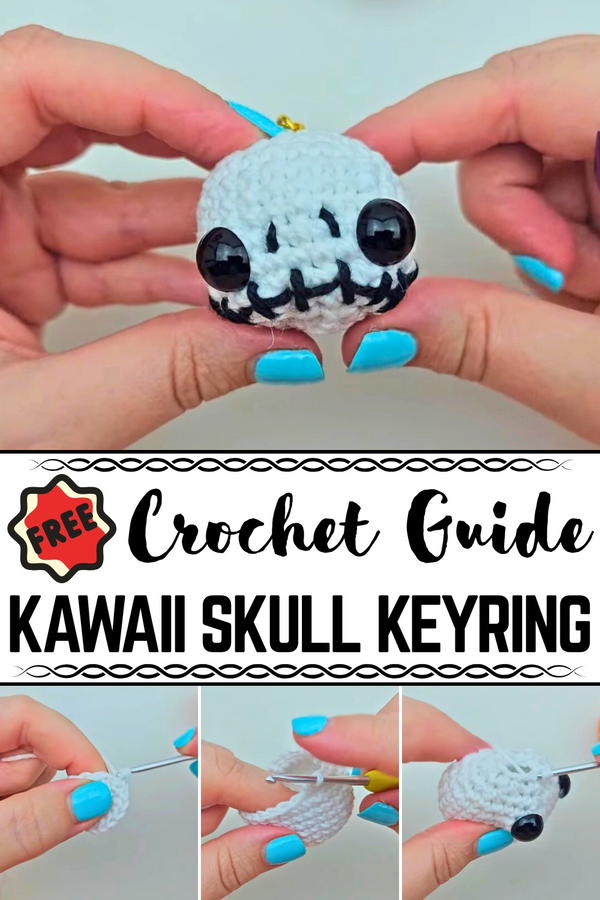
The finished keyring features an adorable skull design accented by cute facial embroidery and safety eyes, making it ideal for decorating bags, keys, or even as a thoughtful handmade gift. 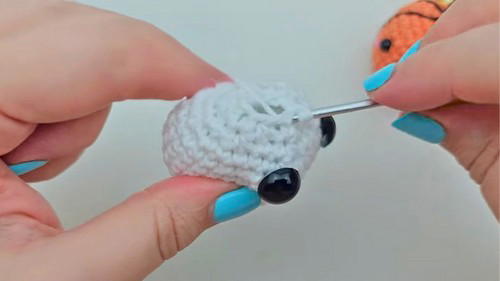
With its lightweight and squeezable nature, it’s easy to carry while adding a playful design that sparks conversation and compliments.
Step-by-Step Details
1. Special Features
- Beginner-Friendly: This series is made for absolute beginners who have never crocheted before. The instructions are simplified for easy understanding.
- Customization Options: You can use different yarn types, hook sizes, safety eyes, and colors to create a personalized skull face.
- Minimal Materials: The project uses small amounts of yarn, making it a great way to clear leftover yarn ("yarn busters").
- Quick Craft: The skull face design is the simplest in the series, requiring fewer features compared to other projects.
- Versatile Design: The project can be adapted into either a keyring or a plush.
2. Materials Needed
- Yarn:
- Main color (white) - King Cole Cotton Soft DK yarn is preferred for its smooth texture.
- Black DK yarn for embroidering the smile and other features.
- Safety Eyes:
- 10mm for the keyring.
- 15mm or larger for the plush.
- Stuffing: Used to fill the skull face for shape and softness.
- Crochet Hook: 2.5mm for the keyring or 7mm for the plush.
- Darning Needle: Needed for embroidering the black smile and sewing on the keyring.
- Scissors: For cutting yarn and finishing.
- Keyring: For turning the skull face into a functional accessory.
3. Level of Difficulty
- Beginner Level: This crochet skull face is described as the easiest project in the Halloween Kawaii Key Ring Series. It is straightforward due to the fewer details and features. For instance, the blush and additional elements from other projects are omitted.
- Right-Handed Instructions: The tutorial is designed for right-handed viewers, with no direct instructions for left-handed crocheters.
4. Tutor’s Suggestions
- Cotton Yarn: The tutor recommends King Cole Cotton Soft DK yarn because it is smooth, soft, less squeaky on the hook, and very easy to work with.
- Yarning Technique: Use “yarn under” rather than “yarn over” when making toys to create tighter stitches that minimize gaps where stuffing may show.
- Customization: Take creative liberty with features like eye size and placement. Larger eyes work better for plush versions.
- Magic Ring: Detailed guidance is provided on how to crochet a magic ring, making it beginner-friendly.
- Safety Eyes Installation: Attach safety eyes properly between rows 10 and 11, spaced evenly for a symmetrical design.
5. Uses
- Keyring: Convert the crochet skull face into a portable accessory.
- Plush: Make a larger, soft plush version using chunky yarn and a larger hook size.
- Decor: Use as Halloween decor or a spooky gift.
6. Step-by-Step Process
Rounds 1-5:
Start with the magic ring and gradually increase stitches to create a circular base. The tutorial uses clear instructions for single crochet and increases.
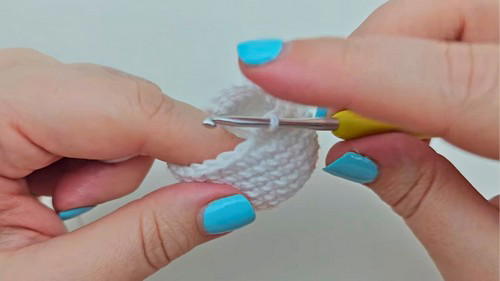
Rounds 6-10:
Crochet evenly around without increases to build the depth of the head.
Round 11 and onward:
Start decreasing the stitches to shape the head. Add stuffing for volume. Incorporate eyes between rows 10 and 11, ensuring symmetry.
Final Steps:
- Add the keyring: Sew it securely onto the top center using the stitched row.
- Embroider facial features: Use black yarn for the smile (backstitch) and vertical lines for the nose.
Tip
- To ensure durability, slightly melt the back of installed safety eyes using a lighter. Be cautious not to damage the project.
Conclusion
The crochet skull face keyring offers an enjoyable and simple project, ideal for beginners or those looking to make a quick Halloween-themed craft. You can customize it, use minimal materials, and adapt it into either a keyring or a plush. Whether you're creating spooky accessories or adding to your crochet collection, this series gives excellent guidance for all skill levels.


