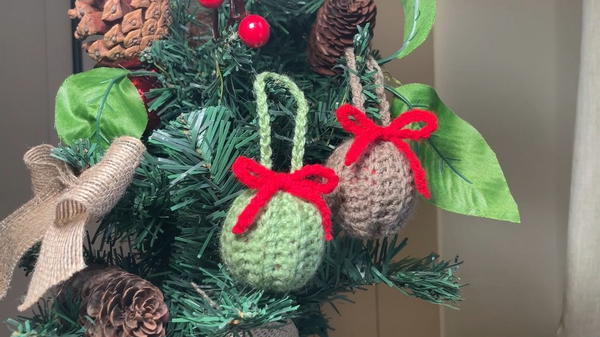
Brighten your holidays with this Free Crochet Ball Ornament Pattern, adding colorful charm, cozy texture, and festive beauty to every seasonal décor.
In many homes, ornaments carry stories—symbols of joy, warmth, and shared memories that return each festive season. The Free Crochet Ball Ornament pattern brings that same sense of nostalgia through the gentle rhythm of stitching, turning simple yarn into a beautiful keepsake. Each ball ornament can be customized with colors that reflect your personal style or match your holiday décor, adding a soft, handmade charm to the celebrations.
Lovely Crochet Ball Ornament Pattern That Shines Bright

Lightweight and durable, these ornaments are perfect for hanging on Christmas trees, decorating wreaths, or even filling clear glass bowls for a cozy display. They can also serve as thoughtful gifts, small yet meaningful tokens of affection that hold a sense of care in every loop and stitch. The process encourages mindfulness, allowing the maker to enjoy calm and focus while shaping each round.
Whether adorned with glittering threads or subtle tones, these crochet ball ornaments bring a touch of timeless beauty to any festive space. Their versatility ensures they remain part of your decorations year after year, carrying both tradition and creativity in every detail, a simple reminder that the most beautiful decorations often come from the hands that make them.
Materials Needed
- Yarn: Any type of yarn (scrap yarn works perfectly).
- Crochet Hook: Size 3.5 mm.
- Scissors: For cutting yarn.
- Yarn Needle: For sewing and weaving in ends.
- Stuffing Material: This can be yarn scraps, leftover stuffing, or even an old ornament.
Step-by-Step Instructions
1. Create the Base
Make a slip knot:
- Create a loop.
- Insert the hook into the loop, pull the long end of the yarn, and tighten to form a knot.
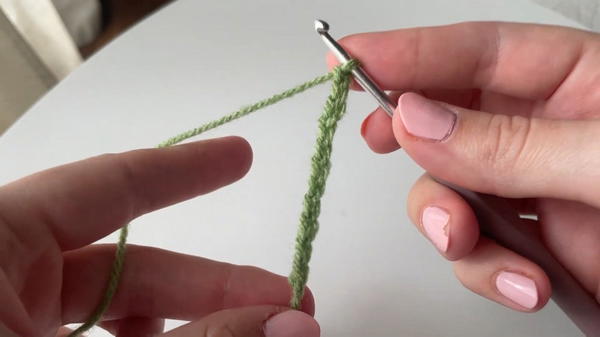
Chain 11:
- Yarn over and pull through to form each chain. Repeat this for a total of 11 chains.
Single Crochet (Row 1):
- Start from the second chain from the hook (not the chain your hook is currently in).
- Insert the hook, yarn over, pull up a loop, yarn over again, and pull through both loops (single crochet).
- Repeat this for each chain, leaving you with 10 single crochets.
Chain 1 and Turn Work:
- For Row 2, begin working in back loops only (this creates texture):
- Insert the hook into the back loop of the stitch, yarn over, pull up a loop, yarn over, and pull through two loops.
- Complete 10 single crochets.
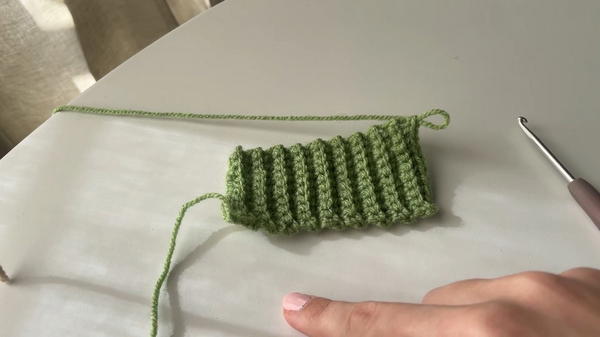
- For Row 2, begin working in back loops only (this creates texture):
Repeat for 18 Rows:
- Continue chaining 1, turning the work, and doing 10 single crochets in the back loops only for each row.
- By the end, the piece should measure approximately 9.5 cm by 4.5 cm.
Tip: If you want a bigger ornament, start with more initial chains and follow the same pattern.
2. Assemble the Ornament
Finish and Shape:
- After completing the 18th row, chain 1, cut the yarn, and pull it through.
- Using the yarn needle, fold the piece in half and sew up the edges.
Close the Top:
- Sew through the top loops, weaving in and out in a circular motion.
- Pull the yarn to scrunch the top closed, then sew a couple of extra loops to secure it.
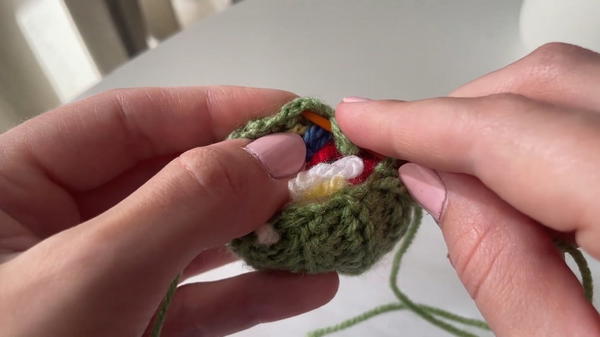
Stuff the Ornament:
- Turn the piece inside out (optional) to hide the seam.
- Insert stuffing material (e.g., scrap yarn, synthetic stuffing, or an old ornament) and ensure it is tightly packed.
Close the Bottom:
- Using a separate piece of yarn, sew the bottom in the same way: in and out until it is secure. Tie off the ends and hide them.
3. Add a Hanging Loop
- Use another piece of yarn to create a slipknot and chain to your desired hanging loop length.
- Knot the chain and sew it into the top of the ornament.
- Hide any loose ends by weaving them into the ornament.
4. Optional Embellishments
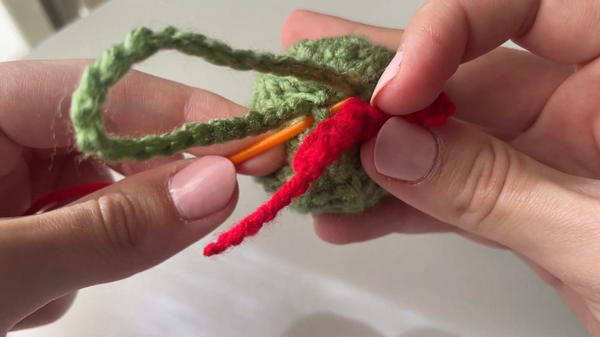
Add a Bow:
- Use a piece of red yarn to create a slip knot and chain to the desired length for a bow.
- Tie the chain into a bow and attach it to the front of the ornament using the yarn needle.
Decorate Further:
- Embroider details, use contrasting yarn for patterns, or add other small decorations to your ornament.
- Embroider details, use contrasting yarn for patterns, or add other small decorations to your ornament.
Special Features
- Texture: The back-loop-only technique creates a ribbed texture, giving the ornament a more professional look.
- Customizable: Adjust the size, colors, and embellishments to match your style.
- Eco-Friendly: Great way to repurpose yarn scraps and reduce waste.
Difficulty Level
- Beginner-Friendly: This project requires only basic skills, such as chaining, single crochet, and working with a yarn needle.
Tutor's Suggestions
- Double-check your stitch count (10 single crochets per row) to maintain evenness.
- For a larger or smaller ornament, adjust the starting chain length and number of rows.
- When sewing, take your time and make secure knots to keep the structure intact.
Uses of the Ornament
- Hang on your Christmas tree.
- Use as a decorative piece for gifts or packages.
- Create sets to give as handmade gifts to family and friends.
Materials Summary
- Yarn (any type, including scraps).
- A size 3.5 mm hook.
- Scissors, yarn needle, and stuffing.
Conclusion
This crochet ornament project is perfect for adding a handmade touch to your festive decorations. With its simple steps, textured design, and customizable features, it’s a great project for any level of crochet enthusiast. Whether you use it as a Christmas tree ornament or tie it into a gift embellishment, it’s sure to bring joy and charm to the holiday season.
Final Tip
When closing the top and bottom, pull the yarn tightly to ensure the ornament retains its shape. Take care to sew securely and hide all loose ends for a polished and professional finish.


