Step up your style with a Crochet Checkered Cropped Top Pattern that feels light, shows elegant design, and adds chic charm to sunny days and casual outings.
Made with soft and breathable yarn, this top keeps you cool and comfy, especially on warm days. Its fun checkered design adds a cheerful and lively touch, making it a perfect choice for casual outings, beach days, or hanging out with friends. The cropped style gives it a trendy and fresh look that pairs well with jeans, skirts, or shorts.
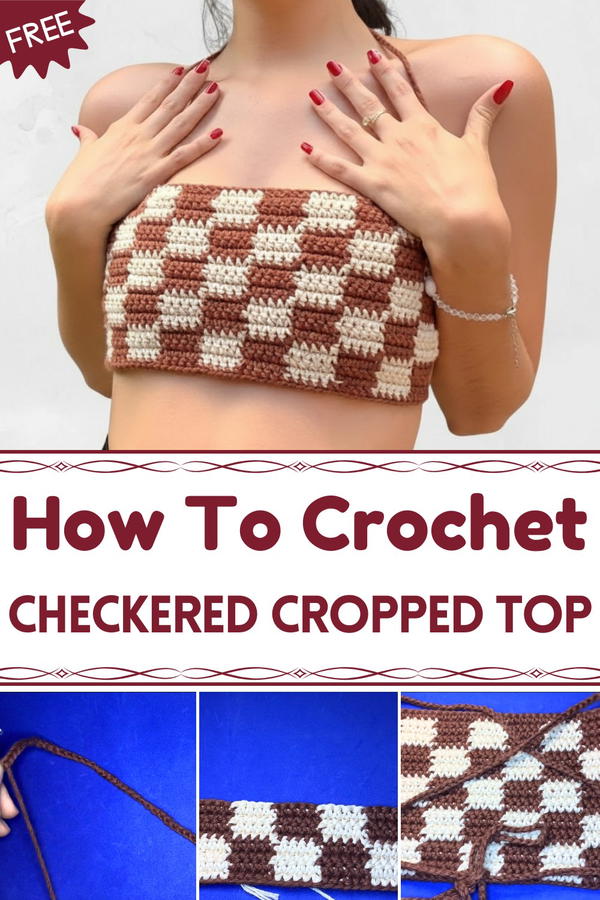
Fashionable Crochet Checkered Cropped Top Pattern for Summer Vibes
Lightweight and stretchy, it moves with your body, letting you feel free and comfortable all day long. The handmade feel makes it unique and special, giving your wardrobe a personal touch that stands out. Easy to wear and stylish, this top is great for adding a pop of pattern and color to your everyday outfits. Whether you want to feel relaxed or show off a bit of playful flair, this charming top fits perfectly into your summer fun and fashion!
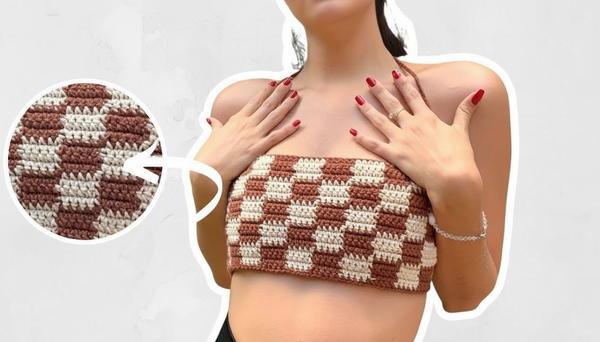
Simple Checkered Crochet Top Pattern
Materials Needed:
- Baroque yarn number 6 (or any similar weight yarn) in two contrasting colors (e.g., brown and beige)
- Crochet hook size 3 or 3.5 mm
- Scissors
- Tapestry needle for weaving ends
Difficulty Level:
Beginner
The pattern uses only basic stitches but includes color changes and yarn guiding, which is a useful skill for beginners to practice.
Special Features:
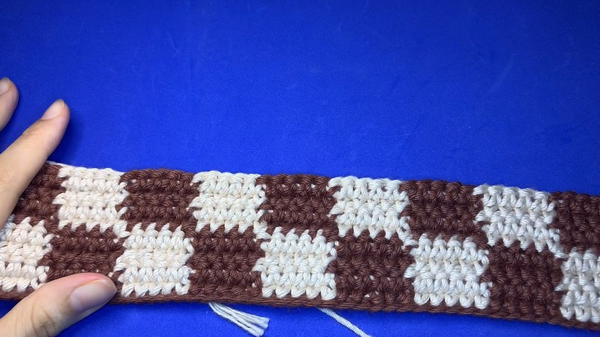
- Simple rectangular shape made of color-blocked squares
- Uses only single crochet and chain stitches
- Easy to customize size by adjusting chain and row counts
- Yarn carrying technique keeps the work neat
- Symmetrical design makes crochet straightforward and repetitive
Step-by-Step Pattern Instructions:
Step 1: Take Your Measurements & Calculate Chain Length
- Measure your bust circumference (e.g., 84 cm).
- Divide bust measurement by 2 (e.g., 42 cm).
- Divide that number by 4 to find a quarter measurement (e.g., 42 / 4 = 10.5 cm).
- Subtract this quarter value from half bust to get your starting chain length (42 – 10.5 ≈ 31 cm).
- This will be your chain length to start the rectangle base.
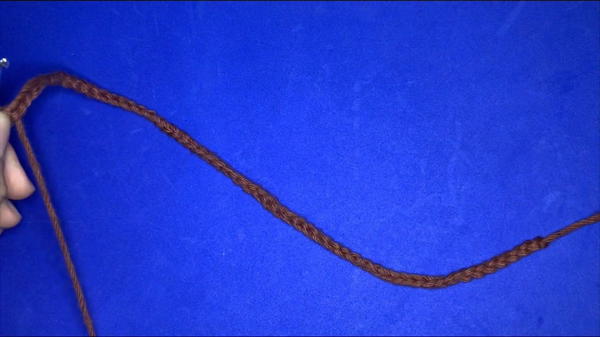
Step 2: Make Foundation Chain
- Using your chosen hook and yarn, chain chains until your chain measures approximately your calculated length (e.g., 31 cm).
- For reference, Bia used 55 chains to reach 31 cm with her yarn.
Step 3: Start First Row of Single Crochet
- Chain 1 to turn.
- Starting in the second chain from the hook, make 1 single crochet (sc) in each chain across the foundation chain.
Step 4: Create Checkered Blocks of Color
- Work in blocks of 5 single crochet stitches (sc) per color.
- For each block, switch yarn color on the 5th stitch as follows:
- Insert hook, yarn over with old color and pull loop, yarn over and pull through two loops — but pause before completing last yarn over.

- Pick up new color yarn, yarn over, and pull through loops to finish the stitch with the new color.
- Insert hook, yarn over with old color and pull loop, yarn over and pull through two loops — but pause before completing last yarn over.
- Carry unused yarn guide inside stitches to keep work tidy and avoid tangling.
Step 5: Work Subsequent Rows
- Chain 1, turn your work.
- Repeat making single crochet stitches across, carrying yarns and working blocks of 5 sc alternately in each color.
- Change color on the 5th stitch of each block using the above method.
- Continue repeating rows until you reach desired length of the top.
Step 6: Maintain Yarn Guiding Technique
- Always carry the unused yarn consistently either in front or at the back of the work to avoid tangles.
- Position yarns so that color changes appear neat and the carried yarn remains hidden within the stitches.
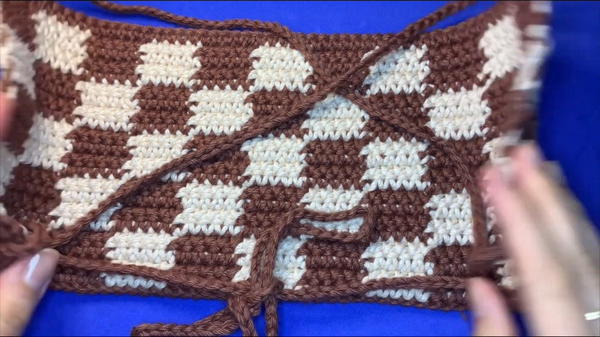
Step 7: Finishing Your Rectangle
- When rectangle is finished and sized appropriately, cut yarns and neatly weave in ends using a tapestry needle.
Step 8: Assemble & Wear
- Fold and cross the rectangle at the back and tie in the center or use as per your desired style.
- For straps, make long chains to tie around neck or hips or crochet straps separately and sew on.
Tutor’s Suggestions:
- Keep your tension consistent for uniform stitches and neat edges.
- Color changes might feel tricky at first; practice on a small swatch before starting your top.
- Carrying yarn inside stitches saves time finishing and makes your edges clean.
- Adjust chain length and row count to fit any size or style preference.
- Use a tape measure regularly to ensure your work matches measurements.
Uses:
- A lovely summer crop top or beach cover-up.
- Perfect for casual wear paired with shorts or skirts.
- An excellent project for beginners to learn yarn color changes and single crochet.
- Makes a thoughtful handmade gift customizable with your favorite colors.
Tip:
Always count your stitches carefully, especially when changing colors in blocks, to maintain the checkered pattern evenly. Mark your blocks if needed.
Conclusion:
This beginner-friendly checkered crochet top combines ease with style, using simple stitches and effective color changes to create a visually appealing design. By following the measurements and steps, anyone can crochet this adaptable piece, improving skills while making a wearable accessory.