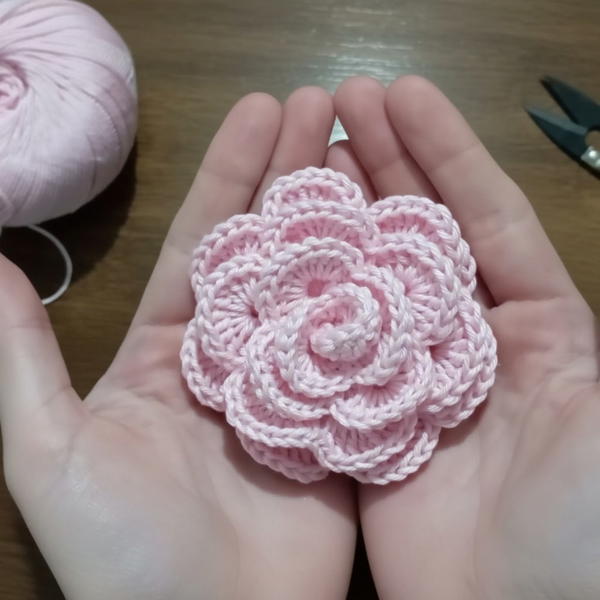
Celebrate spring with this Crochet Cherry Blossom Flower Pattern full of delicate petals gentle textures and a charming bloom that adds beauty to any space or gift.
Step into a world of delicate beauty with a tiny flower that captures the soft charm of spring. This handmade blossom looks like it just bloomed on a sunny day, with gentle petals that are light and full of grace. Its pretty shape and soft colors bring a fresh, happy feeling wherever it’s placed. Perfect for adding a sweet touch to clothes, hats, or hair accessories, this flower also makes lovely decorations or thoughtful gifts.
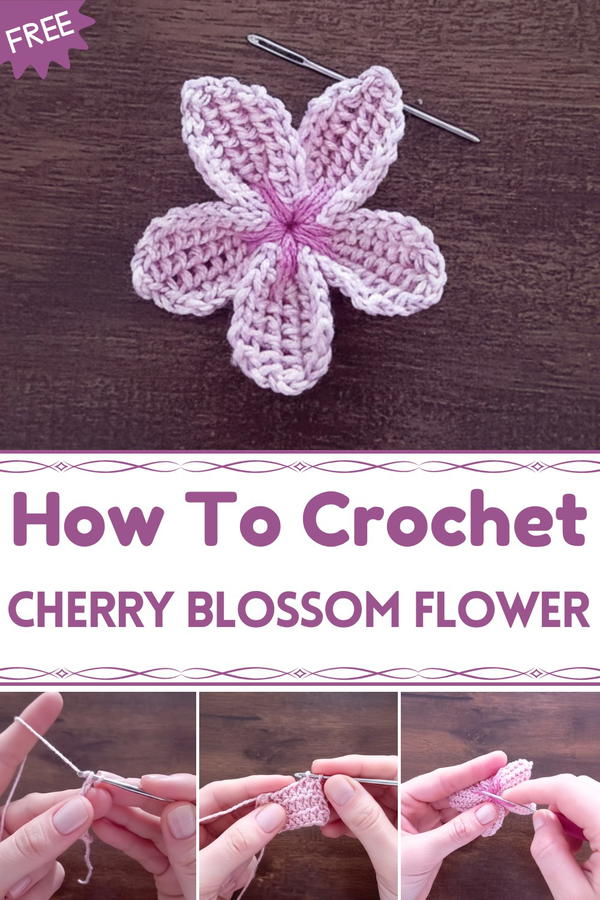
Crochet Cherry Blossom Flower Pattern for Bouquets and Decor
Made with soft yarn, it feels gentle to the touch and easy to carry around. Whether you’re new to making or have tried crocheting before, this flower is simple and fun to create. It’s a wonderful way to bring a little bit of springtime’s magic into your everyday life, reminding you of sunny days and blooming gardens all year long. Brighten up your world with this beautiful little treasure.
Crochet Cherry Blossom Flower Pattern
Materials Needed:
- Soft pink yarn (Anne brand or similar light pink cotton yarn)
- Crochet hook size 1.75 mm
- Embroidery thread in a darker pink for the flower’s center
- Tapestry needle for weaving and embroidering threads
- Scissors
Special Features:
- Inspired by Japanese cherry blossom (Sakura)
- Tunisian crochet technique on back loops for texture
- Petals shaped by increases and decreases
- Embroidered center for realistic detailing
- Small and delicate size, perfect for appliques or embellishments
Difficulty Level:
Intermediate — Requires working Tunisian stitches on back loops, managing increases and decreases, and basic embroidery for the flower center.
Step-by-Step Instructions:
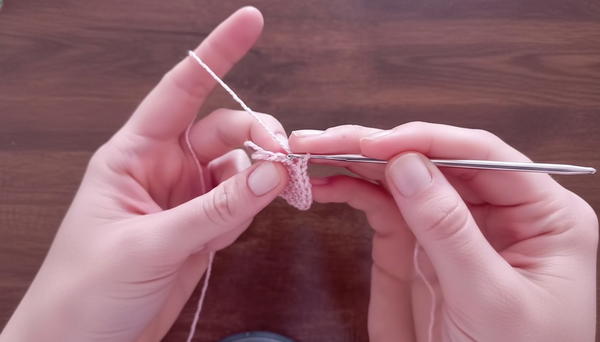
Step 1: Start with a Magic Ring
- Make a magic ring.
- Chain 6 inside the ring (counts as first Egyptian stitch).
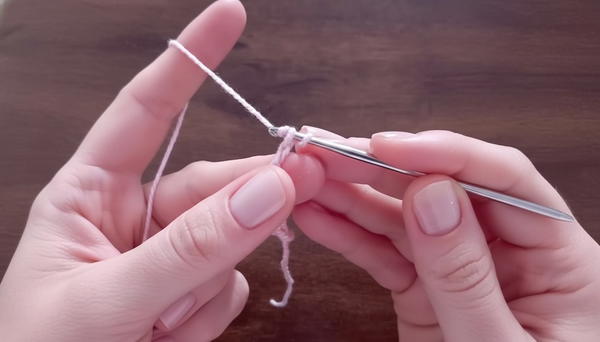
- Work 6 Tunisian simple stitches (TSS) into the magic ring, working behind the back loops of the chains.
- Pull the ring gently to close but keep it loose.
Step 2: First Return Pass
- Yarn over and pull through 2 loops on the hook repeatedly to complete the return pass.
- You should now have 8 loops on the hook.
- Release the loops 2 by 2, keeping stitches loose and even for flexibility.
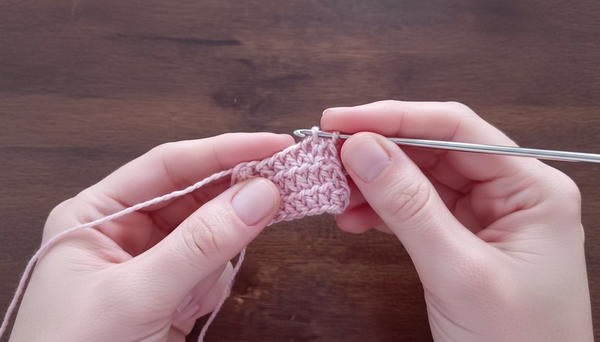
Step 3: Second Row – Increase
- Chain 1 loosely (doesn't count as stitch).
- Insert hook into the back loop of the next stitch, yarn over, pull up a loop seven times to increase one stitch (now 7 loops).
- Yarn over and complete return pass loops two at a time. You will have 9 loops on the hook after this.
- Release loops 2 by 2, keeping tension loose.
Step 4: Third Row – Further Increase
- Repeat the previous step, increasing one more loop (now 8 stitches on the forward pass).
- Complete the return pass the same way, you will have 10 loops on the hook.
- Release loops maintaining consistency.
Step 5: Fourth Row (Middle Row, Highest Petal Row)
- This row has the maximum height, 9 stitches worked as before.
- Maintain loose tension for flexibility to form petals.
Step 6: Fifth & Sixth Rows – Decrease Rows
- Begin decrease by working Tunisian simple stitches with back loops, but at the start of the row do a slip stitch decrease:
- Insert hook normally, yarn over, pull loop (leave on hook).
- Insert hook into next stitch, yarn over, pull loop.
- Yarn over and pull through all loops on hook together (decrease one stitch).
- Continue with normal Tunisian simple stitches to end row.
- Complete return pass as usual.
- Decrease one stitch per subsequent row to shape petals.
Step 7: Final Row – Slip Stitches
- After decreasing to the desired small number of stitches, finish the petal row with slip stitches (sl st) to close the petal’s edge.
- Make the slip stitches loosely not to tighten the shape.
Step 8: Complete Five Petals
- Repeat Steps 1 to 7 five times to make five petals of the flower.
- Use the magic ring base to adjust tightness as you go, tightening or loosening the ring for petal shape.
Step 9: Assemble and Shape
- Pull the base threads to gently shape and curve the petals.
- Tie off securely, leaving long ends for sewing petals together.
- Arrange petals in a circle, sewing or stitching together at the base neatly with a tapestry needle.
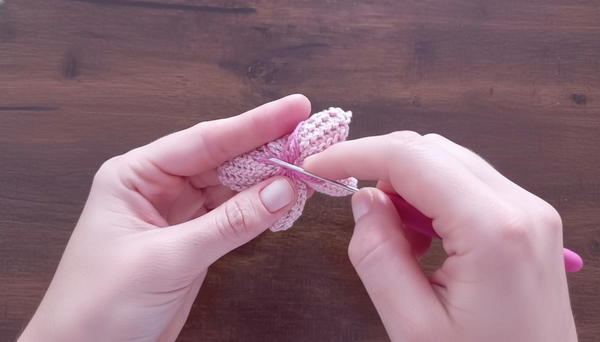
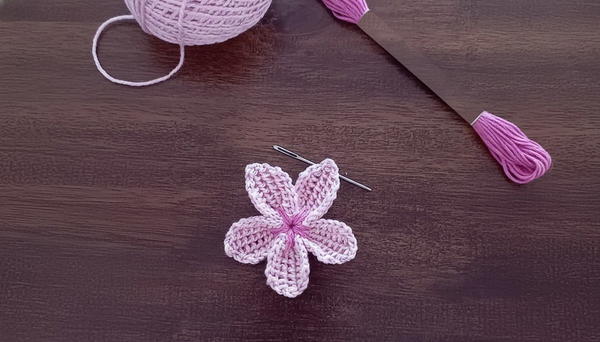
Step 10: Embroider the Center
- Use darker pink embroidery thread.
- Thread the needle and make small straight stitches to create a clustered center mimicking cherry blossom stamen.
- Stitch twice or thrice per petal base for a balanced look.
- Tie knots at the back and weave in ends securely.
Tutor’s Suggestions:
- Keep loops loose during Tunisian stitches for easy shaping of delicate petals.
- Practice slip stitch decreases before starting to ensure smooth shaping.
- Use thin embroidery thread to avoid overpowering the flower’s delicate look.
- Experiment with slightly different petal sizes or yarn shades for realistic effects.
- Block finished flowers gently if needed to set the shape.
Uses:
- Embellishments for blankets, scarves, hats, or bags
- Appliques for clothing or accessories
- Floral hair clips or brooch bases
- Decor for gifts and home decoration
Tip:
Avoid pulling the magic ring too tight at the start; having some looseness helps in giving natural petal curves and prevents puckering.
Conclusion:
This Japanese cherry blossom crochet flower is a delicate and beautiful addition to any crochet project. With Tunisian crochet techniques and simple embroidery finishing, it’s a rewarding intermediate project that brings elegance and softness to your work.