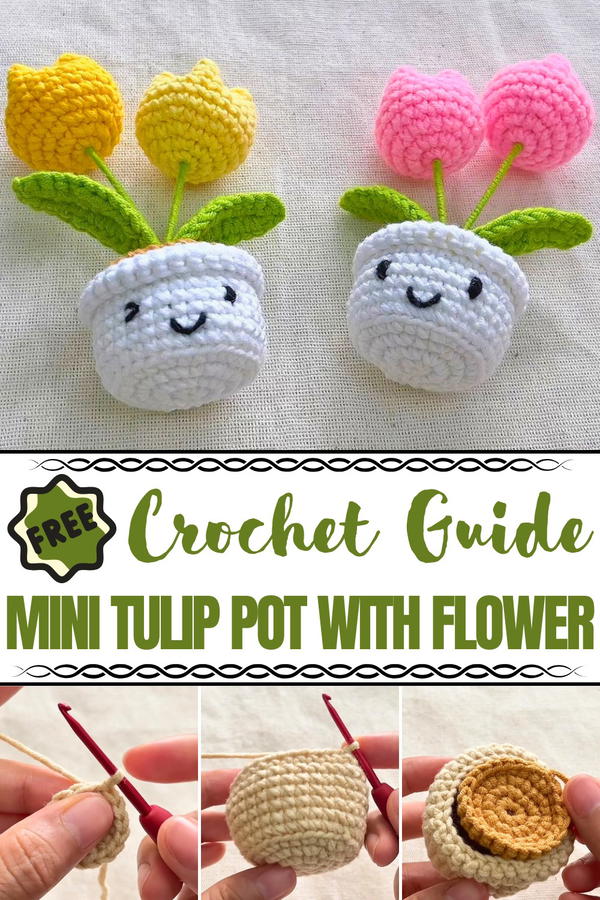
Sprout elegance with this Crochet Tulip Pot With Flower pattern, a delightful design to create timeless blooms for décor or heartfelt gifts.
Tulips have long been cherished as symbols of grace and renewal, yet their natural blooms last only a short while. The Crochet Tulip Pot With Flower pattern offers a way to preserve their charm forever, turning delicate yarn into blossoms that remain fresh and radiant through time. Each tulip is shaped with thoughtful detail, standing tall in its pot, capturing the spirit of spring in a form that never fades.
Free Crochet Tulip Pot With Flower Centerpiece for Home Decor
The soft texture of the yarn brings warmth, while the vibrant arrangement brightens any corner of a room with gentle elegance. Unlike real tulips that require care and eventually wither, this piece remains beautiful without maintenance, making it practical as well as decorative. It works perfectly as a centerpiece, a desk accent, or a thoughtful handmade gift that speaks of care and appreciation.
The arrangement’s timeless style allows it to complement both minimal and richly decorated spaces, adding charm without overwhelming its surroundings. Its durability ensures that the tulips stay as vivid as the day they were made, offering joy season after season. With its lasting beauty, ease of care, and symbolic meaning, the Crochet Tulip Pot With Flower pattern is a treasured addition to any home.
Materials Needed
- Cotton Yarn: Various colors for the pot, flower buds, leaves, and stems.
- Wire: To provide structure for the leaves and branches (16 cm for leaves, 10 cm for stem).
- Crochet Hook: Recommended size is 2.5 mm.
- Fiberfill Stuffing: For stuffing the pot and tulip buds.
- Milk Glue: To secure pieces during assembly.
- Scissors: For cutting yarn.
- Stitch Marker: To mark the last stitch when working in rounds.
Special Features of the Mini Tulip Pot
- Complete Design: Includes the pot, soil, flower buds, realistic leaves, and branches wrapped in yarn.
- Beginner-Friendly: Uses simple crochet techniques suitable for those with basic experience.
- Customizable Colors: Choose your favorite yarn colors to create unique, personalized designs.
- Versatile Use: Ideal for home décor, table centerpieces, gifts, or crocheting showcases.
Level of Difficulty
This project is rated beginner-friendly. It involves basic stitches such as single crochet, half-double crochet, and slip stitch. The pattern also introduces techniques like working with a magic ring, crocheting around wire, and assembling pieces using glue and stitching. While some precision is needed during the assembly phase, the clear instructions make it easy to follow step-by-step for both beginners and intermediate crocheters.
Step-by-Step Instructions
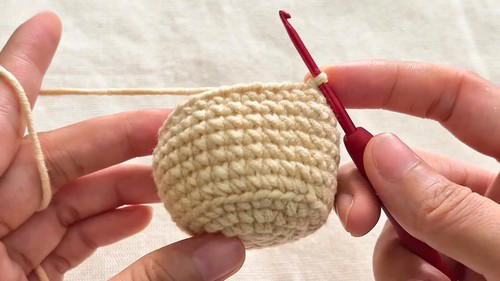
1. Making the Pot
- Row 1: Begin with a magic ring. Make 8 single crochets into the ring. Pull the yarn tightly and make a slip stitch into the first stitch to close the round. Chain one to start Row 2.
- Row 2: Make an increase in each stitch by crocheting two single crochets into every stitch (total: 16 stitches). Slip stitch to join and chain one.
- Row 3: Alternate between one single crochet and one increase (two single crochets in the same stitch) to create a total of 24 stitches. Slip stitch to join and chain one.
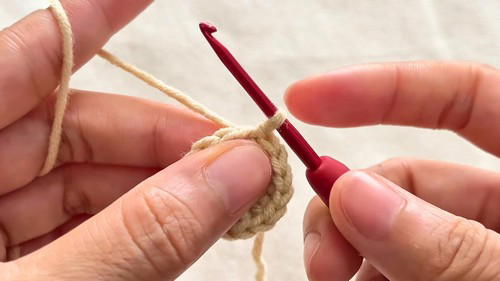
- Row 4: Alternate between two single crochets and one increase, repeating this pattern for a total of 32 stitches. Slip stitch to join and chain one.
- Row 5: Work all single crochets in the back loops only for 32 stitches. Slip stitch to join and chain one.
- Row 6–11: Work one single crochet in both loops across all stitches (32 stitches per row). Repeat for six rows.
- Row 12: Work one single crochet in front loops only for all stitches (32 stitches). Slip stitch to join and chain one.
- Row 13: Work one single crochet in both loops for all stitches (32 stitches). Slip stitch to finish. Chain one, fasten off, and weave in your ends.
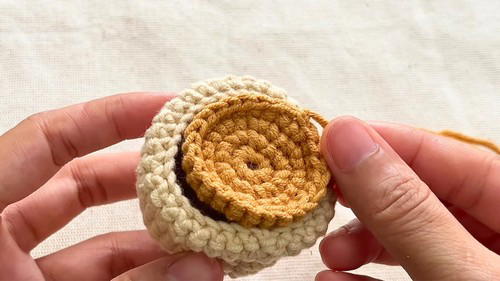
2. Making the Soil
- Row 1: Start with a magic ring and make 8 single crochets into it. Tighten the loop but leave a small hole in the center.
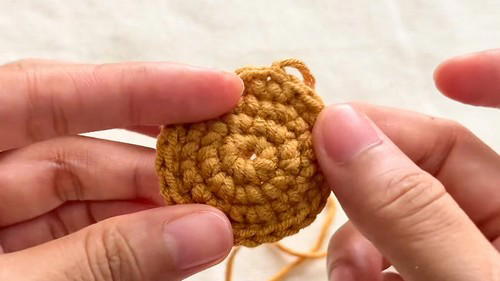
- Rows 2+: Work in rounds to create the soil, following a similar increase pattern as the pot. Leave a long yarn tail after finishing the soil for sewing it to the pot.
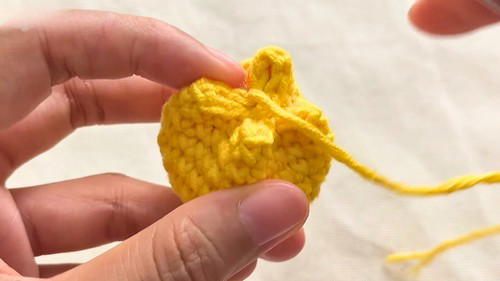
3. Making the Tulip Buds
- Row 1: Start with a magic ring and crochet 6 single crochets into the ring. Pull tightly to close the loop and mark the last stitch with a stitch marker.
- Row 2: Make an increase in every stitch (total: 12 stitches).
- Row 3: Alternate between one single crochet and one increase (total: 18 stitches).
- Row 4: Alternate between two single crochets and one increase (total: 24 stitches).
- Rows 5–10: Work one single crochet in each stitch across all rows (24 stitches per row).
- Finish: Slip stitch into the next stitch, chain one, and fasten off. Leave a long tail for sewing and stuff the tulip bud with fiberfill.
4. Making the Leaves
- Prepare Wire: Use a 16 cm piece of wire for each leaf.
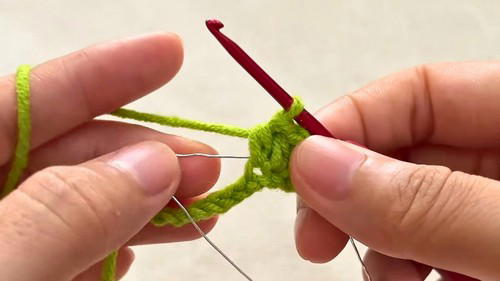
- Row 1: Start with a slip knot and make 12 chains.
- Crochet Over Wire: Place the wire along the working yarn and crochet into the chains.
- Make 1 single crochet in the second chain from the hook.
- Follow with 7 half-double crochets.
- Finish with 3 single crochets at the tip and chain two into the last stitch for a rounded edge.
- Work Back on the Opposite Side:
- Crochet single crochets into three chains, then 7 half-double crochets, and finish with 1 single crochet in the last chain.
- Fasten Off: Slip stitch, chain one, and cut the yarn. Wrap remaining yarn around the wire for a neat finish. Make two leaves for your tulip pot.
5. Assembling the Tulip Flowers
- Prepare Stem: Cut a 10 cm wire and apply glue. Wrap green yarn around the wire to create the stem.
- Attach Flower Buds: Insert the wire into the center of the tulip bud, securing it with glue.
- Combine Flowers and Leaves:
- Wrap the yarn for about 5 cm down the first stem. Attach the second flower and leaves using glue and yarn.
- Continue wrapping the yarn around the stems to secure.
6. Final Assembly
- Stuff the pot and sew the soil to the edges.
- Insert the finished tulip stems into the center hole of the soil.
- Add a final round of glue at the base for stability.
Tutor’s Suggestions and Tips
- Use Stitch Markers: Mark your last stitch in each round to avoid confusion.
- Ensure Stability: Add extra glue and yarn wrapping when assembling the flower stems.
- Customize Colors: Experiment with different color combinations for a personalized finish.
Uses of the Mini Tulip Pot
- Home Décor: Display on desks, windowsills, or side tables.
- Occasions: Perfect for gifting on birthdays, anniversaries, or other celebrations.
- Craft Shows: A beautiful handmade project to showcase talent.
Pro Tip
When crocheting over the wire for leaves, take your time to ensure all stitches are even. Wrapping the yarn around the wire afterward creates a polished, professional look.
Conclusion
The crochet mini tulip pot is a charming and straightforward project perfect for crocheters of all skill levels. By following the step-by-step instructions, you'll create a beautiful, lifelike arrangement that’s ideal for home décor or gifting. The attention to detail—like the fully formed tulip buds, leaves, soil, and pot—makes this project both satisfying and rewarding.


