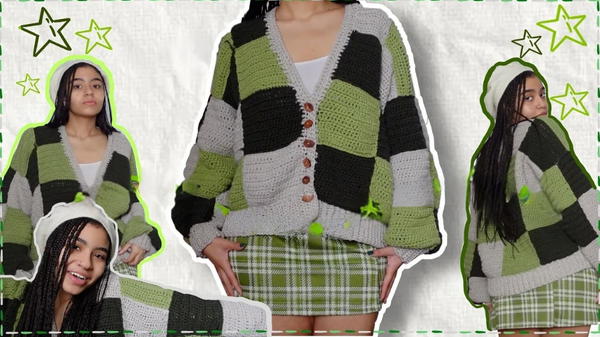
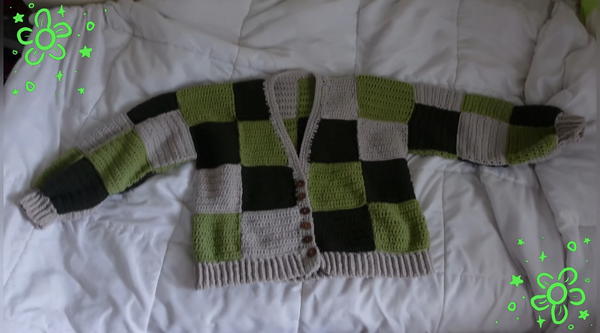
Wrap up in charm with this Crochet Patchwork Cardigan pattern, a cozy design that blends color, comfort, and flair for stylish everyday wear.
There is a certain charm in garments that tell stories through color and form, and the Crochet Patchwork Cardigan pattern carries that sentiment beautifully. Each square works like a brushstroke, combining textures and shades that come together in harmony to form a piece both timeless and expressive. Unlike ordinary cardigans, it carries individuality in every stitch, offering a style that is casual yet artistic, making it a striking companion for daily wear.
Luxury Crochet Patchwork Cardigan for Bold Fashion Lovers
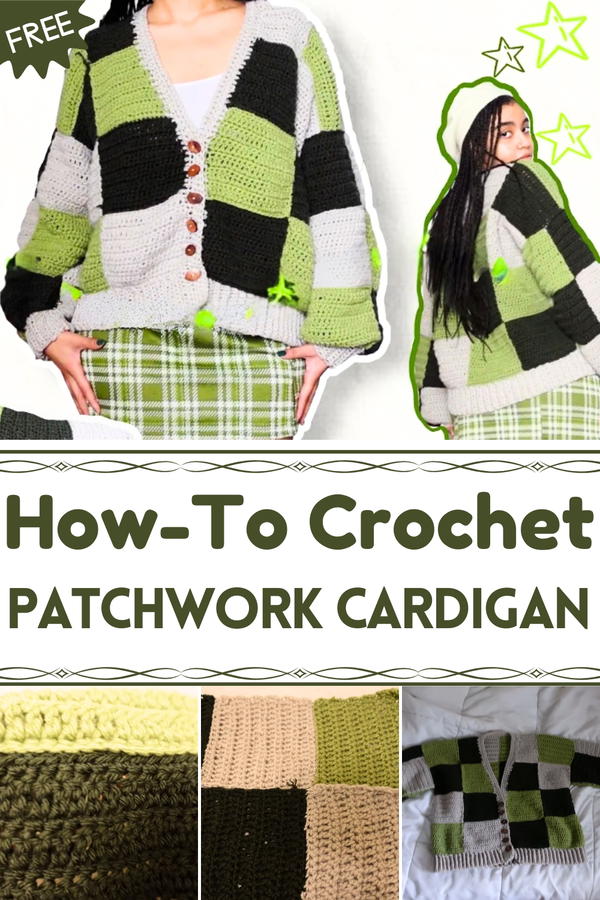
Practical in use, this cardigan provides warmth while remaining lightweight enough to wear throughout changing seasons. Its patchwork character gives room for playful expression, whether through vibrant contrasts or muted tones that suit a softer look. The arrangement of shapes lends a sense of structure, yet the overall appearance feels effortlessly relaxed, making it equally suitable for layering at home, pairing with jeans for outings, or draping over a dress for a polished touch.
Beyond its beauty, it offers durability and comfort, holding both functional value and aesthetic charm. The Crochet Patchwork Cardigan pattern celebrates versatility—serving as a cozy layer, a statement piece, and a wardrobe favorite. With its balance of practicality and elegance, it stands as a wearable expression of creativity and style.
Materials Needed
To recreate Creator patchwork cardigan, you’ll need:
Yarn (Three Colors):
- Light green, dark green, and light gray. Creator purchased seven balls of yarn, though she ended up with one unused ball.
Crochet Hook:
- Alyssa suggests using a crochet hook that matches your yarn weight for smooth stitching.
Scissors:
- For trimming yarn ends.
Sewing Needle:
- Used to sew the crochet pieces together.
Optional Buttons:
- Used for buttonholes if you want to add closures.
Special Features
Patchwork Design:
- A customizable, colorful design unique to patchwork-style cardigans.
Detailed Visuals:
- Alyssa provides a step-by-step breakdown of decreasing strategies for shaping the pieces.
Seamless Sewing Technique:
- An innovative approach to sewing squares using front loops ensures no visible seams on the finished cardigan.
Added Finishings:
- Includes ribbing for cuffs, a buttoned collar, and decorative touches for a professional look.
Level of Difficulty
Intermediate:
This project is ideal for crocheters with a basic understanding of single crochets, double crochets, and decreasing techniques. Patience is key for assembling dozens of squares into a cohesive design while maintaining symmetry and alignment.
Tutor's Suggestions
Create a Design/Pattern First:
- Alyssa highly recommends creating a visual plan for the layout of the squares, whether digitally or on paper with colored pencils.
Consistency in Stitching:
- Ensure uniform stitch tension for perfectly shaped squares.
Screenshot Key Steps:
- Alyssa frequently advises viewers to screenshot diagrams and patterns provided in the video to make the process easier to follow.
Test Measurements Frequently:
- Check alignment of pieces early in assembly to avoid disproportionate sizing.
Wash and Dry for Finishing Touch:
- Alyssa puts the finished cardigan in the washer and dryer but notes this as optional depending on your preference.
Step-by-Step Instructions
Step 1: Planning the Design
- Create a visual guide for your cardigan’s layout. You can use digital tools or draw it by hand with colored pencils.
2: Crocheting the Squares
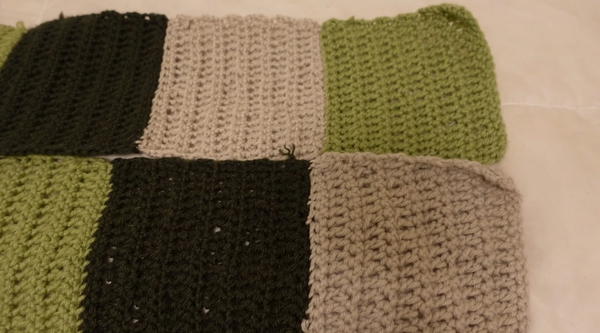
Begin with Foundation Rows:
- Start each square by chaining 20 + 1 for leveling, then single crochet across the row.
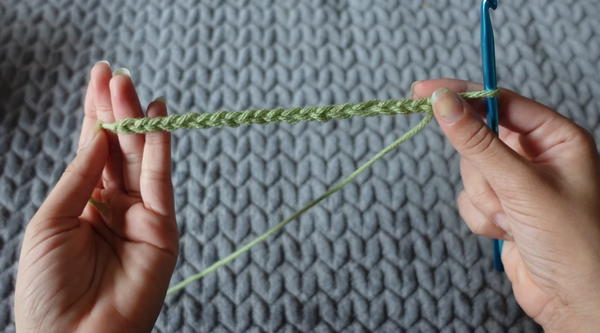
- Start each square by chaining 20 + 1 for leveling, then single crochet across the row.
Switch Between Single and Double Crochets:
- Alternate every row between single crochet and double crochet until you finish 13 rows (7 single crochet rows and 6 double crochet rows).
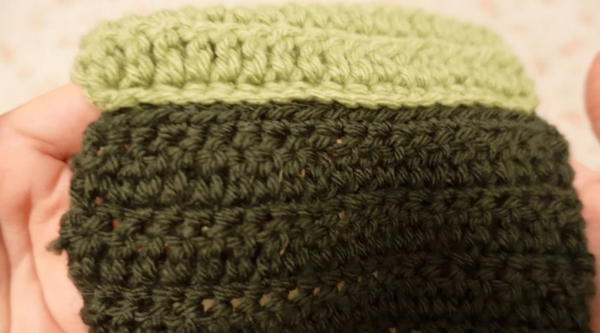
- Alternate every row between single crochet and double crochet until you finish 13 rows (7 single crochet rows and 6 double crochet rows).
Repeat for All Squares:
- Crochet a total of 46 squares, distributed among the colors:
- Light green: 17 squares
- Dark green: 16 squares
- Light gray: 13 squares
- Crochet a total of 46 squares, distributed among the colors:
3: Crocheting Decrease Squares
Follow a Special Decrease Pattern:
- Alyssa provides a diagram for decrease squares to create diagonal shapes. Screenshot this pattern for reference.
Perform the Decreasing Technique:
- When decreasing at the end of rows, insert your hook into the front loops of the last two stitches and go through all loops step-by-step until you complete the decrease.
Align the Rows:
- Chain according to the pattern to ensure decrease squares fit seamlessly with full squares.
4: Creating Ribbing for Cuffs and Waist
Chain 10 for Cuffs:
- Single crochet through the back loops for each row until you’ve created pieces with 8 inches in length.
Chain 48 Inches for the Waist Ribbing:
- This long piece adds structure to the bottom of the cardigan.
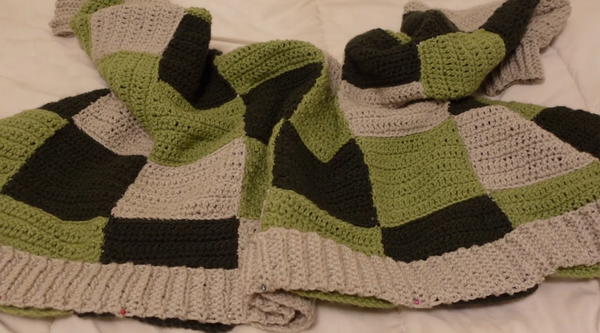
5: Sewing the Squares Together
Column Assembly:
- Lay out your squares according to your design. Use the same color of yarn as the bottom square to sew squares. Insert the needle into the front loops only for seamless connections.
Combine Columns:
- After sewing the columns, sew them together while keeping seams invisible.
- After sewing the columns, sew them together while keeping seams invisible.
6: Final Assembly
Attach Sleeves:
- Pin the sleeves to the body panels, ensuring alignment at the middle seam. Sew them together using the same front-loop technique.
- Pin the sleeves to the body panels, ensuring alignment at the middle seam. Sew them together using the same front-loop technique.
Add Ribbing and Collar:
- Pin ribbing to the waist and sew securely. Create a buttonhole collar by double crocheting a full row and marking where buttons will go. Create buttonholes by chaining 2 and skipping 2 stitches. Finish with additional single crochet rows for polish.
- Pin ribbing to the waist and sew securely. Create a buttonhole collar by double crocheting a full row and marking where buttons will go. Create buttonholes by chaining 2 and skipping 2 stitches. Finish with additional single crochet rows for polish.
Uses and Benefits
- Fashionable and Handmade: Perfect for creating a customizable, high-quality cardigan with a cozy patchwork aesthetic.
- Gift Idea: A thoughtful project for loved ones.
- Skill Building: Great for advancing crochet techniques like increasing, decreasing, and seamless sewing.
Tip
To ensure a seamless appearance, use yarn that matches the dominant color of the squares while sewing them together. This minimizes visible seams and imperfections.
Conclusion
The Perfect Crochet Patchwork Cardigan pattern is an engaging project for those looking to create a trendy and personal crochet piece. Creator's step-by-step guidance covers everything from crocheting squares to assembling panels and adding finishing touches like buttonholes and ribbing. The end result is a stunning cardigan that blends functionality with creative artistry.


