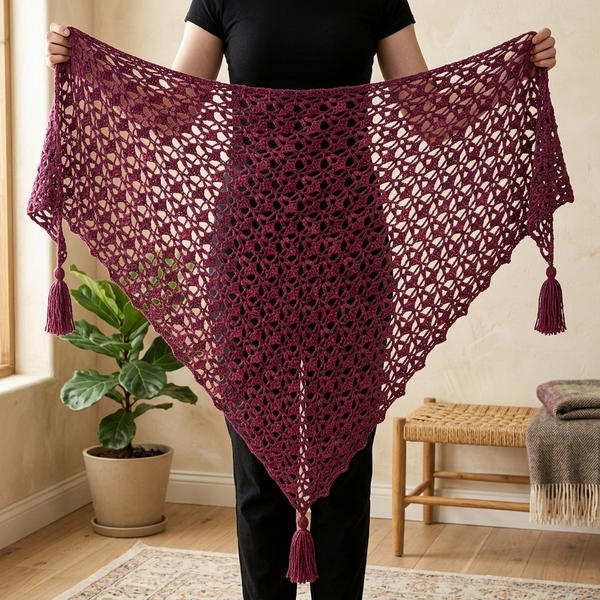
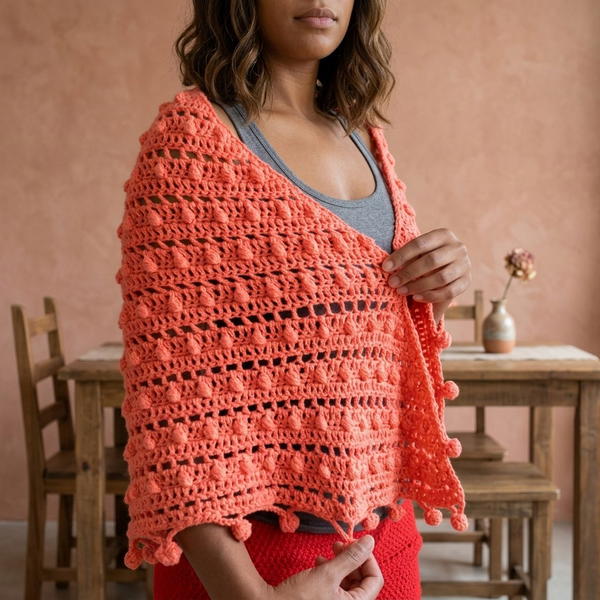
Try the free crochet puff stitch scarf pattern to enjoy a cozy and textured accessory that keeps you warm while giving your outfits a stylish and charming touch.
There’s something cozy and charming about wrapping up in a handmade scarf, especially one with a unique and eye-catching design. The puff stitch scarf pattern combines soft texture with a playful yet elegant look, making it perfect for all seasons. This free crochet pattern creates a scarf that feels fluffy and warm, while also showcasing a stylish appearance with its distinctive puff stitches.
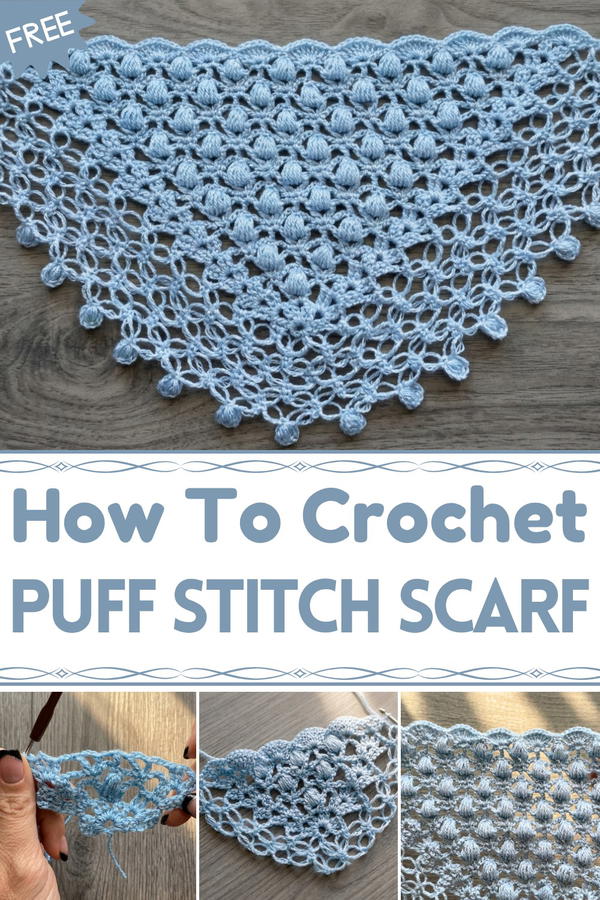
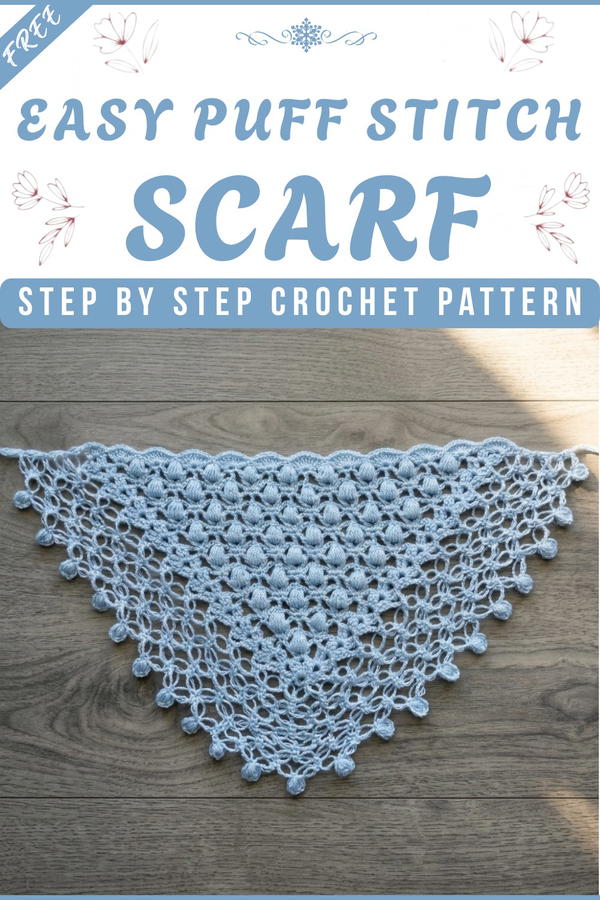
Simple Crochet Puff Stitch Scarf for Chilly Days
Whether it’s for a casual outing or dressing up an outfit for a chilly evening, this scarf adds both comfort and style. Its lightweight and airy design make it easy to wear, yet it doesn’t compromise on its cozy factor. The puff stitch creates a delightful pattern that stands out without being overwhelming, making it a wonderful accessory to brighten up any wardrobe. Easy to follow and perfect for beginners, it’s a fantastic way to bring handmade beauty into your everyday life.
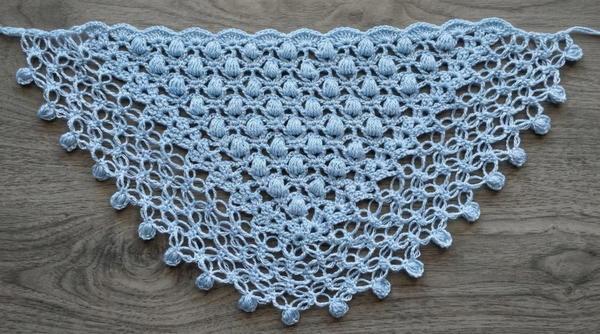
Triangular Scarf with Spider Stitch Pattern
Materials Needed
- Yarn: Lightweight yarn suitable for a 2.5 mm hook. Acrylic, cotton, or blended yarn can be used. Choose a color that highlights texture stitches like puff or spider stitches.
- Crochet Hook: 2.5 mm crochet hook.
- Additional Tools:
- Yarn needle for weaving in ends.
- Scissors.
Gauge
Gauge is not crucial for this design as it is highly customizable. However, working loosely to achieve an airy lace effect is recommended.
Finished Size
The scarf can be customized to the desired size by adding rows. A small sample used approximately 4 rows for demonstration, but for a full-sized scarf, continue until your preferred width or length is achieved.
Pattern Construction
This scarf starts from a ring base and increases as you add rows. The core pattern alternates between V-Stitches rows and Puff Stitch rows, creating depth and texture, while the border adds elegance with Spider Stitches and Pom-Pom edging.
Special Techniques
Extended Double Crochet (E-dc):
Yarn over, insert the hook into the stitch or ring, yarn over and pull through the stitch. Yarn over, pull through 1 loop only. Yarn over, pull through 2 loops, yarn over, and pull through the remaining 2 loops.Spider Stitch:
Pull the yarn up high, yarn over, hold onto the loop and pull through, insert hook into the held loop, yarn over and pull through, yarn over and pull through 2 loops.Pom-Pom Technique:
Chain 4, then work multiple loops high and tight at the base until forming a puff-like appearance, slip stitching to secure.
Pattern Instructions
Foundation Ring
- Create a slip knot and chain 6.
- Slip stitch into the first chain to form a ring.
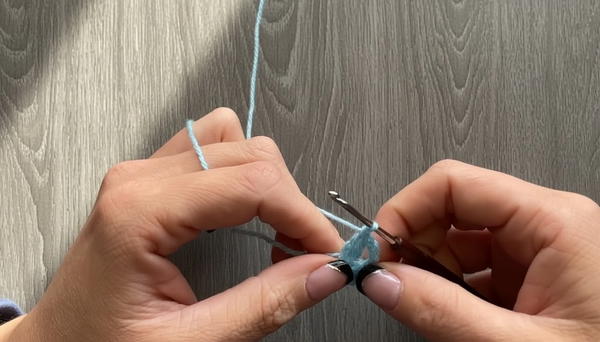
Row 1:
- Chain 5. This counts as a treble stitch plus 2 chains for the first part of the V-Stitch.
- Work 2 extended double crochet (E-dc) into the ring.
- Chain 2.
- Repeat 2 E-dc, chain 2 three more times into the ring, forming 4 sets of extended double crochets separated by chain spaces.
- Turn your work.
Row 2:
- Chain 5, turn.
- Work 2 E-dc, chain 2, 2 E-dc in the first space (this is the edging and is repeated at both ends).
- Chain 3, work a V-Stitch into the next space (1 E-dc, chain 3, 1 E-dc in the same space).
- Chain 3, then repeat the edging: 2 E-dc, chain 2, 2 E-dc at the next end space.
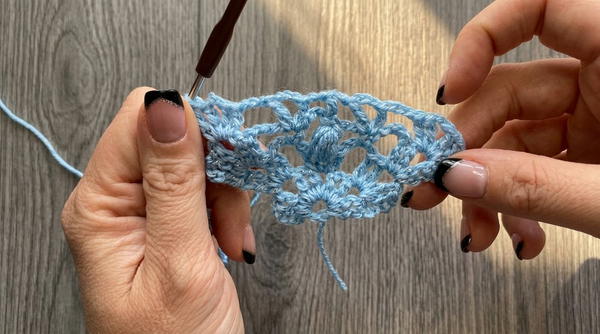
Row 3 (Puff Stitch Row):
- Chain 5, turn.
- Work the edging (2 E-dc, chain 2, 2 E-dc) as before.
- Chain 4, single crochet into the first space.
- Chain 4, work a Puff Stitch into each V-Stitch space as follows:
- Yarn over, pull the yarn up high, repeating 6 times.
- Yarn over and pull through all loops. Chain 2 to complete the Puff Stitch.
- Repeat the chain 4, single crochet, chain 4, Puff Stitch sequence across the row.
- Finish with the edging.
Row 4 (V-Stitch Row):
Follow the same instructions as Row 2, working V-Stitches across the spaces between Puff Stitches. Repeat this alternating sequence—V-Stitch rows and Puff Stitch rows—until the scarf reaches the desired size.
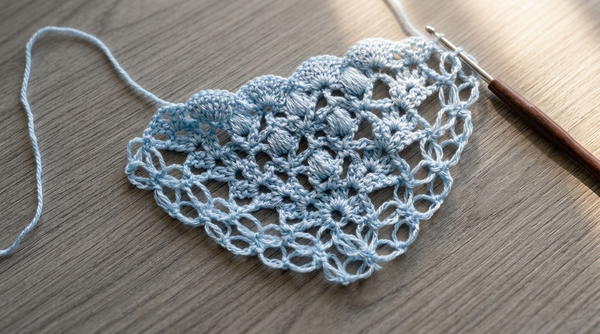
Finishing the Neck Edge
When the scarf has reached its minimum desired size, you can create an elegant neck edge on the final Puff Stitch row:
- Start with regular edging on one side.
- In each single crochet space, work 8 extended double crochets (E-dc).
- Place single crochets on top of puff stitches.
- Repeat across the row.
Border with Spider Stitch
- Begin the border by working Spider Stitches. Start with a single crochet in the chain-5 space from the previous row.
- Work the Spider Stitch into each space across the row (double spiders can be created if desired by adding height/repetition).
- Turn and repeat Spider Stitches between existing stitches for the next row. Add 4 rows of Spider Stitch or as preferred for the border width.
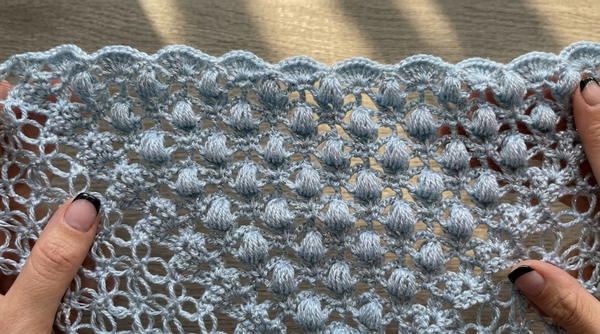
Pom-Pom Edging
- Start by chaining 4.
- Yarn over, insert the hook and pull up a loop. Repeat 4-6 times for fullness.
- Yarn over and pull through all loops, securing the pom-pom with a slip stitch into the base.
- Chain 4 to move to the next space and repeat the pom-pom creation process.
Blocking
Blocking is vital for ensuring evenness and highlighting the lace texture created by Spider Stitches and pom-pom edges:
- Soak the scarf lightly or spray with lukewarm water. Avoid tugging the finer yarn.
- Pin all edging points and pom-poms onto a blocking mat.
- Let dry fully before removing pins.
Tips and Customizations
- Customize Size: Continue repeating rows until the scarf reaches your preferred length or width.
- Color Variation: Use multicolor or gradient yarn for a striking effect with texture stitches.
- Pom-Pom Alternatives: If pom-poms are too bulky, replace with simple picot stitches or tassel edges for a minimal finish.
Conclusion
The Triangular Scarf with Spider Stitch and Pom-Pom Edging is a beautifully textured accessory that can be customized in size, pattern length, and trims. Its alternating Puff Stitch and V-Stitch rows, combined with the delicate Spider Stitch border and playful pom-pom finish, make it a versatile and elegant addition to any outfit. With patience and perseverance, as emphasized, this project yields a stunning handcrafted piece you'll be proud of.