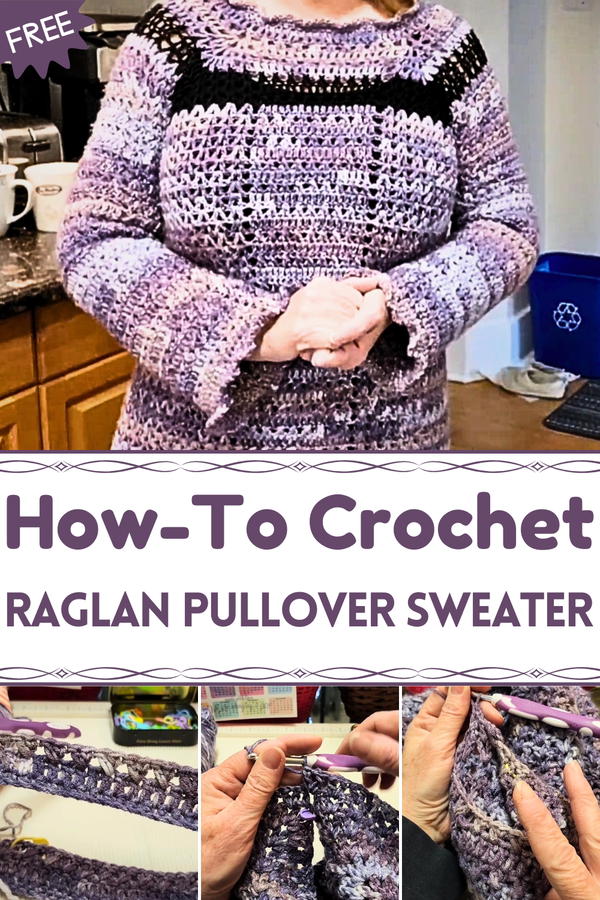
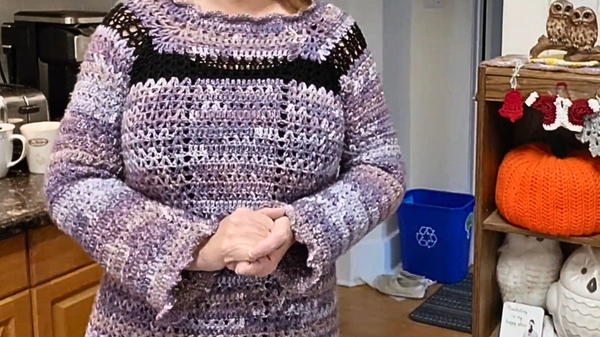
Cozy up in style with this Free Crochet Raglan Pullover Sweater Pattern, that's a wardrobe essential offering warmth, comfort, and timeless charm.
Cool mornings and crisp evenings often call for garments that provide warmth without compromising style. A Free Crochet Raglan Pullover Sweater pattern offers a cozy solution, combining comfort, versatility, and timeless appeal. Its raglan sleeves allow for effortless movement and a flattering fit, making it suitable for a variety of body types and casual occasions. Working on each section encourages a calming rhythm, turning focused handwork into a rewarding and meditative experience.
Cozy Layers Crochet Raglan Pullover Sweater for Fall & Winter
Soft, durable yarn ensures the finished sweater remains comfortable against the skin while withstanding frequent wear and washing, making it a practical addition to any wardrobe. Color choices can be personalized, from subtle neutrals to vibrant hues, allowing each piece to reflect individual style or seasonal trends. Lightweight yet warm, it works equally well for layering over shirts or wearing solo during transitional weather.
Beyond personal use, it makes a thoughtful handmade gift, offering both function and charm. Whether worn for daily errands, cozy indoor days, or outdoor walks, this sweater merges utility and casual elegance. A Free Crochet Raglan Pullover Sweater pattern transforms yarn into a versatile, comforting garment that provides warmth, style, and satisfaction from creation to wear.
Special Features
- Raglan Style: The sweater begins at the neckline and follows a traditional raglan technique for seamless shaping and structure.
- Size Adjustable: The sweater can be customized to fit various sizes by increasing or decreasing the number of rows around the body and sleeves. Ideal for beginners and intermediate crocheters alike.
- Distinct Borders: Includes a beautiful, textured border around the hemline, sleeves, and neckline for an elegant finish.
- Multi-Yarn Compatibility: Works well with various types of yarn, making it adaptable to personal preferences and available materials.
- Comfortable Fit: Designed to be form-fitting yet breathable, this sweater is ideal for casual wear.
Materials Needed
- Yarn:
- Ice Cream Smoothie Anti-Pilling Yarn (3-weight, discontinued color Huckleberry).
- Black Twister Solid by Hobie (2-weight, 55% cotton and 45% acrylic).
- Crochet Hooks:
- Sizes 5mm, 4.5mm, and 4mm for various sections of the sweater (e.g., sleeves and border).
- Additional Tools:
- Scissors, tapestry needle, stitch markers.
Step-by-Step Instructions
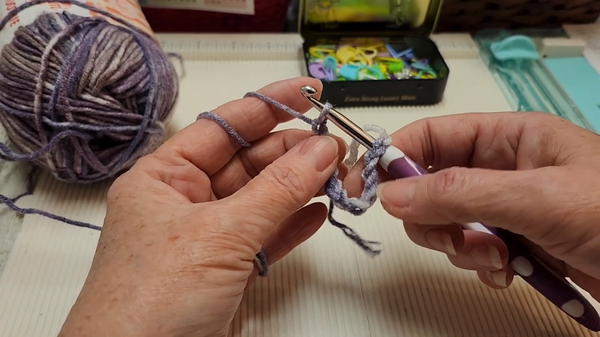
1. Starting at the Neckline
- Begin with a slip knot on the hook and create a chain of 84 stitches.
- Form the chain into a circle (to prevent twisting) and secure the chain with a slip stitch.
- Work a row of single crochets into every chain stitch to form the base. Ensure you have 84 single crochets at the end of the round.
- Mark the first stitch and slip stitch into it to close the round.
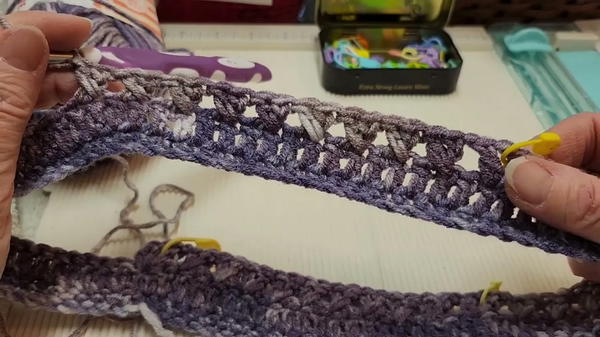
2. Shaping the Raglan
- Chain one, then work one double crochet into every stitch to form the second round (84 double crochets total).
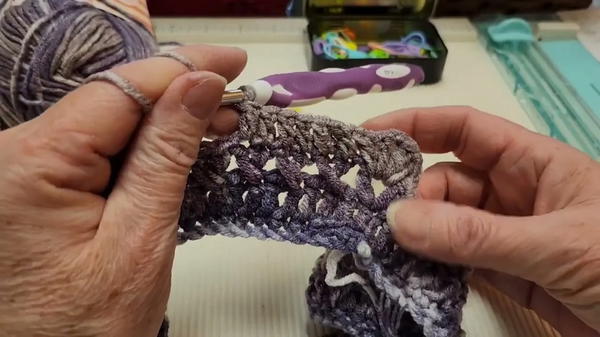
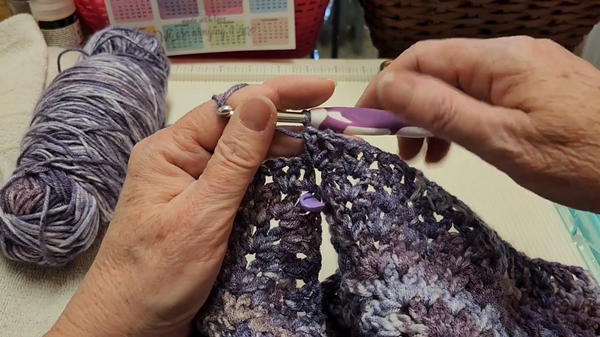
- Create four corners in the next round. Each corner is made up of a "V-stitch" (double crochet, chain one, double crochet). Between corners, work "X-stitches" (two crossed double crochets) for structured shaping.
- As you move outward, continue alternating rows between double crochet and X-stitches, ensuring corners are marked and properly spaced.
3. Increasing Width and Adjusting Size
- Continue building rows in the established pattern, repeating X-stitches and double crochet rows. Each round adds width and length to the sweater.
- Darla recommends checking the fit periodically by folding the piece at the neckline and trying it on. Adjust the number of rows based on the desired fit (oversized or snug).
4. Joining Under the Arms
- Once the desired width is achieved, fold the sweater at the neckline and pin the underarms using stitch markers.
- Join the corners at the underarm areas with V-stitches across chain spaces. Use slip stitching for clean joins.
5. Crocheting the Sleeves
- Begin working directly onto the armholes by attaching your yarn to one of the arm openings.
- Repeat the body pattern (alternating X-stitches and double crochets) for the sleeves, turning your work after each row.
- If desired, switch hook sizes (e.g., 4.5mm) to taper the sleeves gradually.
6. Adding Borders
- Complete the body, neckline, and sleeve lengths with a ruffled border.
- Work two rows of single crochet stitches around each edge, followed by one row of “single crochet, chain one, single crochet in the same stitch” for a textured finish.

Level of Difficulty
The Carmen Sweater is rated beginner to intermediate. While the techniques are simple—single crochets, double crochets, V-stitches, and X-stitches—the pattern requires attention to stitch counts and symmetry. Beginners may need to practice gauging size and maintaining uniformity in stitches, but Darla’s clear instructions make the process straightforward.
Tutor’s Suggestions
- Try the Fit Often: Regularly try on the sweater during key milestones (neckline, body rows, sleeve lengths) to ensure proper fit.
- Experiment with Yarn Weights and Colors: While the tutorial uses 3-weight and 2-weight yarns, you can adapt the sweater for chunkier or finer yarns based on your preferred look.
- Adjust Hook Sizes: Darla recommends switching to smaller hooks for the sleeves and borders to add subtle shaping, but this step can be skipped if desired.
Uses of the Carmen Sweater
- Casual Daily Wear: A breathable, stylish piece for layering over jeans, leggings, or skirts.
- Handmade Gifts: Perfect for thoughtful presents, especially since it can be sized to fit recipients.
- Crochet Practice: Great for honing skills in V-stitches, X-stitches, and raglan construction techniques.
Conclusion
The Carmen Sweater is a versatile, stylish, and customizable crochet piece that transitions seamlessly between seasons. Its raglan construction ensures a comfortable fit for various body types, while the addition of textured borders amplifies the skillful. Whether you're crocheting one for your own collection or gifting it to someone special, this sweater embodies the elegance of handmade fashion. With careful attention to size adjustments and stitch counts, this project will leave you with a timeless garment that’s as rewarding to make as it is to wear.
Bonus Tip
Mark key areas (corners, underarms, and row starts) with stitch markers to stay organized and ensure symmetry during construction.


