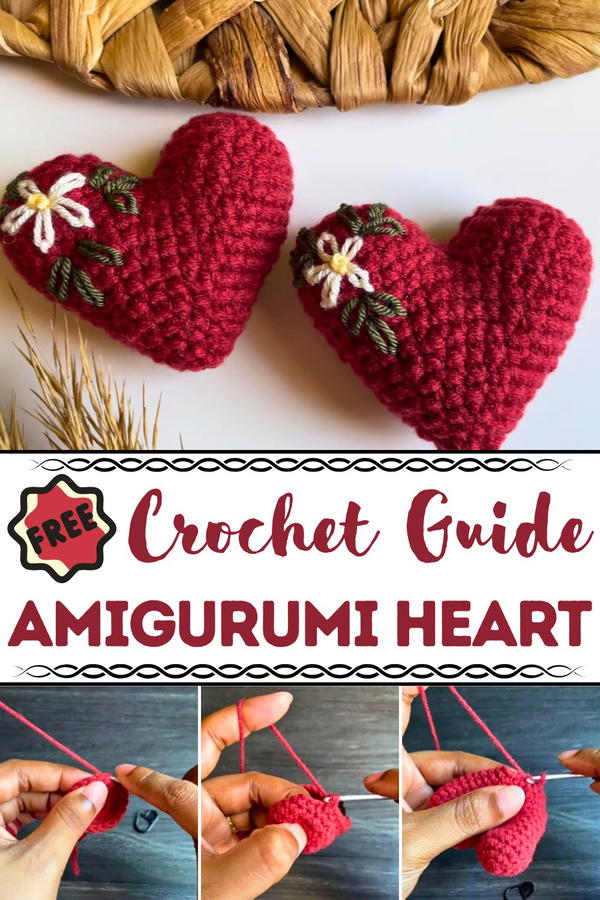
Spread love in every stitch with the Crochet Amigurumi Heart pattern, a sweet and timeless symbol perfect for gifts, décor, or keepsakes.
In moments of love and care, even the smallest gestures hold lasting meaning, and a handmade heart carries that warmth in its simplest form. The Crochet Amigurumi Heart pattern turns soft yarn into a timeless symbol that conveys affection, joy, and kindness. With smooth curves and a compact shape, this heart is versatile enough to serve as a thoughtful keepsake, keychain charm, festive decoration, or a sweet token slipped into a gift. Its lightweight structure makes it easy to carry, while its soft texture offers comfort, whether held in the palm or displayed on a shelf.
Adorable Crochet Amigurumi Heart for Meaningful Gifts
The rhythmic stitching brings relaxation and focus, rewarding patience with a charming piece that radiates positivity. Each heart can be personalized with color choices, size variations, or small embellishments, ensuring every one feels unique and meaningful. Whether used as party favors, Valentine’s surprises, wedding accents, or everyday tokens of gratitude, these hearts spread warmth in every setting.
Their durability ensures they can be cherished for years, carrying with them the sentiment of the maker’s care. The Crochet Amigurumi Heart pattern beautifully balances simplicity with heartfelt expression, turning yarn into a symbol of love that brightens occasions both big and small.
Materials Needed
- Yarn:
- Milk cotton yarn (or any yarn of your choice).
- An additional color yarn for optional embroidery.
- Crochet Hook: 3mm (adjust size according to your yarn).
- Fiber Stuffing: To fill the heart.
- Darning Needle: For weaving ends and optional embroidery.
- Stitch Markers (optional): To mark rounds as you work.
- Scissors: To cut the yarn.
Special Features
- Beginner-Friendly Design: The pattern uses simple stitches—magic ring, single crochet, increases, and decreases—making it ideal for beginners.
- Two-Piece Assembly: The heart is made by combining two identical pieces, which simplifies the process while creating a 3D shape.
- Customizable Embroidery: Optional embroidery, like a lazy-daisy flower, allows for creative customization.
- Durable Finish: The project includes tips on stuffing and creating a seamless, polished look.
Level of Difficulty
Beginner-Level with Optional Intermediate Features
The pattern is designed for beginner-level crocheters, as it relies on basic stitches and techniques. However, the optional embroidery might be more suitable for intermediate crocheters who are comfortable working with fine detailing.
Tutor's Suggestions
- Use a 3mm Crochet Hook: This keeps your stitches tight and uniform. However, you can use any yarn and hook combo as long as the size matches.
- Add a Stitch Marker: For easy tracking in rounds, especially as the stitches increase.
- Do Not Overstuff: When filling the heart, ensure even and light stuffing to maintain the shape.
- Optional Embroidery: Enhance the design by stitching simple patterns. You can skip this step if you prefer a plain-hearted design.
Step-by-Step Instructions
1. Making the First Half of the Heart
Round 1: The Magic Ring
- Create a magic ring by wrapping yarn around your finger in a crisscross.
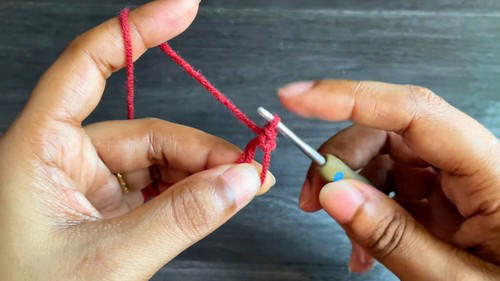
- Insert your hook under the second loop and chain 1 to secure the ring.
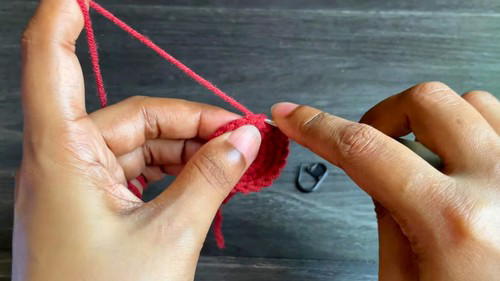
- Crochet 6 single crochets (sc) into the magic ring.
- Pull the tail to tighten the ring.
- Join with a slip stitch in the first single crochet.
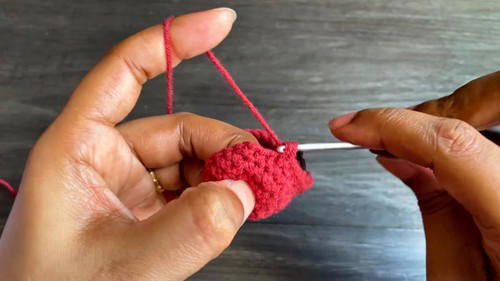
2: Increases
- Start with chain 1 and make 2 single crochets into each stitch around.
- You should have 12 single crochets at the end of this round. Join with a slip stitch.
3: Alternating Increase Pattern
- Chain 1, then create the following pattern:
- 1 single crochet in the first chain space.
- 2 single crochets in the next chain space (increase).
- Repeat around to reach 18 single crochets. Slip stitch to join.
4 & 5: No Increases
- Chain 1. Work 1 single crochet into each stitch around.
- The round ends with 18 single crochets in total (for both Rounds 4 and 5).
2. Making the Second Half of the Heart
- Repeat the steps to create another piece identical to the first half (Rounds 1–5).
- However, do not cut the yarn at the end of the second piece, as you will use it to join the two halves together.
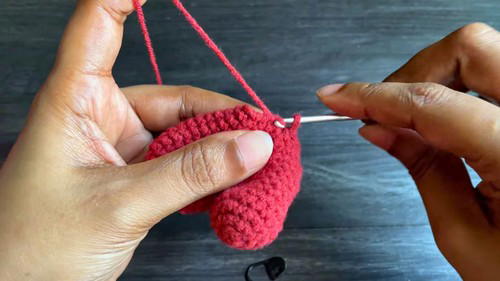
3. Joining the Two Halves
- Place the two pieces side by side. Insert your hook into the stitch where the second piece ended and slip stitch into the stitch of the first piece.
- Work 18 single crochets around the first piece, then continue to the second piece and work 18 single crochets.
- You should now have a total of 36 single crochets after this step.
4. Shaping the Heart
7–9: Stabilizing the Shape
- Chain 1. Work 1 single crochet into each stitch across (36 stitches in total for each round).
- Slip stitch to join at the end of each round.
10: Start Decreasing
- Work in the pattern:
- 1 single crochet in the next 3 stitches.
- Decrease over the next 2 stitches using the front loop only (invisible decrease).
- Repeat this pattern around the heart. Reduce to 24 stitches total.
11: No Decreases
- Work 1 single crochet into each of the 24 stitches.
12: Further Decreasing
- Work in the pattern:
- 1 single crochet into 2 stitches, followed by a decrease over the next 2 stitches.
- Reduce to 18 stitches this round.
13: Final Stretch Before Stuffing
- Work 1 single crochet in each stitch (total 18).
- Begin filling the heart with fiber stuffing to shape and puff it.
14: Decrease Further
- Work in the pattern:
- 1 single crochet, followed by a decrease.
- Reduce to 12 stitches this round.
15: Final Decrease Round
Perform decreases in every stitch (6 stitches total).
Close the Gap: Thread the remaining yarn tail through the front loops of the last 6 stitches and pull tight to close the gap.
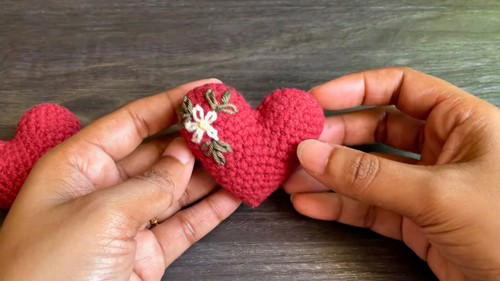
5. Custom Embroidery (Optional)
- Use contrasting yarn to embroider patterns like a lazy-daisy flower, French knots, or leaves.
- Use a darning needle to pass the yarn through the heart at desired positions.
Uses of the Amigurumi Heart
- Gift Idea: Perfect for Valentine’s Day, anniversaries, or as a thoughtful handmade gift.
- Home Décor: Use as table decorations, keychains, or garland.
- Crafts for Kids: A simple and safe introduction to amigurumi.
Pro Tip
To make the heart symmetrical, ensure that both pieces are aligned perfectly before starting the round to join them. Use stitch markers to guide your positioning.
Conclusion
The amigurumi heart is a charming and easy-to-make project that combines simplicity with versatility. Whether you keep it plain for minimalistic beauty or embellish it with embroidery, it is sure to be a delightful addition to your crochet collection. Follow the step-by-step guide, personalize it as you like, and enjoy the rewarding experience of crocheting something truly special.


