Charm every occasion with this Free Crochet Classic 3D Hearts Pattern, bringing soft handmade love to gifts, décor accents, and heartfelt keepsakes.
Symbols of affection often speak louder than words, and few shapes convey love as clearly as a heart with dimension and softness. A Free Crochet Classic 3D Hearts pattern offers a charming way to share that sentiment, turning simple yarn into plush keepsakes suited for many occasions. Perfect as tokens for weddings, baby showers, or Valentine’s Day, these gentle shapes can be given individually, strung together as garlands, or used to accent gifts and home décor.
Crochet Classic 3D Hearts Pattern for Valentine Projects

Their small size makes them ideal for personal touches—tucked into greeting cards, scattered across a festive table, or added to keychains and bags for a subtle reminder of care. Working each heart provides a calm, steady rhythm that encourages focus and relaxation while rewarding the maker with a meaningful result.
Color choices range from soft pastels to bold, vibrant tones, allowing each piece to reflect the personality or intention behind the gesture. Lightweight and easy to store, these hearts can be kept as cherished mementos or shared generously without losing their shape. Whether gifted to loved ones or enjoyed as decorative accents, they embody warmth and thoughtfulness, proving that even the smallest handmade object can carry deep emotion and lasting beauty.

Materials Needed
Yarn:
- 4-ply yarn. Use any color of your choice.
Hook:
- 3 mm crochet hook.
Additional Tools:
- Scissors.
- Needle.
- Pins for marking stitches.
- Cotton or synthetic stuffing material to fill the heart (e.g., toy filling, synthetic fiber, or cotton).
Step-by-Step Instructions
1. Creating the Magic Ring (Start of the Heart)
Form a magic ring:
- Cross the yarn loop, insert the hook, pull the working end through the loop, and create the ring.
Inside the magic ring:
- Chain 1.
- Make 10 single crochets (sc) inside the ring.
- For single crochet: Insert the hook into the ring, yarn over, pull up a loop, yarn over again, and pull through both loops.

- Pull the ring tight to close the circle.
Adjust the stitches to form a small, closed circle.
2. Building the Heart Shape (Rounds 2-6)
- These rounds focus on increases to shape the heart into its characteristic puffed appearance.
2:
- Insert the hook into the first stitch of the previous round.
- Work 2 single crochets into the same stitch (increase). Mark the first stitch with a pin to track the start of the round.
 Continue with the following pattern:
- Make 3 single crochets (1 sc in each of the next 3 stitches).
- Make an increase (2 sc into the same stitch).
- Alternate between 3 single crochets and increases for the remaining stitches of the round.
3:
- Begin with an increase at the start of the round. Mark the first stitch.
- Make 5 single crochets (one in each of the next 5 stitches).
- Work an increase in the next stitch (2 sc in one).
- Repeat the sequence: 5 single crochets followed by 1 increase.
By now, the heart should have 18 single crochets in total.
4:
- Start with a single crochet increase in the first stitch. Mark the stitch.
- Work 16 single crochets (one sc in each of the next 16 stitches).
- Finish the round with an increase in the final stitch.

The total count for this round is 20 stitches.
5:
- Build the puff shape of the heart further: Work 18 single crochets, then two increases (2 sc in each of the last 2 stitches).
6:
- Continue the same technique of increasing and measuring evenly to maintain the round structure.
3. Shaping and Reducing (Rounds 7-15)
Once the base is built, the focus shifts toward shaping and reducing the stitches to achieve the pointed end of the heart.
7:
- Start with an increase in the first stitch.
- Work 9 single crochets, then make 2 decreases:
- To decrease: Insert the hook into the next stitch, pull up a loop, insert the hook into the following stitch, pull up another loop, yarn over and pull through all loops.
- Make another 9 single crochets and close the round.
8:
- This round mirrors Round 7: Begin with an increase, make 9 single crochets, decrease twice, make another 9 single crochets, and finish the round.
9-13:
- Continue alternating single crochets and decreases, gradually reducing the total stitch count per round. By Round 13, the heart will have clear puffed sides and a tapering base.
14:
- Start with a decrease, make 5 single crochets, then work 2 decreases.
- Continue working single crochets and decreases as instructed in the round sequence.

15:
- In the final round, taper the number of stitches down to 10.
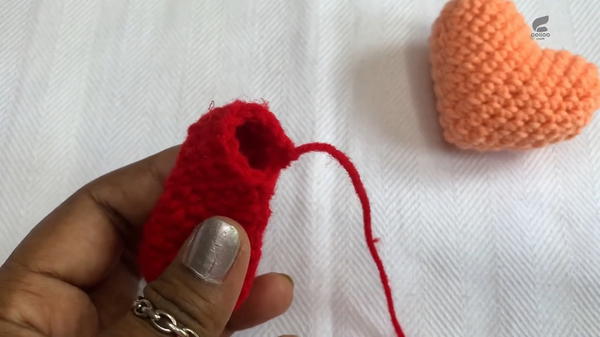
4. Finishing the Heart
- Cut the yarn and fasten off.
- Stuff the heart with cotton or synthetic filling. Be sure to fill it evenly to create a smooth, 3D puffed look while maintaining the shape.
- Use a needle and yarn to sew the bottom of the heart, making clean stitches to close any remaining gaps.
- Weave the end of the yarn and pull it through the middle to secure all stitches. Trim any leftover yarn, and tie a small knot for extra durability.
Special Features
- Beginner-Friendly Pattern: This heart design is simple and uses only single crochet stitches, making it accessible to new crocheters.
- 3D and Versatile: The finished heart has a charming depth due to its 3D structure. It can be turned into a keychain, hanging ornament, or gift embellishment.
- Minimal Materials: Requires only basic materials, making it a cost-effective project.
- Customizable Size: The heart size can be adjusted by using thicker yarn or larger hooks.
Level of Difficulty
This project is highly beginner-friendly and straightforward.
- Requires knowledge of single crochet, increasing, and decreasing stitches.
- A focus on counting stitches is emphasized to avoid errors.
- Working in the round and understanding the magic ring might require a bit of practice for absolute beginners.
Tutor’s Suggestions
- Mark Your Rounds: Always use a pin or stitch marker to clearly mark the first stitch of each round. Counting and marking are critical for maintaining symmetry in this pattern.
- Stuff Tightly but Evenly: Add enough stuffing to create a firm 3D shape without overfilling, which could distort the heart.
- Count Carefully: Recheck the number of stitches at the end of every round to prevent mistakes.
- Practice the Magic Ring: If you’re a beginner, practice creating the magic ring a few times before starting the project.
Uses
- Keychain: Attach a keyring to transform the heart into a cute keychain.
- Valentine's Day Gift: Gift it as a token of love or friendship.
- Home Décor: Use it as an ornament for a Valentine’s tree, or attach it to a wall garland.
- Bag Charm: Add it to a handbag or backpack as an accessory.
Tip for Success
While working with single crochets, ensure your stitch tension is consistent to prevent uneven edges. Also, check the overall shape after every round to make adjustments if necessary.
Conclusion
This crochet tutorial teaches you the easiest way to create a 3D heart using only single crochet stitches. The step-by-step instructions make it simple to follow, even for raw beginners. With minimal materials and an adorable outcome, this project is perfect for creating heartfelt handmade gifts or chic decorative items.


