Hop into cuteness with this Crochet Bunny Hat pattern, a playful piece that adds warmth, charm, and whimsy to outfits or thoughtful gifts.
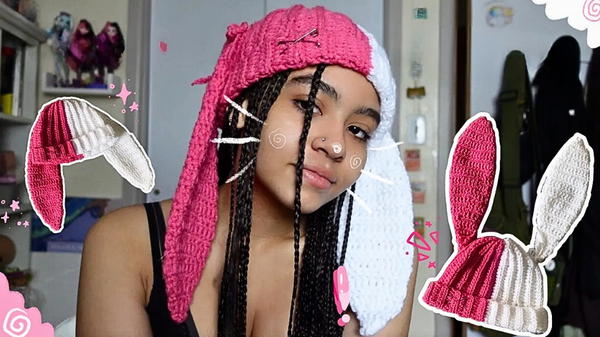
Soft ears peeking playfully from the top of a hat have a way of sparking smiles, reminding us of innocence and warmth. The Crochet Bunny Hat pattern captures that joy, turning a simple accessory into something filled with charm and comfort. With its gentle texture and thoughtful details, this hat offers both practicality and character, making it a delightful choice for little ones and even a whimsical option for themed occasions.
Fun Crochet Bunny Hat with Youthful Style
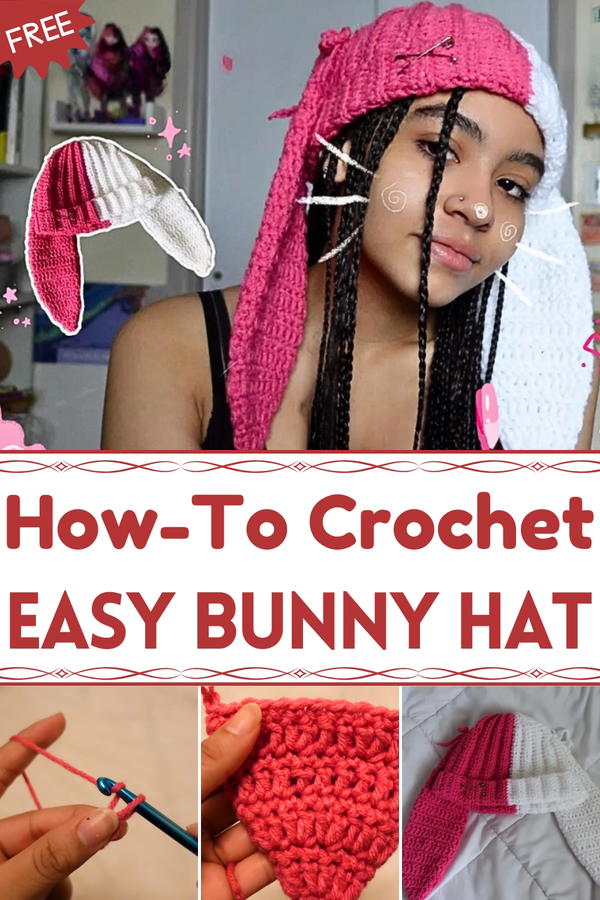
Its snug fit ensures warmth during cooler days, while the lightweight feel keeps it comfortable enough for everyday wear. The signature bunny ears add a touch of fun that children adore, making the hat more than just a piece of clothing—it becomes part of their play and imagination. Available in soft tones for subtle sweetness or bright colors for a bolder look, it adapts beautifully to personal preference.
Beyond daily wear, it makes a thoughtful gift, treasured in baby showers, birthdays, or Easter celebrations. Parents value its functionality, while children cherish its playful spirit. The Crochet Bunny Hat pattern combines coziness, durability, and charm, offering not just warmth but also joyful memories stitched into every detail—a piece that feels as special as the smiles it inspires.
Materials Needed
- Yarn:
- Two colors of yarn (Creator uses pink and white).
- Crochet Hook:
- 5mm crochet hook.
- Stitch Markers:
- For identifying rows and aligning ear placement.
- Yarn Sewing Needle:
- For weaving ends and sewing bunny ears onto the hat.
Special Features of the Bunny Hat
Adorable Look:
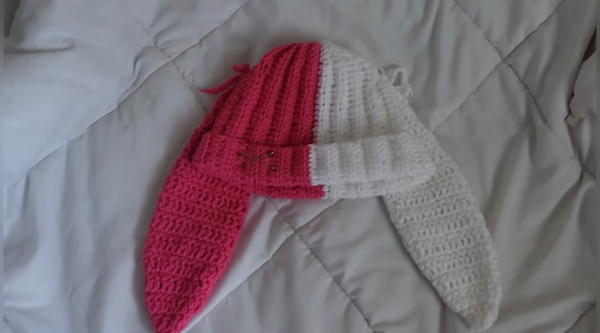
- The bunny hat blends the functional warmth of a beanie with playful bunny ears, making it both cute and practical.
Customizable Design:
- You can choose your preferred colors, stitch marker placement for ear alignment, and optional decorations (bows, safety pins, etc.).
Beginner-Friendly Components:
- The project uses basic techniques like half-double crochet, single crochet, and magic loops, making it accessible to those new to crocheting.
Warm and Functional:
- Perfect for chilly weather, Creator describes it as cozy and suited for outdoor wear in snowy conditions.
Level of Difficulty
Beginner to Intermediate:
While the project is beginner-friendly overall, Creator mentions that it leans toward an intermediate level near the end due to the techniques involved in crocheting the ears and stitching the hat pieces together. If you know basic stitches, you're ready to tackle this hat project.
Step-by-Step Instructions
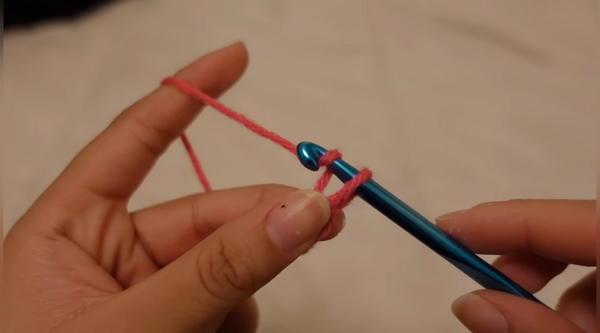
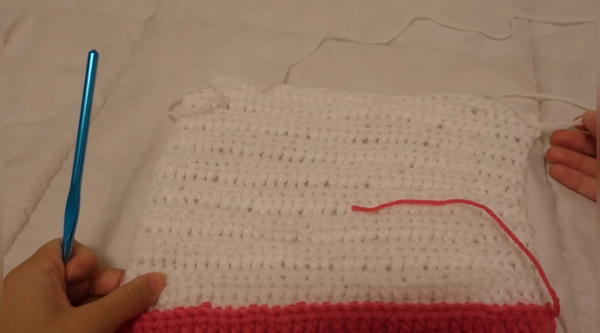
1. Start the Hat Base
- Create a slip knot and chain 34 stitches with your first yarn color (e.g., pink). Add an extra chain at the end.
- Row 1: Begin half-double crochet in each chain until you reach the 29th stitch. For the last 5 stitches, switch to single crochet.
- Row 2 and Onward: Turn your work, chain 1, and single crochet through the back loop for the first 5 stitches. Then half-double crochet through the back loops for the remainder of the row.
- Continue this process until you’ve completed 19 rows.
2. Switch Yarn Color
- Change to the second yarn color (e.g., white) and repeat the same steps (19 rows total).
3. Join the Hat
- Fold the hat horizontally and use slip stitches to join the edges.
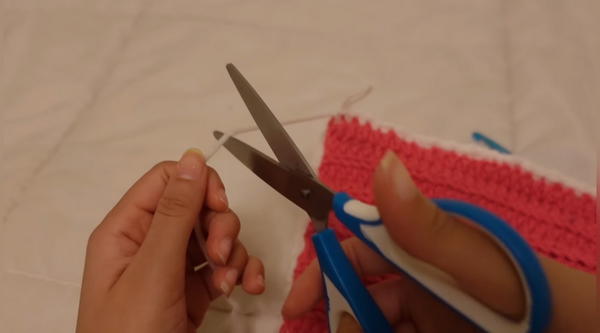
- After joining, close one end of the hat:
- Weave the yarn through the edges with a yarn needle, pulling the hole closed gently without breaking the yarn.
- Keep the opposite side (wide edge) open.
4. Creating Bunny Ears
- Start with a magic loop in your chosen yarn color.
- Row 1: Chain 2 into the loop, then double crochet 4 times and pull the loop tight to close.
- Row 2: Single crochet into each stitch. Use a stitch marker to identify the start of each round.
- Row 3: Double crochet into each stitch twice (increase row).
- Rows 4-5: Alternate between single crochets and normal double crochet rows.
- Row 6: Increase by double crocheting into every second stitch twice.
- Row 7: Double crochet normally into each stitch.
- Continue alternating increases and normal rows until the ear shape forms.
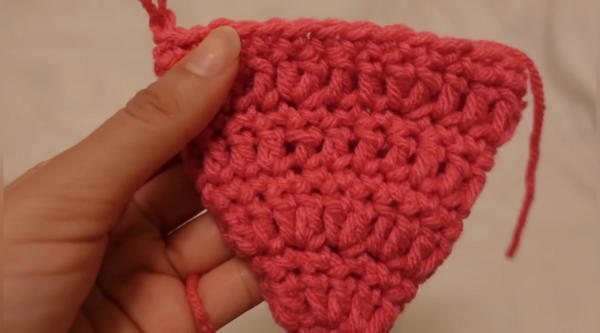 To finish, reverse the direction of your work (inside-out) for aesthetic purposes and begin gradual decreases:
- Row 1: Decrease after every three stitches.
- Row 2: Crochet normally.
- Row 3: Decrease after every two stitches.
- Row 4: Crochet normally.
- For the final rows, decrease every other stitch and then finish with normal double and single crochet rounds.
5. Attach the Bunny Ears
- Identify the back of the hat (using the slip stitch seam as a guideline).
- Place stitch markers to mark where the ears will go.
- Weave the end of the bunny ears with a yarn needle to close their openings, then sew the ears securely onto the hat stitches.
Tutor’s Suggestions
Control Tension:
- Avoid pulling yarn too tightly when closing the hat or bunny ears to prevent breaking.
Use Stitch Markers:
- These help guide row placement and ensure your ears align neatly on the hat.
Experiment with Decoration:
- Add bows, safety pins, or chain stitch accents to personalize your hat.
Rest Between Rows:
- Creator suggests taking breaks to avoid mistakes, especially while crocheting the ears.
Uses and Benefits
- Fashionable Outdoor Accessory:
- Perfect for winter, providing both warmth and style.
- Fun Gift:
- Ideal for friends, family, or children who love whimsical designs.
- Skill Enhancement:
- Combines basic stitching techniques and introduces increases/decreases for intermediate learning.
Tip
Keep a notebook or digital tracker handy to record row counts, especially for the bunny ears where increases and decreases alternate. It will help maintain symmetry and avoid reworking stitches unnecessarily.
Conclusion
Creator Bunny Hat pattern is not just a crochet project; it's a creative way to make something warm, playful, and unique for the winter season. With step-by-step instructions, easy-to-follow techniques, and customization options, this hat offers the perfect mix of practicality and creativity. Whether you’re snapping fun photos for social media or braving the cold outdoors, the bunny hat is sure to turn heads and bring smiles.


