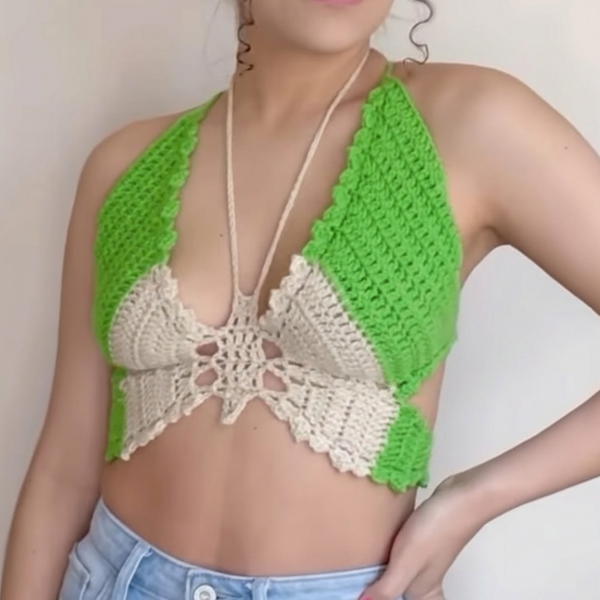
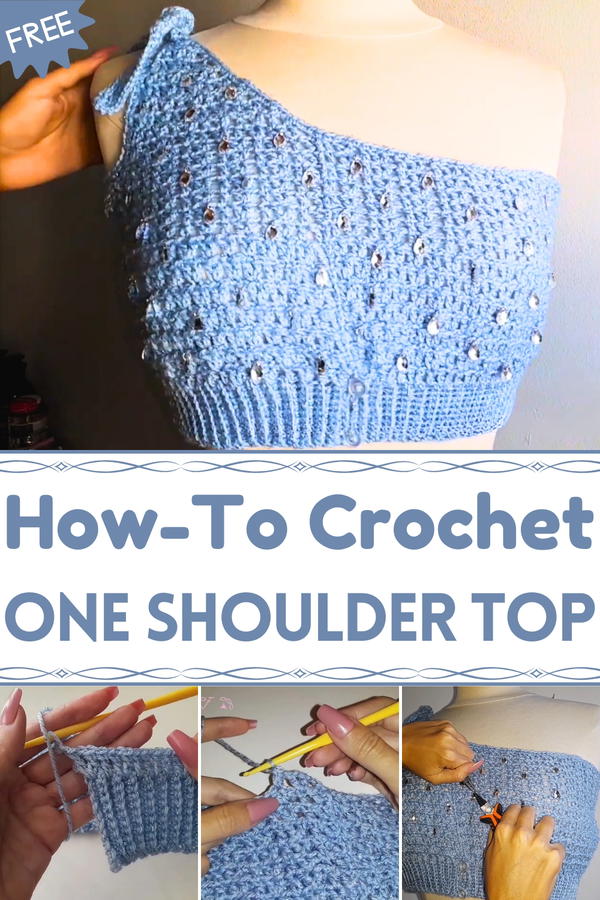
Turn heads effortlessly with this Crochet One Shoulder Top pattern, a chic design that blends comfort and flair for stylish outfits or occasions.
In the world of style, certain garments carry a sense of boldness that effortlessly stands out, and one-shoulder attire has always held that timeless appeal. A Crochet One Shoulder Top pattern brings together elegance and versatility, offering a piece that can be worn for both casual outings and special occasions. Its asymmetrical cut adds an element of sophistication while providing comfort, making it a fashionable choice for warmer days or layered looks in cooler seasons. The textured stitches highlight the beauty of handmade detail, turning a simple silhouette into something refined and striking.
Graceful Crochet One Shoulder Top for Trendy Wardrobes
This top is not only stylish but also practical, as it pairs seamlessly with jeans, skirts, or tailored pants, making it a versatile staple in any wardrobe. The breathable quality of crochet ensures comfort, while the distinctive one-shoulder line enhances femininity with understated charm. Its lightweight nature makes it easy to wear for long hours without sacrificing grace.
Whether chosen for a beach gathering, a brunch with friends, or a casual evening, the Crochet One Shoulder Top pattern reflects individuality with subtle flair. Beyond fashion, it offers a lasting piece that showcases personality, making it both a functional and beautiful addition to personal style.
Materials Needed
To make this shiny crop top, you’ll need:
Yarn:
- Appropriate for the crop top design. The video includes a shiny option but you can choose any yarn based on your preference.
Crochet Hook:
- Use a hook size suitable for your yarn (likely 3.75mm–5mm).
Stitch Marker:
- To track progress on circular or row-based sections.
Buttons:
- Two buttons for fastening the waistband.
Needle:
- For sewing on buttons and weaving ends.
Charms (Optional):
- To add a decorative and unique finish to your crop top.
Scissors:
- For trimming yarn and thread.
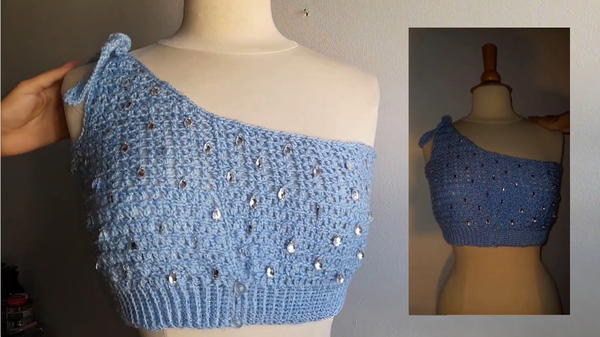
Special Features
- Stretchy Waistband: The ribbed waistband allows for a snug fit without additional sizing adjustments.
- Shiny Finish: Depending on the yarn you choose, you can achieve an elegant glow that makes the crop top stand out.
- Customizable: The design allows for personal touches like added charms, buttons, or different yarn colors.
- Unique Curved Straps: The straps feature a sophisticated shaping technique for better fit and aesthetics.
- Finishing Details: A single crochet border and optional charms create a polished, professional look.
Level of Difficulty
Intermediate: The shiny crop top involves pattern repetition, increases, decreases, and strap shaping. These do not require advanced skills but require attention to detail and patience. Beginners can follow the tutorial step by step to gain hands-on experience.
Tutor's Suggestions
- Measure Accurately: Start with accurate measurements for the waistband—ensure it sits snugly below the underbust. Avoid adding extra inches to its size.
- Focus on Strap Shaping: The straps involve increasing and decreasing stitches in rows for a specific shape. Take time to follow these steps carefully to avoid errors.
- Optional Steps Enhance Appearance: Adding a border with single crochet and decorative charms improves the final look, though these additions are optional.
- Follow the Written Patterns: The instructor provides easy-to-follow visual patterns in the video for added clarity.
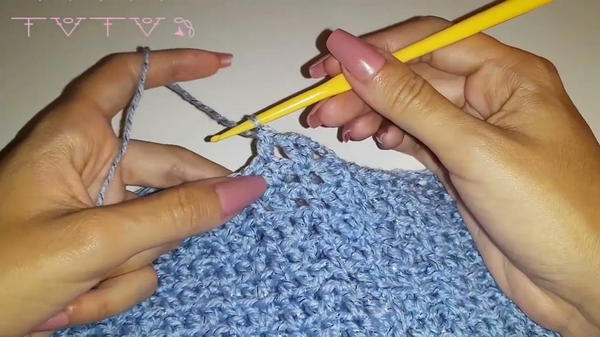
Step-by-Step Instructions
Step 1: Create the Waistband
Measure:
- Take a measurement for the waistband, which should sit slightly below the underbust.
Slip Knot and Chains:
- Start with a slip knot, chain 10, and add one extra chain.
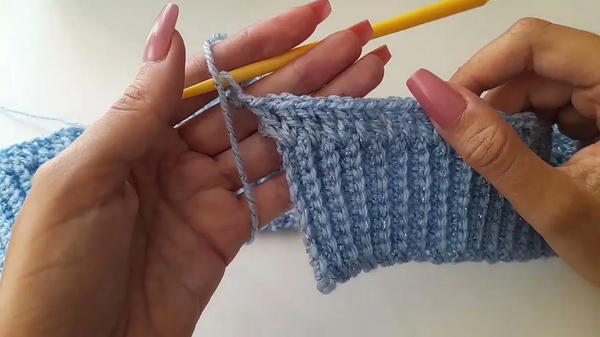
- Start with a slip knot, chain 10, and add one extra chain.
Single Crochet:
- Single crochet into the second chain from the hook, and continue to single crochet across.
Back Loop Work:
- Chain one, turn your work, and single crochet into the back loop only. This creates the ribbed texture.
- Repeat until the waistband reaches your desired size.
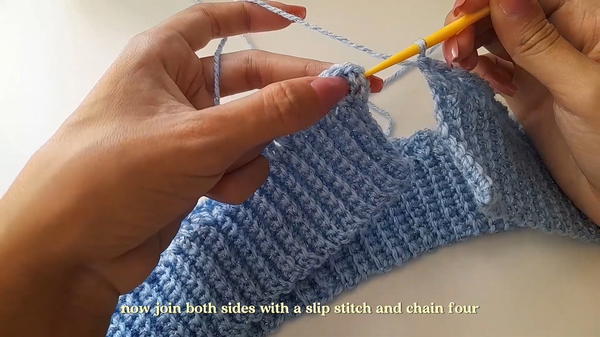
2: Crochet the Body of the Top
Chain and Double Crochet Increases:
- Chain 3 and perform a double crochet increase with one chain in the middle.
- Follow a sequence of 1 double crochet increase, 1 regular double crochet for the first row.
Repeat Rows:
- Join both sides with a slip stitch and chain 4.
- For rows 2–7, consistently perform double crochet increases at the top stitches of the previous row and the chain spaces.
- Start each row by chaining 4 and making a double crochet in the same stitch to represent the first double crochet increase.
Rows 8–14:
- Return to a sequence of 1 double crochet increase, 1 regular double crochet.
- Return to a sequence of 1 double crochet increase, 1 regular double crochet.
3: Shape the Straps
Begin the Strap:
- Chain 3 and perform a double crochet increase in the next stitch.
- Continue following the increase patterns until you have 13 stitches in total for the first strap section.
Form the Curve:
- On one side, eliminate one stitch each row by skipping the last or first stitch. This creates the curved shape for the strap.
- Leave the other side straight by working all stitches from the previous row until you have just one stitch left.
Finish the Strap:
- For rows 15–16, alternate between creating double crochets in the middle and at the ends without increases.
- On row 17, perform a larger double crochet to conclude the strap’s design.
Repeat for the Second Strap:
- Create the second strap by inverting the pattern.
4: Add Buttons
Create Button Loops:
- Use a slip stitch on the waistband. For small buttons, chain 5 to form a loop. Adjust based on button size.
- Skip a stitch and slip stitch to secure the loop. Repeat for the second button loop.
Sew Buttons:
- Attach buttons to the waistband using a needle and thread.
- Attach buttons to the waistband using a needle and thread.
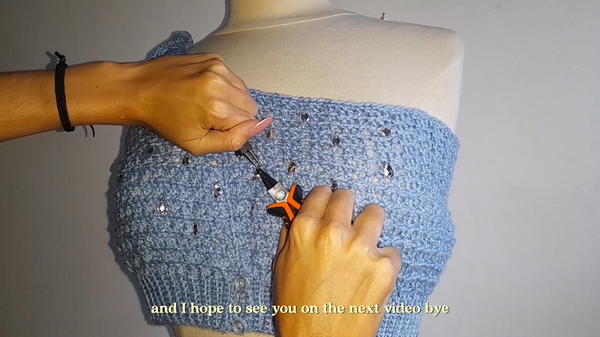
5: Optional Finishing Touches
Single Crochet Border:
- Add a single crochet border around the entire crop top to give it a professional finish.
Decorative Charms:
- Sew or attach charms to the crop top for added personality and uniqueness.
Uses and Benefits
- Wearable Fashion: Perfect for casual outfits, summer wear, or layering.
- Gift Idea: Handmade and customizable, making it a thoughtful gift.
- Skill Practice: Combines fundamental techniques like increases, decreases, borders, and optional sewing.
Tip
When shaping the straps, pay close attention to skip or add stitches where needed. Mark these sections with a stitch marker to stay precise and avoid mistakes during row transitions.
Conclusion
The Shiny Crop Top Crochet pattern is an excellent project for intermediate crocheters looking to tackle a stylish and practical accessory. With its ribbed waistband, shaped straps, and optional finishing details, this crop top embodies creativity and craftsmanship. Whether you're making the top for yourself or someone else, enjoy the process of combining intricate designs with personal touches to create a bespoke piece.