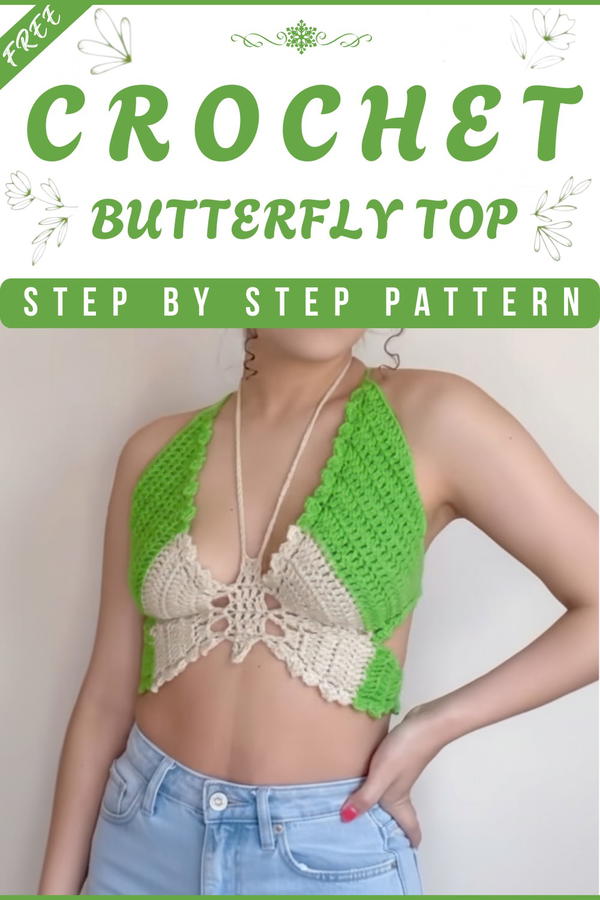
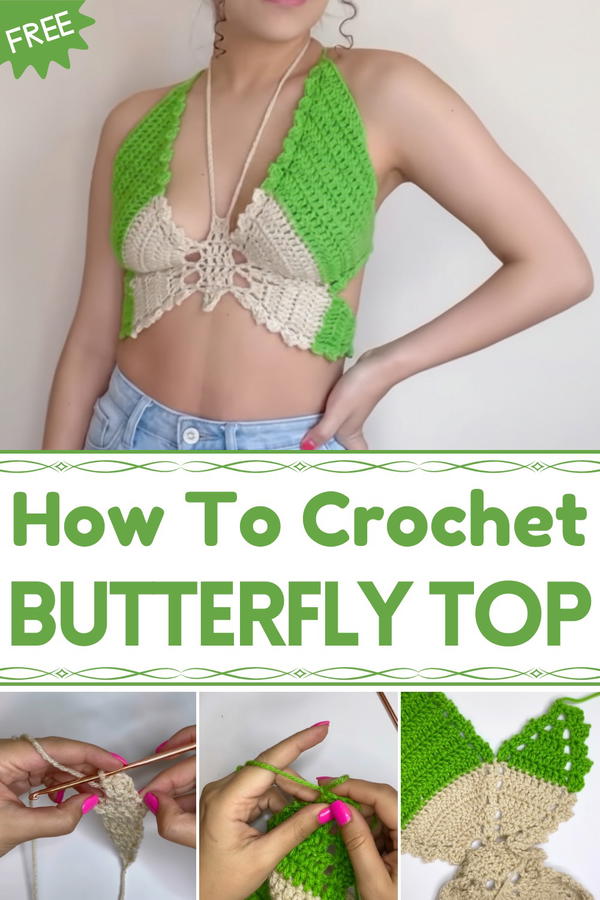
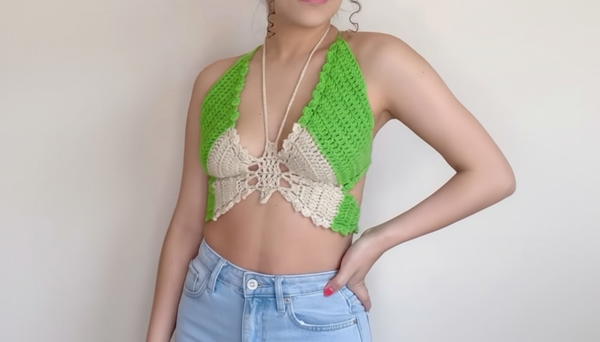
Colorful and playful clothing can make anyone feel cheerful and confident. A Crochet butterfly top pattern helps create a fun and beautiful top that looks light, soft, and stylish. Its main charm comes from the delicate butterfly shapes and smooth stitches that give it a lively and attractive appearance. The top feels comfortable to wear because the yarn is soft and airy, making it perfect for warm days or casual outings.
Pretty Crochet Butterfly Top Pattern Everyone Can Follow
It can be paired with skirts, jeans, or shorts, so it becomes a useful and versatile piece for everyday wear. Beginners enjoy it because the pattern is simple to follow, and the butterfly designs add a creative and joyful touch without being hard to make. This top is not only pretty but also practical, soft, and eye-catching. It brings a fun, handmade look that makes simple outfits feel special and unique for all ages.
Necessary Materials and Supplies
Yarn:
- Two colors of yarn, preferably same brand and thickness (4 mm).
- Choose colors that complement each other or fit the intended look of the top.
Crochet Hook:
- 4.25 mm crochet hook (adjust size based on yarn tension if necessary).
Other Tools:
- Scissors.
- Tapestry/finishing needle (for weaving in ends).
Pattern Outline
The design consists of multiple components: starting foundation, body section, bow-tie straps, and decreases for shaping. The process is detailed below:
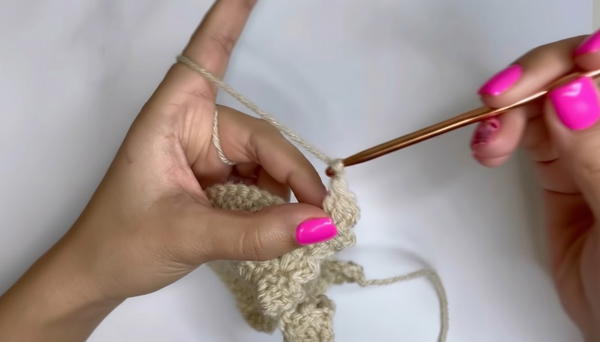
Step 1: Start with Foundation
Set-Up:
- Begin with a slip knot on the hook and chain 3 stitches.
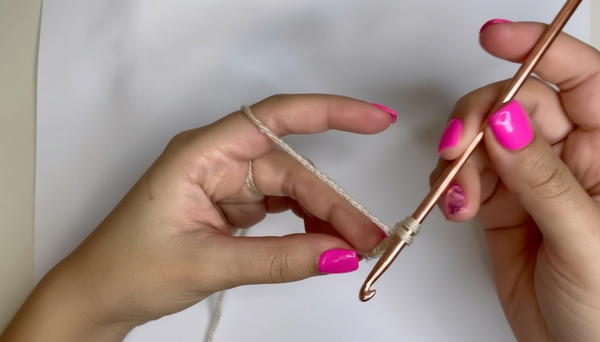
- Begin with a slip knot on the hook and chain 3 stitches.
Foundation Row:
- Insert the hook into the first chain and create 2 double crochets (totaling 3 stitches, including the initial chain).
- Turn the work over and chain 2 stitches (acts as the height of the row).
Increase Method:
- After turning, make an additional double crochet stitch into the first chain.
- Continue working double crochets across the row until you complete the increase pattern.
Step 2: Body Section
Regular Rows:
- Work normal double crochets for 5 rows, keeping the stitch count consistent.
- Start each row with 2 chain stitches, followed by double crochets worked evenly across.
Increase Rows:
- After 5 regular rows, begin creating increases:
- For the first stitch, make an increase with 2 double crochets.
- Repeat increases periodically across the row to expand the body.
- Follow 3–3–2 pattern (detailed in the transcript) to balance the design.
- After 5 regular rows, begin creating increases:
Step 3: Bow-Tie Section
Chain Straps:
- Create 60 chains for the first strap, cut the yarn, and repeat for the second strap.
- These chains form the bows that secure the top at the back.
Attach Straps:
- Secure the straps to the body by working slip stitches along the edge.
- Use slip stitches evenly to create a clean finish.
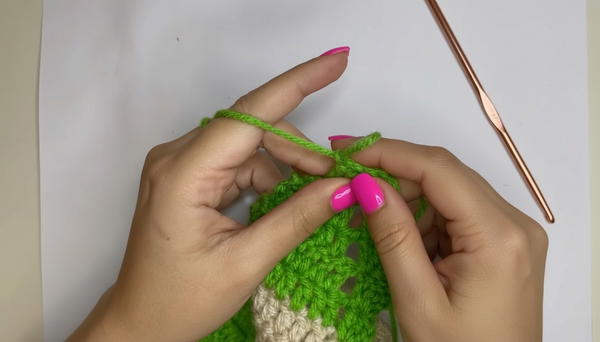
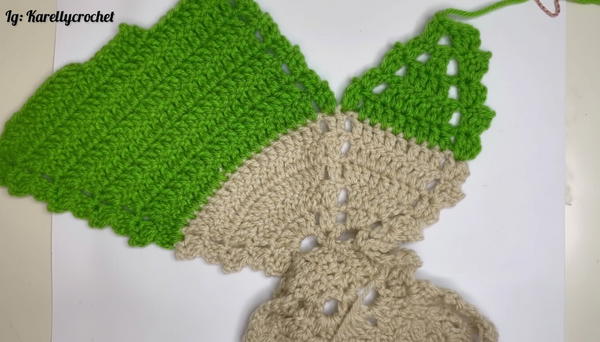
Step 4: Edge and Decorative Enhancements
Top Edge:
- Begin slip stitches along the top edge of the body.
- Work evenly across to create a structured and clean finish.
Fan Pattern:
- Work decorative fan sections made of 3 double crochets, separated by chain stitches.
- For fans:
- Chain 4, make a double crochet at the same stitch, then chain 2 and one double crochet in subsequent sections.
Step 5: Reductions (Shaping)
Decrease Rows:
- Begin shaping by skipping designated stitches as you work.
- Use decreases on both edges of the row to create structure and reduce width.
- In central areas, work unfinished double crochets and join loops to create a subtle decrease.
Repeat Decrease Rows:
- Continue successive rows of decreases until desired structure is achieved.
Step 6: Second Half of the Top
Repeat all steps for the second half of the top, ensuring symmetry.
Tips for Success
Maintaining Tension:
- Work evenly to ensure consistent tension, particularly when alternating between stitches.
- Test your tension with the selected yarn and crochet hook prior to starting.
Framing Edges:
- Slip stitches create clean, professional borders. Do not skip this step.
Choosing Colors:
- Match bright or pastel colors for casual wear or opt for neutral tones for a more versatile top.
Adjust Sizing:
- Add rows or stitches where necessary to fit the desired size.
Customization Options
Straps:
- Use chains with beads or decorative elements for an enhanced look.
Bottom Edge:
- Add fringe or scalloped edging for a creative touch.
Stitch Variations:
- Substitute a textured stitch (like shell or puff) for portions of the body to create more dimension.
Conclusion
This versatile crochet top can be tailored to various sizes and styles, with options to alter the strap length, body width, and decorative edges. The clear sequence of increases and decreases ensures a balanced design that can be worn comfortably.
Crochet Butterfly Top Pattern
This pattern outlines the complete process for crocheting a butterfly top, including its body, tie section, and decorative decreases. The design features clean edges, symmetry, and functionality for tying the top at the back.