Bring holiday magic home with this Free Crochet Large Christmas Tree Pattern, ideal for festive décor, standout accents, and adding cheerful seasonal charm.
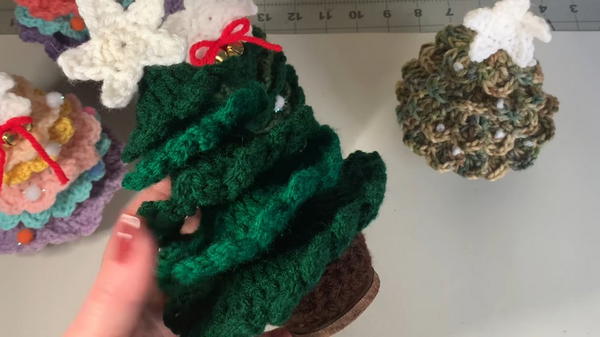
During the festive season, families have long gathered around grand holiday trees, filling their homes with warmth, laughter, and the magic of tradition. The Free Crochet Large Christmas Tree pattern captures that same spirit, transforming simple yarn into a striking decorative piece that can brighten any room. This large, handmade tree is perfect for creating a focal point in living spaces, entryways, or cozy corners, adding both color and texture to holiday décor.
How to Crochet Large Christmas Tree Pattern for Stunning Decor
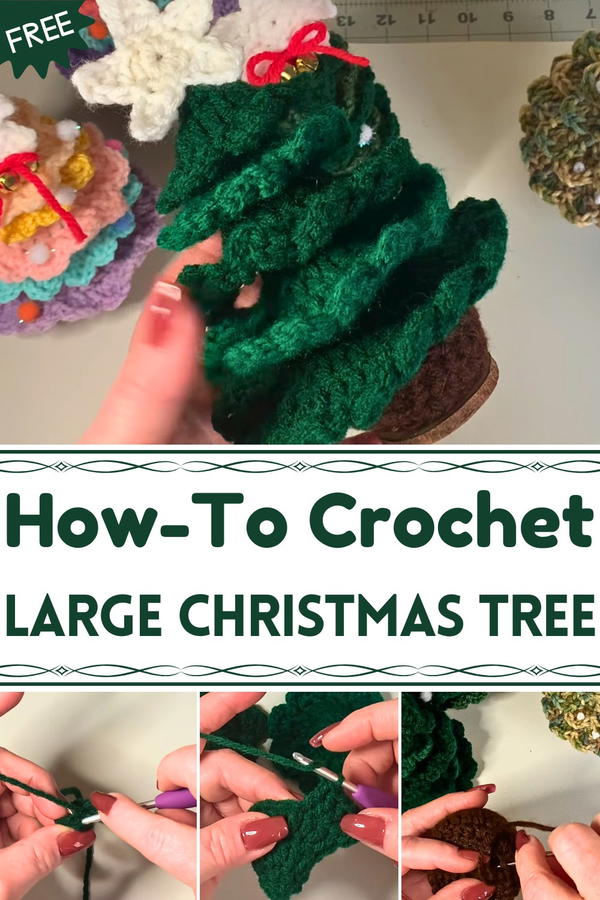
Its generous size makes it ideal for displaying ornaments, garlands, or twinkling lights, while its soft, sturdy construction ensures it remains a cherished part of seasonal celebrations year after year. Beyond its decorative appeal, working on this project provides a calming and mindful experience, helping makers unwind while improving focus and stitch precision.
The Free Crochet Large Christmas Tree pattern also makes a thoughtful handmade gift, offering friends and family a festive keepsake that combines creativity with heartwarming charm. With endless possibilities for color combinations and embellishments, each completed tree reflects personal taste and holiday spirit. Whether used as a statement piece, a family crochet activity, or a unique gift, this large crochet Christmas tree brings joy, tradition, and handmade elegance into every home during the most celebrated season of the year.
Materials Needed
- Yarn: Acrylic 4-weight yarn in different colors for the tree, base, and star.
- Hook: 4mm crochet hook.
- Additional Tools: Hot glue gun (or alternative glue), darning needle, scissors, stuffing, and optional embellishments such as pom-poms or bells.
Special Features of the Crochet Christmas Tree
- Beginner-Friendly Design: Uses basic stitches like single crochet (SC), double crochet (DC), and slip stitches (SL ST).
- Layered Construction: The tree is made in tiers, giving a realistic and textured look.
- Customizable: Can be decorated with bows, pom-poms, mini ornaments, or other embellishments.
- Durable Pot Base: Includes a weighted base to provide stability for display.
- Seasonal Versatility: Perfect for holiday decorating, gifting, or craft fairs.
Level of Difficulty
- Beginner to Intermediate: While the project includes some techniques such as the magic circle and working in rounds, the tutor goes at a slow pace and explains each step thoroughly.
- Forgiving Project: Mistakes in stitch counts are easily adjustable, making this project less stressful for beginners.
Step-by-Step Instructions
Making the Tree Layers
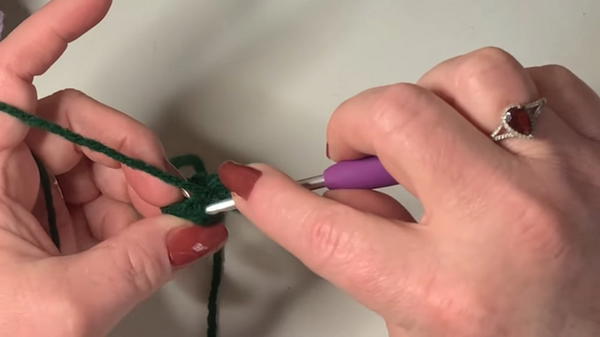
Start with a Magic Circle:
- Chain 2 (counts as the first double crochet).
- Make 5 more double crochets into the circle.
- Pull tight and slip stitch into the top of the chain-2.
Increase the Rounds:
- Flip the circle inside out and chain 2.
- Work 2 double crochets into each stitch around for a total of 12 stitches. Slip stitch to join.
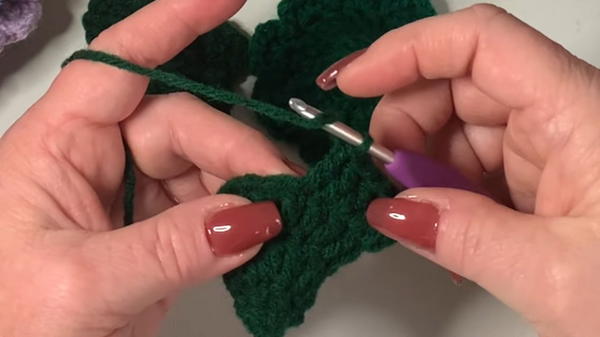
Branch Formation:
- Begin with a chain 1, followed by 2 double crochets.
- Create "branches" by chaining 2 and doing another 2 double crochets in the same stitch.
- Slip stitch into the next stitch and repeat around.
Adding Subsequent Layers:
- For each layer, start with a magic circle and increase the stitch count in each round:
- Round 1: 6 stitches.
- Round 2: 12 stitches (2 DC in each stitch).
- Round 3: 18 stitches (1 DC, 2 DC alternately).
- Round 4: 24 stitches (2 single DC, 2 DC alternately).
- Round 5: 30 stitches (3 single DC, 2 DC alternately), and so on.
- Add branches for each layer following the same pattern as before.
- For each layer, start with a magic circle and increase the stitch count in each round:
Assembling the Tree:
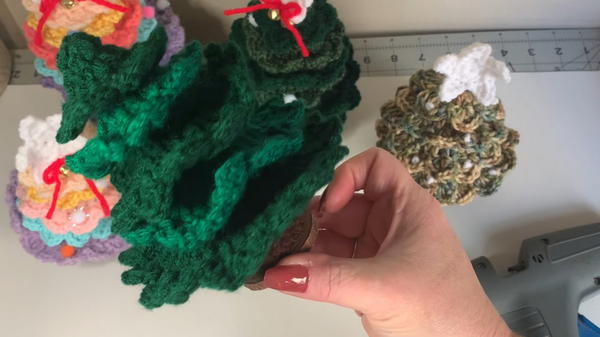
- Once all layers are complete, glue (or sew) them together from smallest to largest. Ensure alignment for a tiered, conical shape.
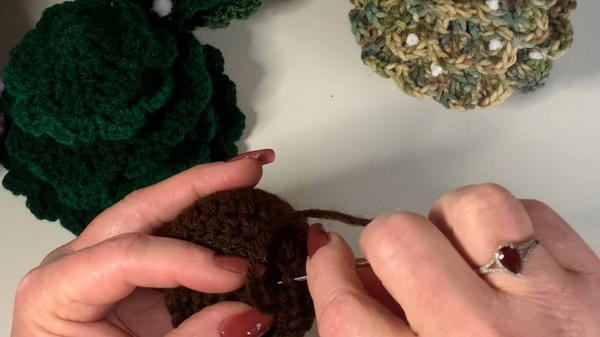
Making the Base (Pot)
Start with a Magic Circle:
- Place 6 single crochets in a magic circle and pull tight.
- Slip stitch to close.
Increase Rows:
- Round 2: 2 SC in each stitch for a total of 12.
- Round 3: 1 SC, 2 SC alternately for a total of 18.
- Round 4: 1 SC in two stitches, 2 SC alternately for a total of 24.
Create the Base Wall:
- Work in the back loop only to create the base's edge.
- Use half-double crochets (HDC) for three rows to form the sides of the pot.
Close the Top:
- Repeat steps 1-4 to create a flat circle for the pot lid.
- Stuff the base and sew on the top securely.
Attach the Pot:
- Glue or sew the completed pot to the bottom of the tree for stability.
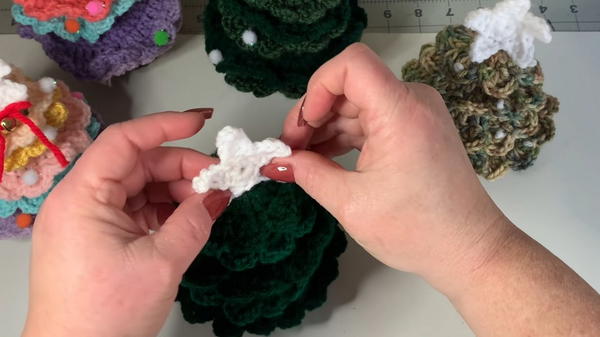
Making the Star
Magic Circle:
- Place 10 single crochets in the magic circle. Slip stitch to close.
Create the Points:
- Chain 4, then work down the chains:
- Second chain: 1 SC.
- Third chain: 1 HDC.
- Fourth chain: 1 DC.
- Skip the next stitch and slip stitch into the following stitch. Repeat for five points.
- Chain 4, then work down the chains:
Attach the Star:
- Shape and block the star if necessary.
- Glue or sew the star to the top of the Christmas tree.
Tutor’s Suggestions
- Custom Decorations: Add embellishments like pom-poms, bells, or ribbons to individualize the tree.
- Fixing Mistakes: The project allows for easy corrections. Ensure accurate stitch counts by doubling back and recounting.
- Durable Assembly: Always work in your ends securely and use strong glue for assembly, especially if using it as a decoration.
Uses
- Holiday decorations for your home.
- Thoughtful, handmade gifts.
- Craft displays or items for sale at holiday markets.
Conclusion
The crochet Christmas tree is a festive, creative, and beginner-friendly project that offers room for personalization. With its tiered layers, stable base, and adorable star topper, this project is perfect for holiday crafting. With Don Marie’s clear, step-by-step instructions, even beginners will enjoy the process and create beautiful results.
Bonus Tip
- Blocking Your Work: If your star or tree branches bend or lose shape, blocking can help. Wet the finished sections, lay them flat on a surface, and pin them into the desired shape. Allow them to dry completely before assembly.


