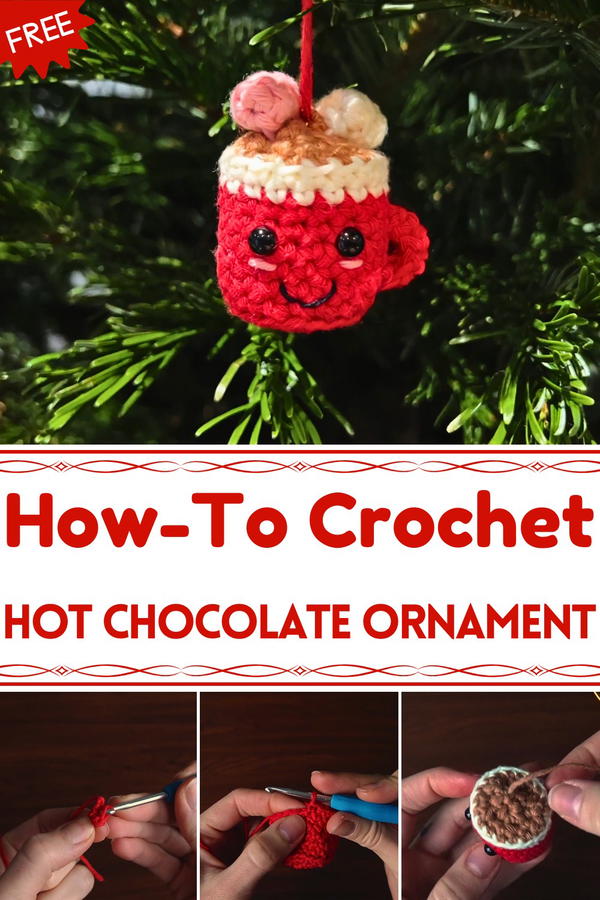
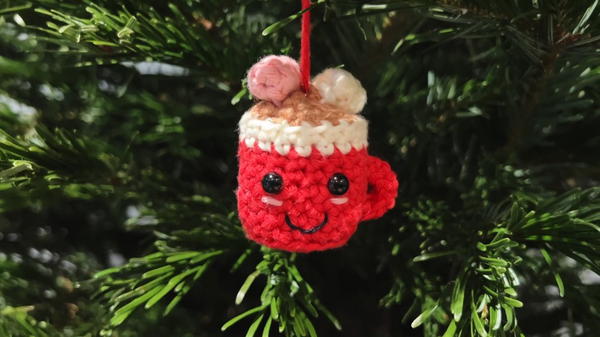
Warm up your décor with this Free Crochet Hot Chocolate Ornament Pattern, adding cozy, festive charm and a playful handmade touch to your holidays.
The first sip of hot chocolate on a chilly winter evening often sparks a smile, and now that cozy feeling can be captured in yarn. The Free Crochet Hot Chocolate Ornament pattern turns simple crochet into a whimsical mini treat that livens up holiday décor. Its playful texture and charming shape make it perfect for Christmas trees, garlands, wreaths, or as a delightful gift topper, adding warmth and personality to every setting.
Cute Crochet Hot Chocolate Ornament to Decorate Your Tree
Lightweight yet sturdy, these ornaments hang securely while maintaining handcrafted charm, making them reusable year after year. The rhythmic stitching process offers a calming, mindful experience, enjoyable for both beginners and seasoned crocheters, and the creative freedom in color choices allows each ornament to reflect personal style. Beyond festive decoration, they make thoughtful gifts, spreading seasonal cheer to loved ones with a handmade touch.
Combining fun, practicality, and holiday spirit, these ornaments bring subtle charm to tables, shelves, and trees alike. Each stitch embodies the cozy joy of winter celebrations, turning simple spaces into inviting displays filled with texture, warmth, and character. With every completed piece, crafters contribute a tiny token of cheer that brightens homes and hearts throughout the holiday season.
Materials Needed
- Yarn: Red and white for the mug, pink or white for marshmallows, and brown for "hot chocolate."
- Hook: A 4mm crochet hook (adjust according to your yarn).
- Safety eyes: For the ornament’s cute face.
- Filling: For stuffing the ornament and marshmallows.
- Stitch marker: To keep track of your first stitch.
- Scissors: For cutting yarn.
- Needle: To sew the handle, marshmallows, and finishing details.
- Black and pink yarn: For facial features (smile and blush details).
Step-by-Step Instructions
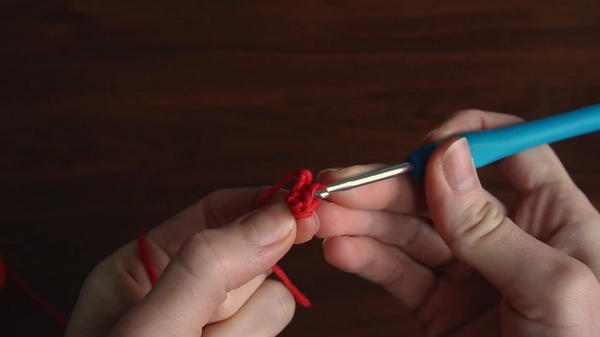
1. Begin with the Mug (Red Yarn)
Create the Base:
- Make a slip knot, chain 4, and connect the first and last chain with a slip stitch to form a circle.
- Chain 1 and crochet 6 single crochets (sc) into the circle.
- Connect the last stitch to the first with a slip stitch to complete the round.
Increase the Base:
- For the second row, chain 1 and place your stitch marker in the first stitch. Make two single crochets in each stitch (an increase in every stitch). By the end, you’ll have 12 stitches.
- Connect to the first row with a slip stitch.
Expand the Base Again:
- Chain 1 and mark your first stitch. Work one single crochet in the first stitch, followed by two single crochets in the next stitch (an increase every second stitch). Repeat this pattern to the end of the row, completing with 18 stitches.
Form the Mug’s Rim:
- Chain 1, and work single crochets into the back loop only for this row (18 stitches in total). This creates a turning edge for the base of the mug.
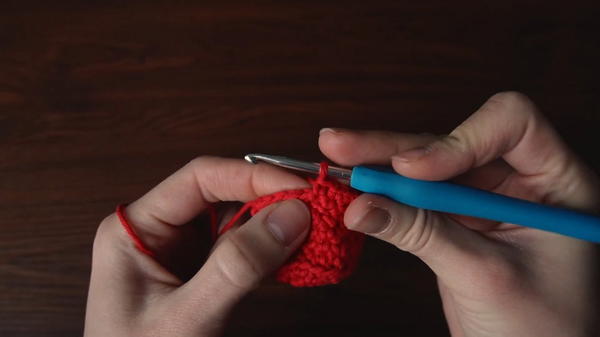
Build the Mug Walls:
- Chain 1 and work single crochets as normal (both loops) in each stitch. Repeat this for 5 rows to build the height of the mug.
- Once done, switch to white yarn as the rim accent and work 18 stitches in white for 2 rows.
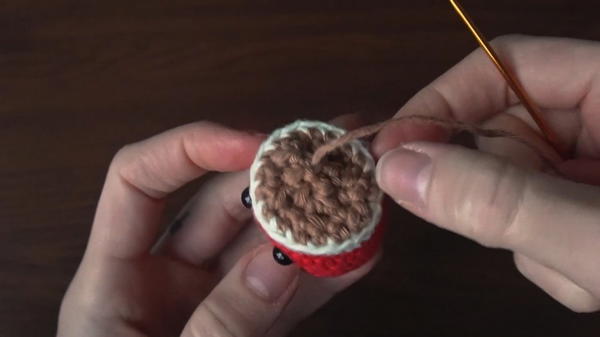
Add the Hot Chocolate:
- Switch to brown yarn and chain 1. Work your first row of brown yarn into the back loop only to create a clean edge for the chocolate layer.
- After this row, pause to add safety eyes, placing them symmetrically on the mug.
Close the Top of the Mug:
- Begin single crochet decreases by working one single crochet, then a decrease in the next stitch (repeat this pattern).
- For the final row, work decreases in every stitch until it's fully closed. Leave a long yarn tail, thread it through a needle, and close the opening by weaving through the remaining stitches. Add filling before sewing shut.
2. Crochet the Marshmallows (White and Pink Yarn)
Start the Marshmallow Base:
- Begin with a slip knot and chain 4. Connect the first and last chain with a slip stitch to form a circle.
- Chain 1 and crochet 6 single crochets into the circle. Join with a slip stitch.
Shape the Marshmallow:
- Pull the tail of the yarn to tighten, and weave in the loose ends. Add filling if desired or leave it hollow.
- Create another marshmallow in a second color if you’d like (e.g., pink).
3. Attach the Marshmallows
- Position the marshmallows on top of the mug at a diagonal angle. Use the long yarn tails to sew them securely in place.
4. Add the Mug Handle (Red Yarn)
- Create the Handle:
- Chain 7 and work single crochets across the row.
- Leave a long yarn tail for sewing, and attach the handle to the side of the mug. Make sure it loops like a real cup handle.
5. Final Touches
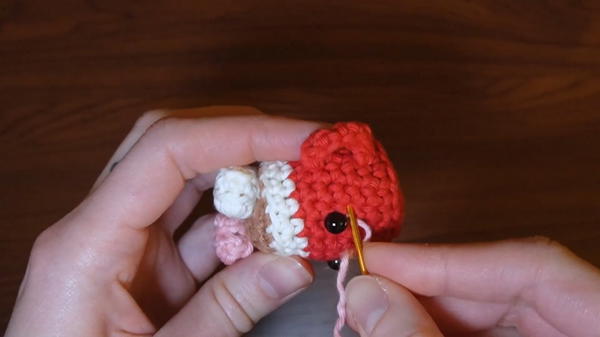
- Blush and Smile:
- Thread pink yarn and stitch two blush spots under the safety eyes. Use black yarn to create a small smile between them.
- Hanging Strap:
- Create a short chain with yarn and tie it securely to the top edge of the mug. Hide any knots by tucking them inside the ornament.
Special Features
- Charming Details: The blush and smile add personality, while the handle and marshmallows complete the realistic look of the mug.
- Customizable: Use different yarn colors to personalize for different seasons or themes.
- Multi-Purpose: Suitable as a Christmas ornament, winter gift, or décor piece.
Tutor’s Suggestions
- Use a Stitch Marker: With small projects, it’s easy to lose track of stitches. The tutor strongly recommends marking the first stitch of each round.
- Stuff Before Closing: For the hot chocolate and marshmallows, remember to stuff the crochet pieces before fully closing them.
- Adjust Fill Amount: Use just enough stuffing to maintain the shape without overstuffing.
Difficulty Level
- Beginner-Friendly: The stitch patterns (slip stitch, single crochet, increases, decreases) are simple and easy to follow.
- Intermediate Appeal: The project involves minimal color changes and assembly, making it interesting for seasoned crocheters too.
Tip
When switching yarn colors, always secure loose ends by knotting or weaving them delicately. This prevents unraveling and keeps the ornament looking clean and professional.
Conclusion
This hot chocolate ornament is a whimsical and cozy addition to any winter or holiday setup, perfect for creating handmade decorations full of warmth and character. With simple materials and easy-to-follow instructions, it’s an enjoyable project for all skill levels. Whether it’s hanging on a tree, part of a festive display, or gifted to a loved one, this ornament is sure to bring a smile to anyone who sees it.


