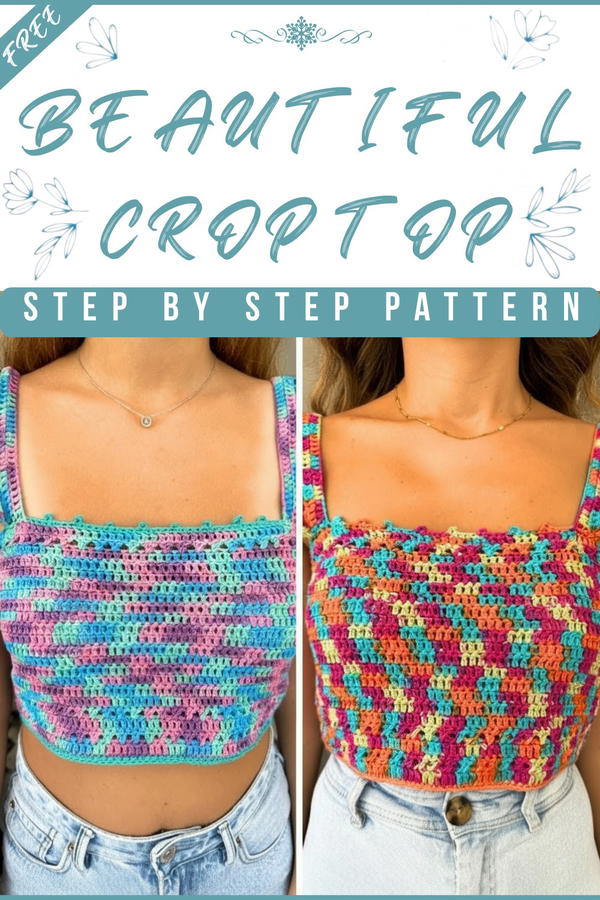
Owning a top that’s not only stylish but handcrafted with love and creativity! This crochet crop top is a little piece of magic you can add to your wardrobe. Lightweight and effortlessly chic, it’s perfect for sunny days, casual get-togethers, or layering over your favorite outfit. The design combines beauty with practicality—showcasing intricate textures while keeping things super comfy.
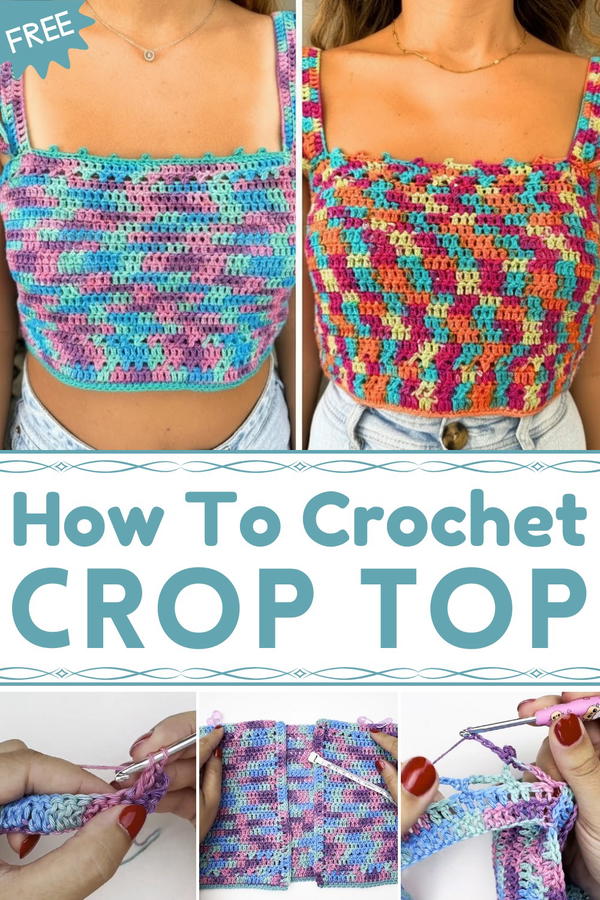
Minimalist Crochet Crop Top Pattern with a Stylish Edge
Its charm lies in how versatile it is. Dress it up with jewelry for a special event or go completely casual for a relaxed day out—the choice is yours. The pattern creates a flattering fit for all shapes and sizes, giving you a standout piece that’s uniquely yours. 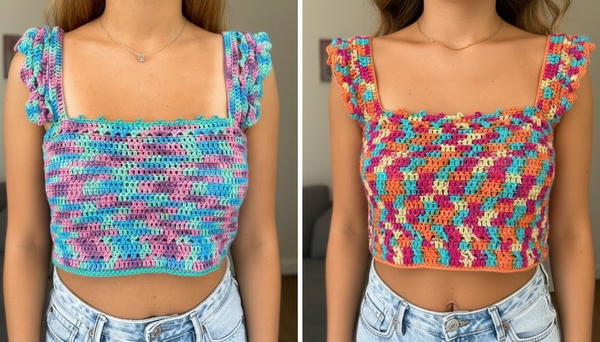
Plus, there's something extra special about wearing something you made yourself! Whether you’re lounging by the beach or heading to brunch with friends, this crochet crop top is sure to bring compliments and make you feel amazing every single time.
Materials List
Yarn:
- Charme Yarn by Círculo:
- Variegated options shown: Mermaid or Lama shades. Other colors can also be used.
- Optional Add-on Colors: Solid shades for finishing touches on the bottom bar and decorative details.
- Requires approximately 1 skein (396 yards) for Size S and XS.
For additional sizes or longer tops, it is recommended to have a second skein.
Tools:
- Crochet Hook: 3.5 mm.
- Recommended for a beautiful, even stitch pattern.
- Measuring Tape: For accurate measurements of bust width and strap placement.
- Scissors: For cutting yarn.
- Tapestry Needle: For weaving in ends and attaching tassels.
- Stitch Markers: To mark strap start and end points for precise placement.
- Optional Tassel Maker: For creating even tassels (3-4 cm size). A cardboard piece can also be used as an alternative.
Skill Level
Beginner-Intermediate
The top employs basic stitches and a consistent repeating pattern of double crochet and cross stitch (an easy modification of double crochet). The addition of decorative straps and tassels involves simple techniques that are beginner-friendly.
Key Abbreviations (US Terminology)
- ch: chain
- sc: single crochet
- dc: double crochet
- st: stitch
- sp: space
- sl st: slip stitch
- yo: yarn over
- picot: (chain 3, insert hook in the top of the last stitch worked, yo, pull through both loops)
Special Notes
- Size & Adjustments: Base the foundation chain on your bust circumference, then divide the measurement in half to determine the top’s width. Add ties at the back to adjust fit further if needed.
- Chain Multiples: Ensure your foundation chain is a multiple of 2, then add 3 additional chains for the turning chain.
- Yarn Behavior: Variegated yarns can add depth and texture to the cross-stitch without requiring additional effort for customization. A solid color may provide more detailed stitch definition.
- Gauge/Tension: Work with even and slightly loose tension, as tight stitches may reduce flexibility or comfort.
Pattern Instructions
1. Foundation Chain
Create a foundation chain in a multiple of 2 until it matches your desired bust circumference.
- For XS-S: Approximately 136 chains plus an additional 3 chains (turning chains).
- The chain should slightly stretch to fit the circumference due to the ties at the back.
Add 3 more chains at the end to act as the turning chain.
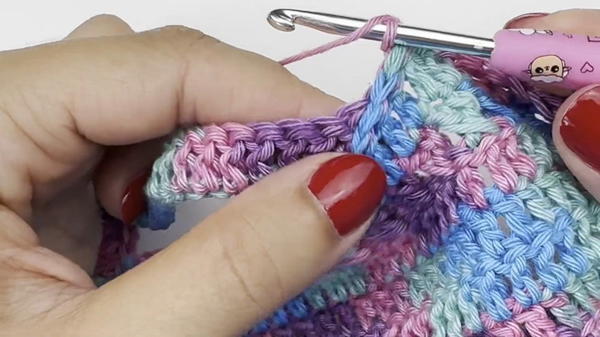
2. Row 1 – Double Crochet (Base Row)
- Yo, insert your hook into the 4th chain from the hook, and make a dc.
- Continue working 1 dc in each chain across to the end of the row.
- You should now have an even number of stitches.
- Turn your work, getting ready for Row 2.
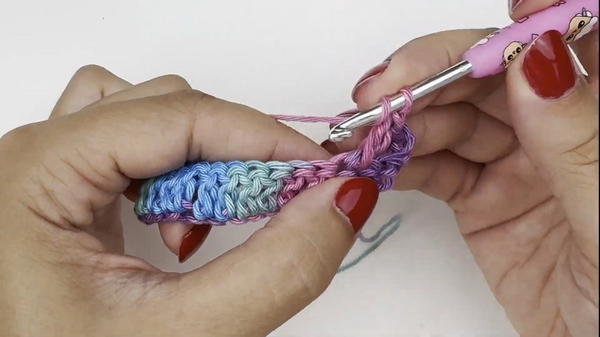
3. Row 2 – Cross-Stitch Pattern
The cross stitch is created by alternating double crochets that “cross over” each other.
- Ch 3 (acts as the first dc and turning chain).
- Skip 2 st, and work 1 dc in the next st.
- Return to the skipped stitch, insert your hook, and make 1 dc.
- This forms the "crossed" effect of the stitch.
- Continue:
- Skip 2 st, 1 dc in the next st, 1 dc in the previously skipped st.
- Repeat this pattern across until 3 st remain.
- Work a final crossed stitch, and place a dc in the turning ch to finish the row.
- Turn your work, preparing for Row 3.
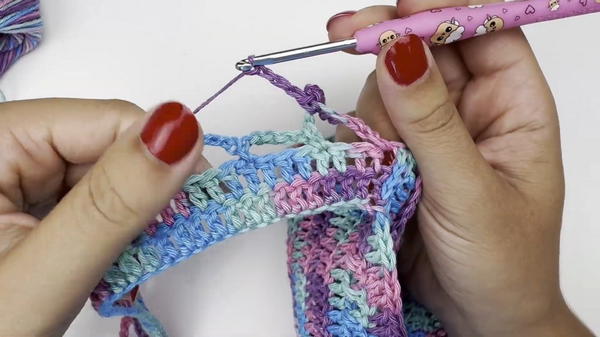
4. Row 3 – Double Crochet Row
Work a simple row of double crochet across the row:
- Ch 3 as the turning chain.
- Work 1 dc in each st across.
- Ensure the total number of stitches equals the first row of dc.
- Turn your work.
5. Repeating the Pattern for the Top Body
Alternate rows of Cross-Stitch Pattern (Row 2) and Double Crochet Row (Row 3).
- Example repetition: High dc row → Crossed stitch row → High dc row → Crossed stitch row.
- Repeat until the top body reaches your desired length.
For a standard length (as shown): Work 15 rows of dc up to Row 3, finishing with 1 cross stitch row and 1 last dc row.
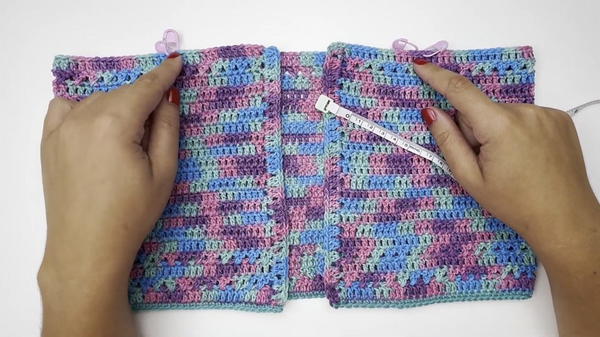
6. Side Edging
To create even edges on both sides:
Turn the work to the side.
Work 2 dc per row of the body edge.
At the top end of the side, work the final dc into the last chain for a clean finish.
Repeat this on the opposite side of your top.
7. Bottom Bar Finishing (Optional)
Enhance the bottom edge with a contrasting or matching yarn color:
- Work a row of single crochet stitches across the bottom edge.
- Insert into each chain or stitch at the base, ensuring consistent spacing for a neat finish.
8. Strap Placement and Shoulder Straps
(a) Mark Strap Placement:
- Use a measuring tape or count stitches to place 4 markers:
- Two for the front and two for the back straps.
(b) Strap Creation:
- Attach yarn at the marked starting point.
- Chain 72 stitches (approx. 36 cm, or to your desired length).
- Attach the chain into the opposite marker using a sl st. Work 3 additional sl sts for a sturdy connection.
(c) Decorating Straps:
- Work 2 rows of dc across the strap to thicken.
- On the next row, create decorative rings by chaining 6 stitches, skipping 3 chains at the base, and sl st to the 4th chain.
- On the final row, add picot stitches (ch 3, sl st into 2 loops of the previous st).
9. Final Customizations
Cord for Closure
- Work a chain of 1.20-1.30 m in length for the cord.
- Pass the cord through the back openings to allow for easy tying.
Add Tassels
- Use a tassel maker or a 4 cm-wide object like cardboard.
- Wrap yarn around the base 15 times, tie the loops, cut, and secure with a binding thread.
- Attach tassels to the ends of the closure cord.
Tips for Success
- Chain Tension: Ensure even and loose tension when making the foundation chain and strap chains to prevent stiffness.
- Strap Lengths: Adjust the lengths of straps according to your preferences and bust size.
- Odd-Number Rings: When creating the rings for the strap decoration, ensure the total count is odd to maintain design symmetry for the final frill.
- Switch Colors: Use a solid or contrasting color for the bottom edge and strap decoration to create added flair.
Conclusion
You’ve now completed your crochet cross top, a modern and versatile garment suitable for any occasion. The combination of cross-stitch and decorative straps creates a unique, eye-catching piece. With plenty of room for customization, you can experiment with colors or add additional rounds for a longer or shorter top.
Crochet Cross Top Pattern
This detailed pattern is perfect for beginners and intermediate crocheters alike, this top combines style and functionality while utilizing basic techniques such as cross stitch, double crochet, and decorative finishes. Featuring Charme yarn by Círculo, this is a great project for creating a trendy and hand-crocheted summer piece.