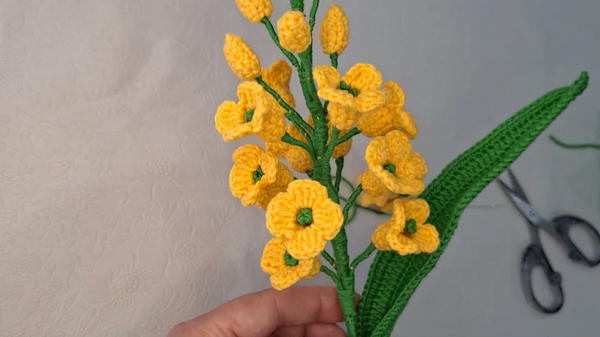
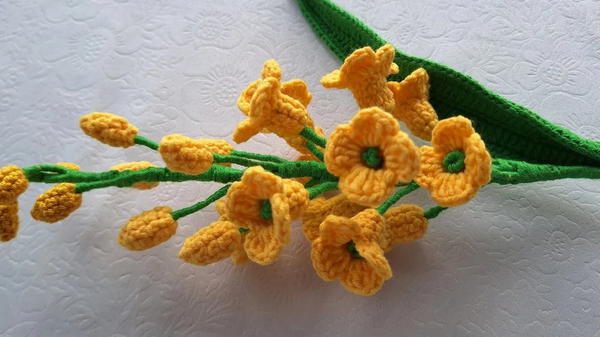
Brighten your space with this Crochet Lily of The Valley Pattern full of delicate blooms gentle textures and a charming creation that adds a touch of spring anywhere.
Achieve the charm of delicate, tiny flowers that bring a touch of spring wherever they go. This beautiful design resembles small, graceful bells hanging softly from slender stems, just like fresh blossoms in a garden. Made with gentle yarn, it feels light and lovely, perfect for adding a natural, peaceful look to any project. Its fine details create a realistic and elegant appearance that captures the heart at first glance.
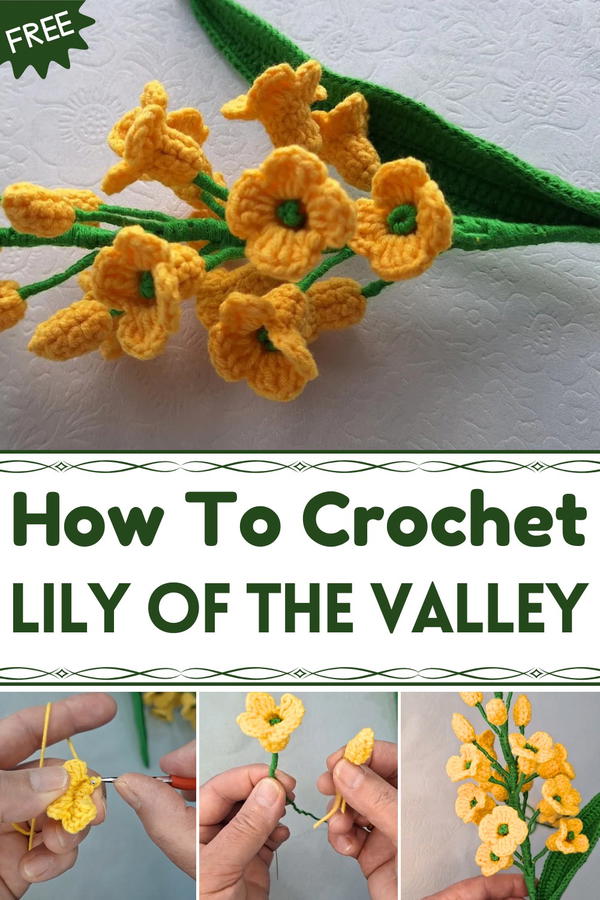
Elegant Crochet Lily of The Valley Pattern to Brighten Desks or Tables
Great for decorating clothes, home items, or special gifts, these soft flowers add sweetness and beauty with every stitch. Whether used to brighten up a scarf, hat, or wall hanging, this design spreads joy and freshness. Its simple yet detailed style is easy to feel proud of and fun to make. This floral treasure brings nature’s charm into your hands, making any creation bloom with warmth and grace.
Crochet Lily of the Valley Flower and Bud Pattern
Materials
- Crochet thread or yarn in your color of choice (yellow used in tutorial)
- Crochet hook suitable for your yarn/thread
- Floral wire or craft wire
- Scissors
Flower Pattern (Four Leaves)
Ring Foundation
Round 1:
- Make a slip knot and create a magic ring (adjustable ring) or make a loop of chain stitches.
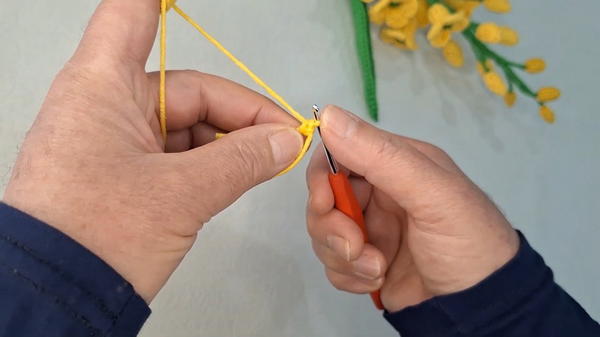
- Work 8 sc tightly into the ring without tightening it too much.
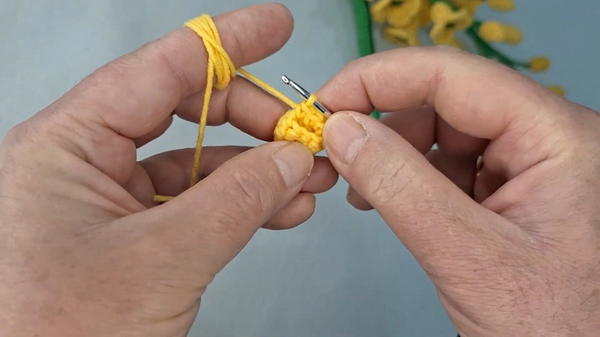
Round 2:
- Without tightening the ring, insert your hook in the slip stitch of the previous round.
- Work 8 sc evenly into the same place.
- Be sure to insert exactly where the thread was slipped to maintain stitch count.
Round 3:
- Slip stitch to the front of the last row’s slip stitch.
- Work 8 sc again into the same space for this round.
Round 4:
- Repeat the steps as in previous rows: slip stitch and make 8 sc tightly into the same place.
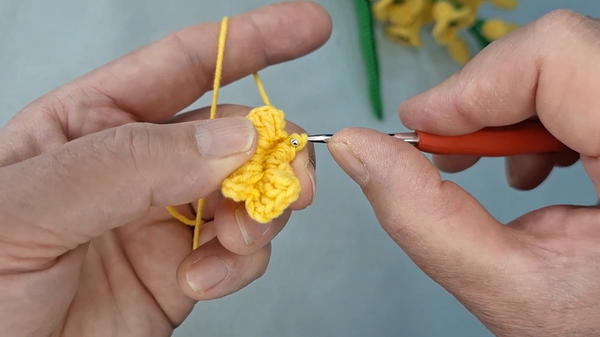
Leaf Creation
- After completing the 4th round, chain 3.
- Make 3 dc into the next eyeball (chain space or stitch next to last work).
- Chain 3 again, and secure with a sl st to the next eyeball.
- Repeat the chain 3, 3 dc, chain 3 sequence until you have created 4 leaves around your flower ring.
- Finish by cutting the yarn.
Bud Pattern
Ring Foundation for Bud
- Make a magic ring or loop and work 6 sc tightly into the ring without tightening the ring immediately.
Tightening and Shaping
- Work around the ring without slip stitching to prevent decreasing stitch count.
- Gradually decrease the number of stitches by skipping stitches as you crochet (e.g., skip every other stitch) to shape the bud.
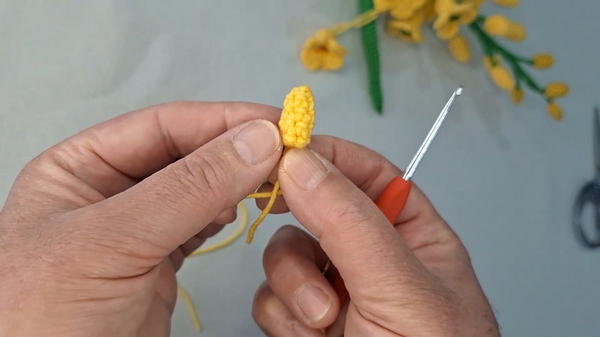
- Continue decreasing until the bud forms a tapered, rounded shape.
Assembly
- Insert a piece of wire through the center of the flower and bud to create stems.
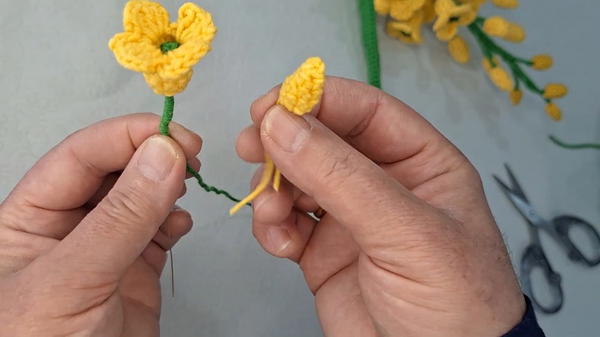
- Wrap yarn tightly around the middle stem part of the flower.
- Fold the wire in half for firmness.
- Bend the wire ends and secure them without pulling too far down to avoid visibility.
Special Features
- Adjustable ring foundation allows seamless round beginnings.
- Leaf sections formed by chain spaces and double crochets create a delicate floral look.
- Wire stems provide structure and flexibility for arranging flowers.
- Simple stitch repetition makes this a great beginner project.
Difficulty Level
Beginner to Intermediate – Basic Crochet stitches with simple shaping and wire handling.
Tutor’s Suggestions
- Don’t tighten the magic ring too much at the start, so you can maintain the correct stitch count.
- Insert your hook precisely where you slip stitched in the previous round to avoid reducing stitch numbers unintentionally.
- Use floral wire for sturdy yet bendable stems; wrap in yarn for a neat finish.
- Practice leaf double crochet groups on a small swatch before starting the flower.
Uses
- Decorative flower bouquets
- Embellishments on hats, scarves, and bags
- Jewelry like brooches or hairpins
- Home décor in vases or craft projects
Tip
Carefully tighten your yarn at the end after inserting the wire, so the flower holds its shape without warping. This finishing ensures your lily of the valley stays beautiful and durable.
Conclusion
With simple stitches and easy shaping, this crocheted Lily of the Valley flower and bud pattern offers an elegant way to bring nature’s charm into your crafts. Suitable for beginners and adaptable for various color choices, these flowers are perfect for gifts, decorations, or adding a handmade touch to your wardrobe.