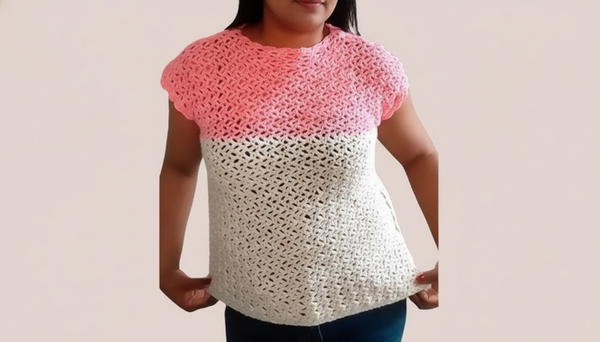
Wear a fresh look with a Crochet Spring Top Pattern that feels light, bursts with color, and is perfect for sunny days, picnics, or casual outings.
A light and airy top like this is perfect for the fresh and lively days of spring. It’s made with soft yarn that feels gentle on your skin, keeping you cool and comfortable when the sun shines bright. The pretty design shows delicate patterns that look like blooming flowers or gentle breezes, bringing the joy of spring right to your wardrobe.
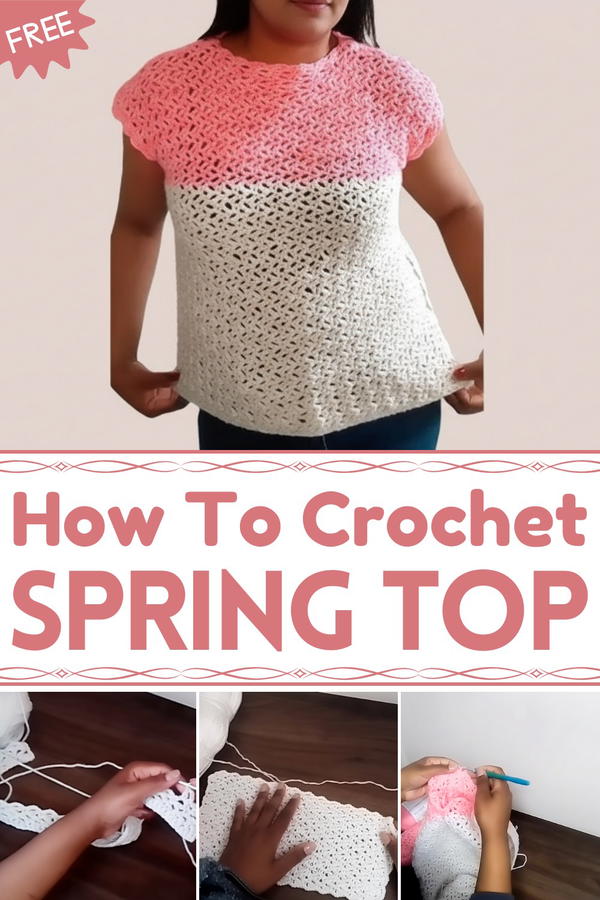
Trendy Crochet Spring Top Pattern for Effortless Spring Looks
Its bright and cheerful colors make you feel happy and ready for any adventure, whether you’re visiting friends, enjoying a sunny picnic, or simply taking a walk outside. The top fits nicely and moves with you, making every step feel easy and free.
Easy to create with simple steps, this top is perfect for beginners who want to try something fun and beautiful. Wearing this top means carrying the spirit of spring wherever you go—fresh, lively, and full of warmth!
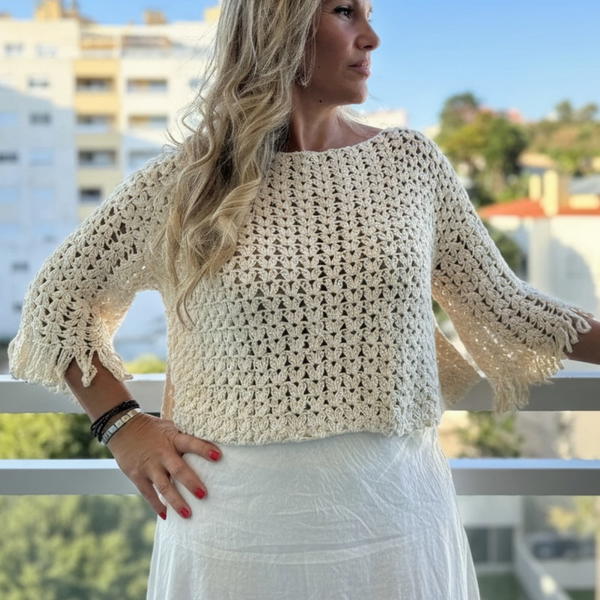
Easy Crochet Two-Tone Top Pattern
Special Features
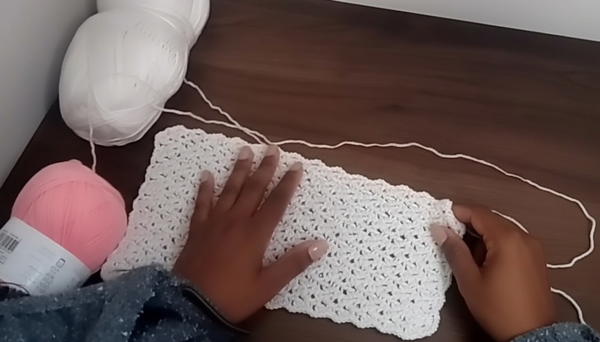
- Easy-to-make rectangular panels joined with single crochet seams
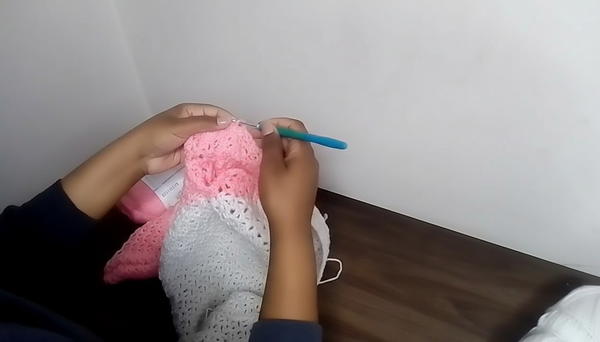
- Two-tone color design for a modern look
- Simple stitch pattern using sc and dc with chains
- Seam-free joining with single crochet
- Customizable with your own measurements
Difficulty Level
Beginner to Intermediate — Requires knowledge of chain, single crochet, double crochet, working in rows, and simple seaming using single crochet join.
Materials Needed:
- Two contrasting yarn colors (any yarn 4-ply or similar)
- 3.5 mm crochet hook
- Scissors
- Darning needle for weaving ends
- Tape measure
Measurements Required:
- Bust circumference: Divide by 2 for front/back panel width
- Shoulder to waist length: Panel height
- Sleeve circumference: Divide by 2 for sleeve opening width
- Neck opening size: Usually 9 to 11 inches
Step-by-Step Pattern:
Step 1: Foundation Chain
- Chain length: Multiples of 3 + 2 to match bust / 2 measurement
- Example: chain 74 for sample. Keep chain loose for stretch.
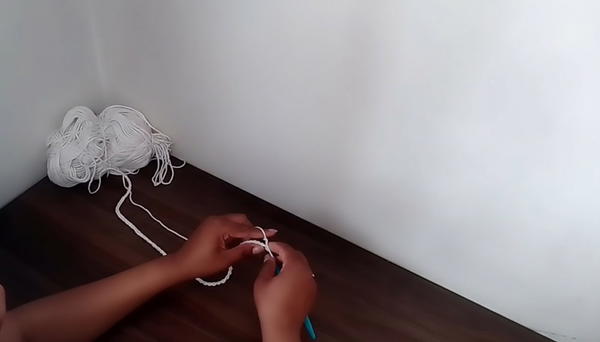
Step 2: Row 1 — Single Crochet Base
- In the 2nd chain from hook, work 1 single crochet (sc).
- Work sc in back loops only for a neater edge.
- Continue sc across row.
- Turn.
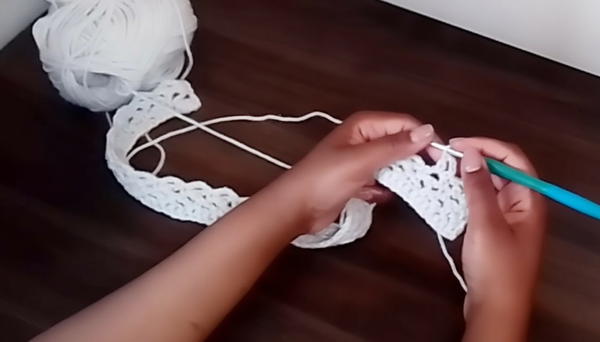
Step 3: Row 2 — First Pattern Row
- Chain 1.
- Work 1 double crochet (dc) in the same stitch.
- Skip 2 stitches, 1 single crochet in 3rd stitch, chain 3.
- Work 1 dc in the same stitch.
- Repeat skip 2, sc, ch 3, dc same stitch across row until 3 stitches remain.
- For remaining stitches: skip 2, sc, chain 3, dc in last stitch.
- Turn.
Step 4: Row 3 — Second Pattern Row
- Chain 1.
- Work 1 single crochet in same stitch.
- In each chain-3 space, work:
- 1 sc, chain 3, and 1 dc in same chain space.
- Repeat across row.
- End with 1 sc in the last stitch.
- Turn.
Step 5: Row 4 — Repeat Pattern Row
- Chain 1.
- Work 1 dc in same stitch to keep edges straight.
- In each chain space, work:
- 1 single crochet, chain 3, 1 dc.
- Repeat until end of row.
- Turn.
Step 6: Repeat Rows 3 and 4
- Continue alternating Rows 3 and 4 until reaching the length: (Shoulder to waist length) – (half the sleeve circumference)
- Example: total 30 rows for sample.
- End on Row 4.
Step 7: Change Color for Sleeve Section
- Cut yarn and tie in second color at end of last row.
- Chain 1, turn.
- Single crochet in same stitch and continue pattern using the second color to create the sleeve width equal to half your sleeve circumference.
Step 8: Make Two Rectangles
- Repeat all the above steps to make two identical panels (front and back).
Step 9: Join Rectangles at Shoulders and Sides
- Lay panels right sides facing.
- Use stitch markers to mark neck opening (approx 9-11 inches) and sleeve openings (half sleeve circumference).
- Single crochet join shoulders, leaving neck opening unjoined.
- Single crochet join sides, leaving sleeve openings free.
- Join using single crochet to get a neat seam (no sewing needed).
Step 10: Sleeve Finishing
- With yarn attached, work 1 round of single crochet evenly around sleeve openings.
- Work 2nd round repeating 2 sc in dc row, 1 sc in sc row sequence for neat edge with correct stitch count.
- Fasten off and weave ends.
- Repeat for other sleeve.
Step 11: Neckline Finishing
- Join yarn on neckline edge.
- Work 2 rounds of single crochet around neckline edge.
- Maintain same sc counts and finish neatly.
- Fasten off and weave in ends.
Tutor’s Suggestions:
- Work in the back loops of foundation chains for neat edges.
- Use stitch markers to mark seam and opening areas precisely.
- Alternate single and double crochets with chains to get lace-like texture.
- When joining with sc, work evenly and pull yarn snugly to avoid gaps.
Uses:
This top makes a chic summer piece paired with jeans, skirts, or shorts. Its light airy design and two-tone pattern add flair to casual or dressy looks.
Tip:
Always block your pieces before joining to ensure proper shaping and easy seaming.
Conclusion:
This easy two-tone crochet top is perfect for crocheters who want a quick, stylish wearable project. With simple stitches and no-sew joining, it’s an excellent introduction to garment-making and color work.
https://www.youtube.com/watch?v=kEkZQyZg2pU