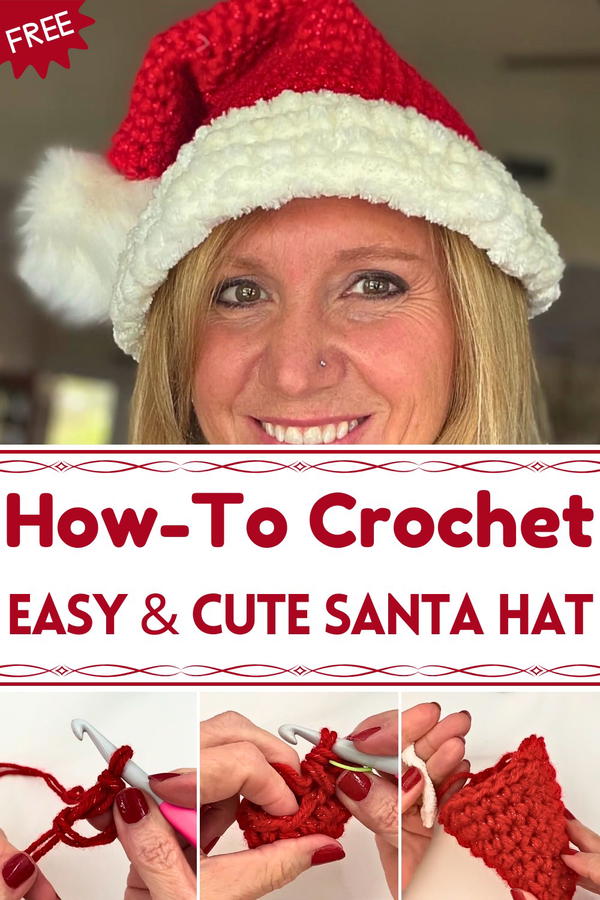
Spread holiday cheer with this Free Crochet Santa Hat Pattern, fun for festive parties, cozy photos, or adding a joyful twist to your winter style.
The sight of a bright red Santa hat instantly brings back childhood memories of laughter, joy, and festive gatherings filled with warmth. The Free Crochet Santa Hat pattern captures that same cheerful spirit in a cozy handmade version perfect for the holiday season. With its soft texture and classic pom-pom top, this crochet hat adds a playful yet timeless touch to Christmas celebrations, family photos, or winter outings.
Adorable Crochet Santa Hat Pattern Everyone Will Love
Comfortable to wear and easy to adjust in size, it suits both adults and children, making it ideal for matching holiday accessories or themed parties. The project offers a peaceful and satisfying experience, helping makers relax while improving focus, rhythm, and stitch precision. The Free Crochet Santa Hat pattern also makes a thoughtful gift for loved ones, spreading seasonal joy in a personal way.
Whether worn at festive events, displayed as holiday décor, or included in handmade gift sets, this charming hat adds warmth and cheer wherever it appears. It’s lightweight, durable, and endlessly customizable, allowing endless color combinations and styles to suit every personality. A true holiday favorite, this crochet Santa hat brings together comfort, tradition, and creativity to celebrate the most wonderful time of the year.

Step-by-Step Details
1. Materials Needed
- Red Yarn: The tutorial uses Red Heart Super Saver Metallic in red, held with double strands for added thickness and a festive metallic shine. If you have chunky yarn in red, you can use that instead.
- White Yarn: A chunky and soft white yarn, such as Royal Velvet, is used for the brim to give it extra fluff and texture.
- Crochet Hook: An 8mm crochet hook that works well for both the red and white sections, despite the white yarn's suggested hook size being larger.
- Other Tools: A stitch marker to keep track of rounds, a pair of scissors, and a tape measure to check the size.
- Pom Pom (Optional): The tutor recommends a store-bought pom pom to save time and reduce shedding, but you can make your own if preferred.
Tutor Tip: Using double strands of red yarn is an easy way to create the appropriate thickness without needing chunky yarn.
2. Measuring for the Hat
- Wrap a tape measure around the person’s head just above the ears, from the forehead to the back of the head.
- For reference, the instructor used her own head measurement of 19–20 inches to guide the tutorial.
The width of the hat should be half the head circumference when folded flat. For example, a head measuring 20 inches will require the hat to be about 10 inches wide (or slightly less, as the material stretches).
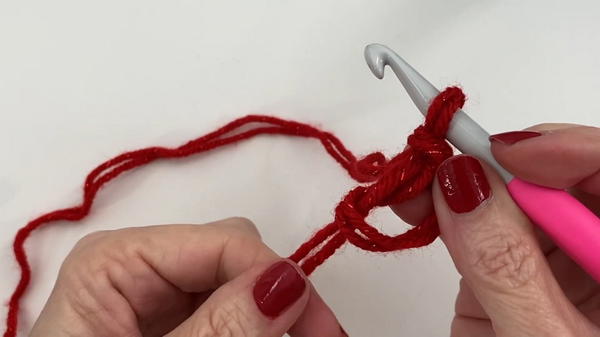
3. Starting the Hat’s Base (Red Yarn)
- Create a magic circle to begin, or use an alternative starting method (chain 3 and slip stitch to form a loop).
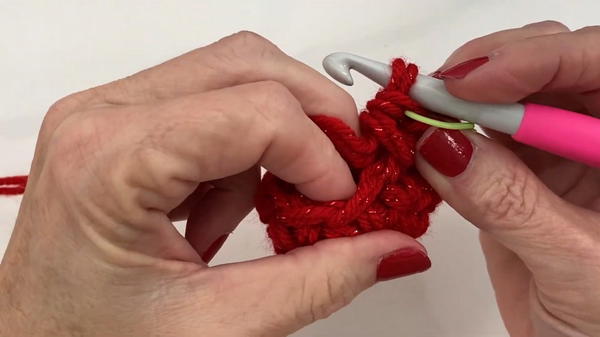
- Work in multiples of 3, gradually increasing the stitch count in each round to form a cone shape.
Steps for Rounds:
- Round 1: Start with 6 single crochets into the magic circle.
- Round 2: Increase to 9 single crochets by working 1 single crochet in the first stitch, 2 single crochets in the next stitch (repeat the pattern around the circle).
- Round 3: Work 9 single crochets (no increases).
- Round 4: Increase to 12 single crochets (2 single crochets, then 2 in the next stitch).
- Round 5: Maintain 12 single crochets without increasing.
- Round 6: Increase to 15 single crochets (3 single crochets, then 2 in the next stitch).
Continue this pattern: alternate an increase round with a round where you maintain the current number of stitches, until the base of the cone is half the width of the intended head measurement.
Tutor Suggestion: Use a stitch marker to track the beginning of rounds, as you’ll be working in continuous spirals without slip stitching to close each round.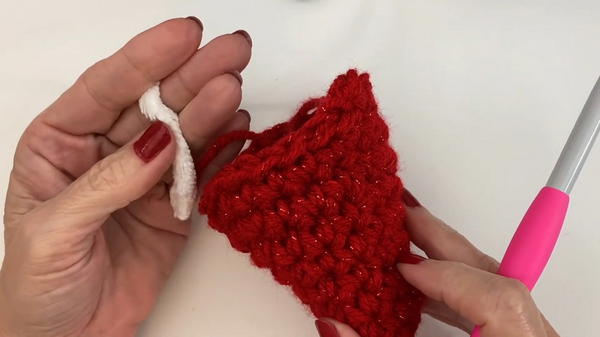
4. Adding the Brim (White Yarn)
Once the base of the hat is complete:
- Attach the white yarn at the bottom edge of the hat, ideally at the back to hide the join.
- Work 3–4 rounds of single crochets using the white yarn. The chunky texture naturally widens the brim, so no additional increases are necessary.
If the white yarn you use is thinner than the tutorial’s yarn, consider adding a few increases to ensure the brim is wide enough.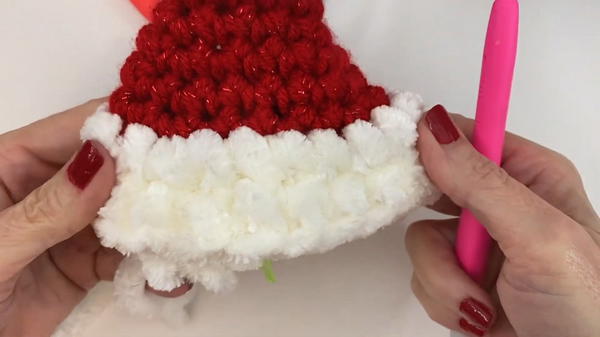
5. Fastening Off and Weaving Ends
- Once the brim reaches the desired width, finish with a slip stitch, cut the yarn, and neatly weave in the ends.
- Leave the tail from the red yarn at the top of the hat untouched until after you’ve secured the pom pom.
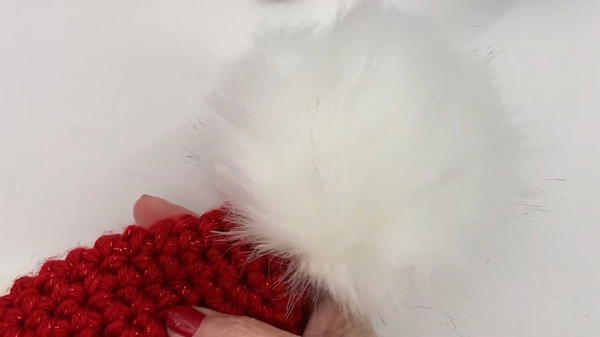
6. Adding the Pom Pom
- Store-Bought Pom Pom: Attach it to the top of the hat using a needle or by knotting the loops of the pom pom securely into place. The instructor recommends this method for durability, as store-bought pom poms are less likely to shed compared to handmade ones.
- Handmade Pom Pom: Alternatively, make your own pom pom:
- Wrap white yarn around your hand about 50 times.
- Slide the loops off your hand and tie them tightly at the center with another piece of yarn.
- Cut through the loops and trim the pom pom into a round shape.
Special Features
- Beginner-Friendly: Uses only single crochet stitches, making it perfect for first-time crocheters.
- Quick to Make: The hat can be completed in 1–1.5 hours.
- Customizable: You can adjust the size, brim width, and type of pom pom to personalize the hat.
- Festive Look: The red metallic yarn and fluffy white brim add a cheerful and traditional holiday feel.
Level of Difficulty
The project is beginner-friendly, as it involves basic stitches and minimal techniques. The primary skills needed are working in the round, increasing stitches, and switching yarn colors.
Tutor’s Suggestions
- Use a stitch marker to avoid losing track of rounds while crocheting.
- Stick to simple single crochets for a clean and even look.
- If you want a softer, more luxurious look, choose plush or velvet yarns for both the red and white sections.
Uses of the Santa Hat
- Festive Wear: A fun and playful accessory for the holiday season.
- Holiday Décor: Can be displayed on a shelf, used as a tree topper, or added to other festive decorations.
- Handmade Gift: A thoughtful and personalized present for friends or family.
Final Tip
If you’re making this hat for a child or someone with an extra-small head circumference, reduce the starting stitches in your magic circle and modify the increase pattern to ensure it fits properly.
Conclusion
This crochet Santa hat is a fun and simple craft project perfect for beginners. With its festive look and customizable design, it’s a great way to spread the holiday spirit. Whether you’re crafting it for yourself, as a gift, or as part of your holiday décor, this project is sure to delight.


