Drift into winter charm with this Free Crochet Snowflakes Pattern, adding delicate beauty, festive sparkle, and a cozy handmade touch to seasonal décor.
Every snowflake carries a unique form, a natural reminder of how beauty can exist in the smallest details. That same charm can be brought indoors through the Free Crochet Snowflakes pattern, allowing delicate yarn to capture the quiet elegance of falling snow. Each stitch comes together to form intricate lace-like shapes that mirror the wonder of real snowflakes—light, graceful, and perfectly distinct.
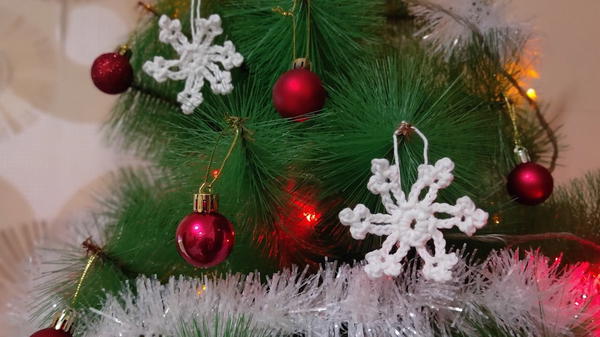
Classic Crochet Snowflakes Pattern to Decorate Your Tree

These crochet snowflakes can be used in countless ways, from adorning Christmas trees and window frames to decorating gift wraps or festive tables. Their airy texture and soft shine add a magical touch to any winter setting while remaining timeless enough for year-round use. The pattern suits crocheters of various skill levels, offering both a relaxing project and a rewarding result.
Worked in white or shimmering thread, these snowflakes can be stiffened for ornaments or left soft for a delicate accent on scarves, blankets, or table runners. Each handmade snowflake becomes a small piece of art, filled with patience and care, reflecting the beauty of handcrafted detail and the joy of sharing something made with heart.
Materials Needed
1. Yarn
- Cotton yarn (D27): This is the yarn used to create the snowflake. Any lightweight yarn works for this project, but white, silver, or gold yarn gives a festive winter look.
- Alternative Option: White polyester yarn can also be used for a softer, fluffier finish.
2. Crochet Hook
- Hook size 5 (2.5 mm): Ensure the hook size matches the thickness of your yarn for the best results.
3. Additional Tools
- Stitch marker: Helps identify the starting stitch.
- Scissors: For cutting the yarn.
- Optional hanger materials: String or yarn for making a loop to hang the ornament.
Step-by-Step Instructions
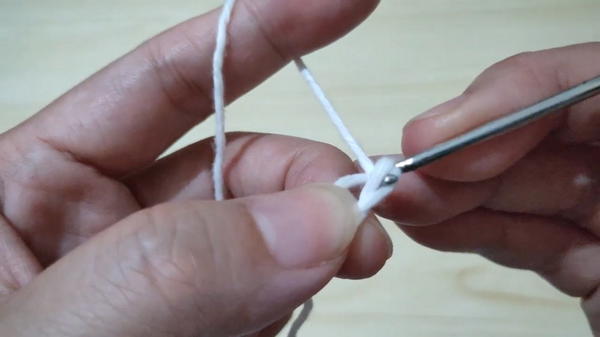
Step 1: Create the Center of the Snowflake
Start with a Slip Knot:
- Make a slip knot to begin the project.
Make a Chain Loop:
- Chain 5 and then join the first and last chains together with a slip stitch to form a small ring.
- Chain 5 and then join the first and last chains together with a slip stitch to form a small ring.
First Round – Single Crochet Base:
- Work a single crochet (SC) into the loop. To help keep track, place a stitch marker in the first SC.
- Continue making single crochets into the loop until you have 6 single crochets in total.
Close the Round:
- Join the last stitch to the first stitch with a slip stitch to complete the round.
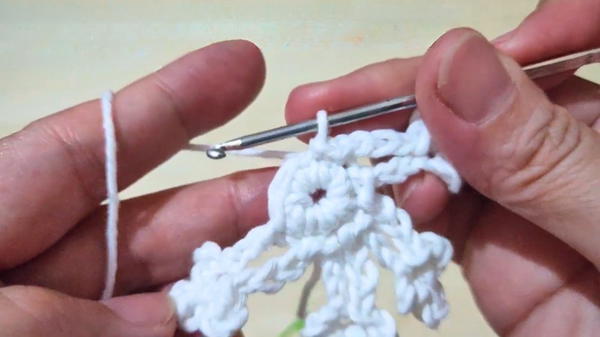
Step 2: Create the 'Spokes' of the Snowflake
Chain 6:
- After closing the first round, chain 6 to start creating the "spokes" of the snowflake.
Add a Small Loop:
- In the 3rd chain from the hook, make a slip stitch to form a small loop.
Create a Midpoint Loop:
- Chain 3 and then make another slip stitch in the 3rd chain (directly after the existing loop).

- Chain 3 and then make another slip stitch in the 3rd chain (directly after the existing loop).
Repeat Loop Creation:
- Chain 3 again, slip stitch into the next stitch, and repeat until you’ve created a small chain loop. This loop sequence will add texture to the spoke.
Close the Spoke at the Base:
- Slip stitch into the next stitch on the base of the snowflake to finish the spoke.
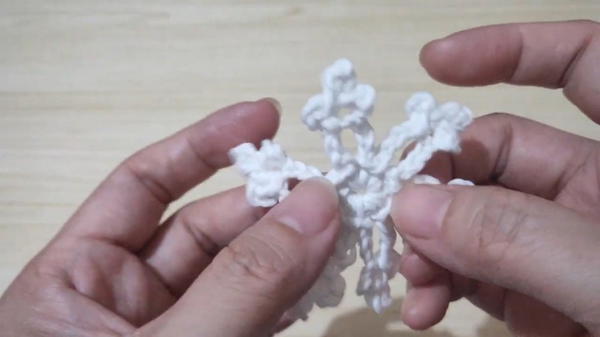
Repeat for All 6 Spokes:
- Continue this process to create 6 evenly spaced spokes around the center of the snowflake. Make sure all spokes are symmetrical for a balanced design.
- Continue this process to create 6 evenly spaced spokes around the center of the snowflake. Make sure all spokes are symmetrical for a balanced design.
Step 3: Finishing the Snowflake
Fasten Off:
- After completing the last spoke, fasten off the yarn. Use scissors to cut the yarn and weave in the loose ends with a tapestry needle.
Add Optional Hanger:
- If you want the ornament to hang, attach a small loop of yarn or string to the back of the snowflake. This makes it ideal for hanging on a Christmas tree.
- If you want the ornament to hang, attach a small loop of yarn or string to the back of the snowflake. This makes it ideal for hanging on a Christmas tree.
Special Features
- Lightweight Design: Weighing only a few grams, these snowflakes are perfect for hanging on delicate branches.
- Eco-Friendly Option: Utilize leftover yarn for this project, reducing waste and saving resources.
- Customizable Sizes: By varying the yarn thickness and hook size, you can create larger or smaller snowflakes.
Level of Difficulty
- Beginner-Friendly: This project involves basic crochet stitches (chain, slip stitch, and single crochet), making it accessible even to those new to crocheting.
Tutor’s Suggestions
- Use a Stitch Marker: It’s helpful for tracking the first stitch of each round, ensuring accurate counts for the snowflake's symmetry.
- Adjust Yarn: If you don’t have cotton yarn on hand, use any lightweight yarn or leftover scraps to achieve a similar look.
- Experiment with Colors: While white is a classic choice, experimenting with silver, blue, or even glittery yarn can give your snowflakes a unique and festive touch.
Uses
- Christmas Ornaments: Hang them on a tree using a simple loop.
- Gift Decoration: Attach them to wrapped presents as a creative decorative element.
- Home Decor: Use them to embellish wreaths, windows, or garlands.
- Accessories: Sew them onto bags, hats, or scarves for a fun winter look.
Tip for Success:
When working with chains and slip stitches, keep your tension consistent. Loose stitches will make the snowflake look sloppy, while overly tight stitches can make it difficult to work in the loops. Practice even tension for the best results.
Conclusion
This crochet snowflake ornament is a versatile and beginner-friendly project, perfect for the holiday season. By following simple steps and utilizing basic stitches, you can create beautiful and festive snowflakes to decorate your home or give as handmade gifts.


