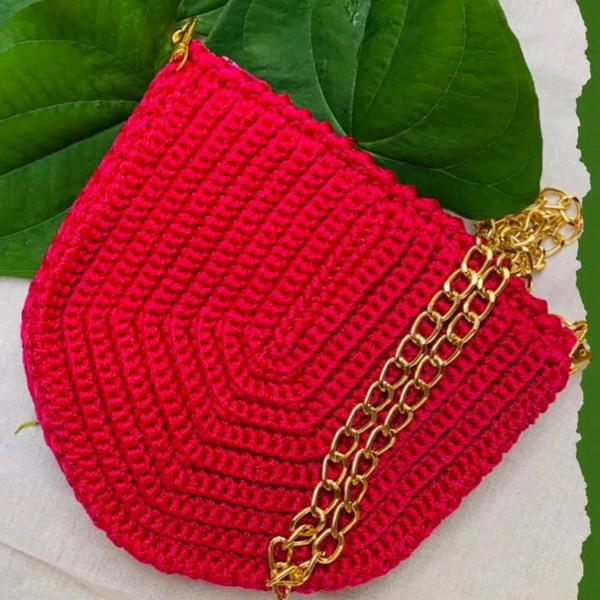
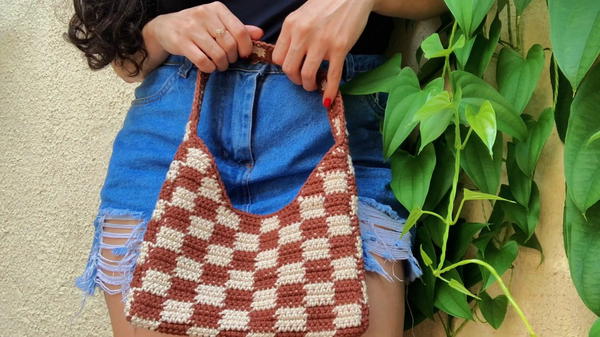
Brighten your outfit with a Crochet Checkered Plaid Bag Pattern that feels strong, looks cheerful, and makes errands, outings, or casual days more fun.
Vibrant colors and playful squares come together to create a stylish and cheerful accessory that catches everyone’s eye. The checkered plaid pattern gives it a lively and fun appearance, making it perfect to carry anywhere from shopping trips to casual outings. Soft yarn makes it comfortable to hold, while its strong, well-made design keeps your belongings safe inside.
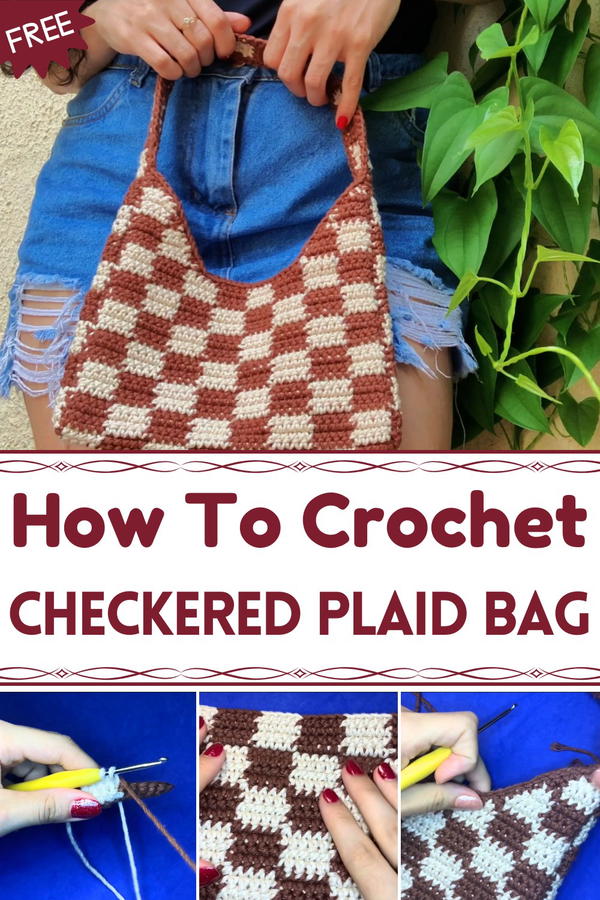
Modern Crochet Checkered Plaid Bag Pattern for Practical Use
The roomy space fits all your daily essentials like phone, wallet, and small snacks, making it both beautiful and practical. Handmade with care, this bag has a special, unique charm that adds personality to any look. The easy-to-carry strap lets you wear it on your shoulder, keeping your hands free to enjoy your day. Whether heading out with friends or running errands, this cheerful and sturdy bag brings both style and convenience wherever you go.
Crochet Checkered Bag Pattern
Materials Needed:
- Baroque yarn number 6 – Beige and Light Brown colors (or colors of your choice)
- Crochet hook size 3.5 mm
- Scissors
- Tapestry needle for sewing and weaving ends
- Stitch markers (optional)
Difficulty Level:
Beginner to Intermediate.
Easy stitch pattern (single crochet only), but involves color changes and shaping for a polished finish.
Special Features:
- Attractive two-tone checkered pattern in blocks of 5 single crochets
- Customizable size by adjusting the number of chains in multiples of 5
- Practical rectangular shape with side panels and handles
- Seamlessly carried yarn threads inside stitches for a clean look
- Neat finishing with hand-sewn edges and single crochet borders
Step-by-Step Pattern Instructions:
Step 1: Foundation Chain
- Chain 40 stitches (or increase in multiples of 5 for a bigger size). Bia increased her chain up to 55 for extra width.
- This chain length will determine the width of your bag. Measure to see if the chain matches your desired size (Bia’s 40 chains measured about 23 cm initially, ending at 25 cm after sides).
Step 2: Begin First Row - Single Crochet (sc)
- Chain 1 more to start the first row.
- Skip the first chain from the hook, and make 1 single crochet (sc) in each chain across (in the second chain and onward), making a total of 40 sc stitches.
- Pull yarn through both loops on the hook to complete each sc.
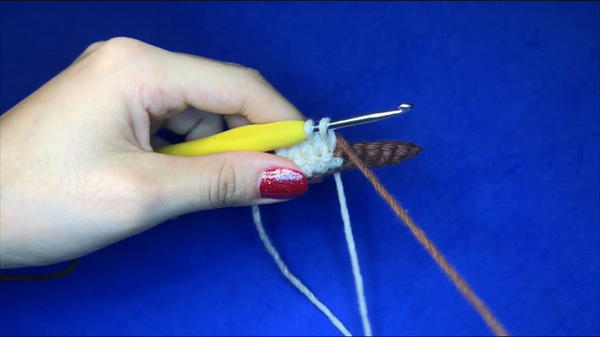
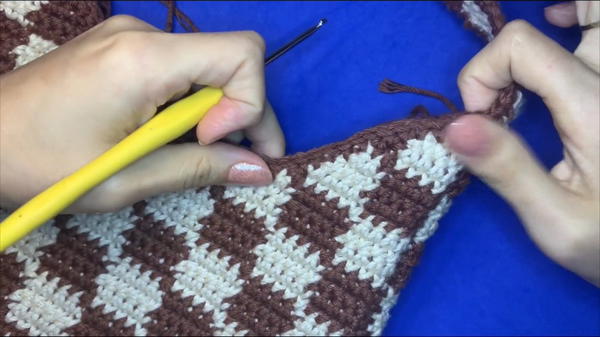
Step 3: Color Blocking with Groups of 5 sc
- Work in blocks of 5 single crochets for each color.
- For the first block of 5 stitches, use the light brown color.
- On the 5th stitch of each color block, do not complete the last two yarn overs with the current color. Leave these loops on the hook.
- Grab the new color yarn and pull through the loops to finish the stitch with the
 new color, smoothly changing colors without cutting yarn.
 - Carry unused yarn inside stitches to keep the fabric neat and avoid tangles.
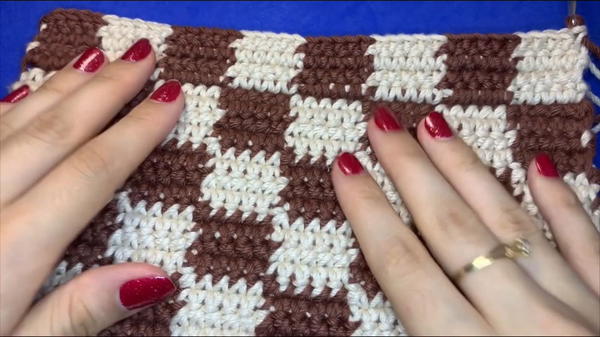
Step 4: Continue Row 1 with Alternating Color Blocks
- Continue making blocks of 5 single crochet stitches alternating between brown and beige (or your chosen contrasting colors).
- Repeat until the entire row is complete.
- Check your stitch count carefully to maintain your multiples of 5 blocks (Bia had 44 stitches at one point due to side increase).
Step 5: Work the Following Rows - Color Pattern
- Chain 1 and turn your work.
- Continue making single crochet stitches across, following the same 5 sc color block pattern, switching colors every 5 stitches using the same color-changing method described above.
- Carry the unused yarn along the row inside the stitches for a tidy look.
- Alternate 4 rows of one color followed by 4 rows of the other color to create a checkered effect in blocks. Bia worked 19 rows before adjusting size.
Step 6: Build the Side Panels and Bag Depth
- After finishing the main rectangular front and back panels, crochet side panels.
- Chain 4 stitches to match the height of 4 rows on the main panels to create side thickness.
- Work 4 rows of single crochet stitches on the side panels following the same color pattern to align with the main piece.
- Sew or crochet side panels in place to form the bag’s body.
Step 7: Shaping with Decreases for Curve (Optional)
- To add shape, gradually decrease stitches at sides by skipping stitches at the start/end of rows.
- Bia reduced 1 stitch per row for a gentle curve, later increasing to 2 stitches per row for a wider curve.
- Continue decreasing until reaching desired bag shape, ending with 3 stitches for a neat finish.
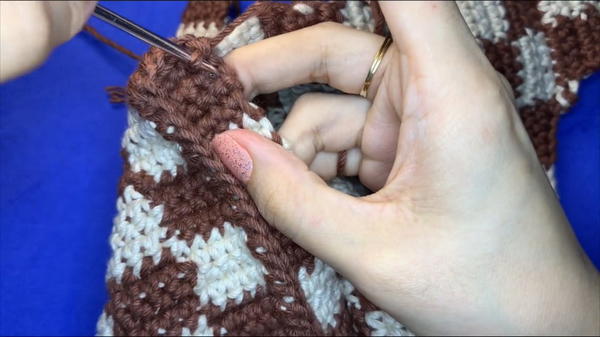
Step 8: Seam and Join Pieces
- Using yarn and a tapestry needle or crochet hook, sew the front, back, and sides together.
- Use a neat single crochet seam on the inside for durability and a clean look.
- Bia recommends sewing with tight, even stitches to avoid gaps.
Step 9: Make the Handles/Strap
- Crochet long chains thick enough to go over your shoulder or hold comfortably.
- Use three yarn strands together for a thicker strap, crocheted with hook size 3.5 mm for durability.
- Attach the handles securely to the bag sides with sturdy stitches and optionally add decorative beads or tips.
Step 10: Finishing Touches
- Work single crochet edging around the bag’s opening and handles for a polished look.
- Weave in all loose yarn ends carefully inside stitches to hide them and prevent unraveling.
- Adjust tension and straighten seams as needed.
Tutor’s Suggestions:
- Keep yarn tension consistent for uniform stitch size.
- Carry unused yarn inside stitches to prevent tangling and thicker appearance in the fabric.
- Alternate carrying yarn colors in front and back to avoid knots.
- Feel free to customize size by increasing chains and rows in multiples of 5 as shown.
- Hand sew seams for a professional finish and extended bag durability.
Uses:
- Stylish everyday handbag or tote for small essentials
- Perfect project for beginners to practice color changes and simple shaping
- Suitable as a handmade gift or market bag
Tip:
To avoid yarn tangling during color changes, always pass the unused yarn either consistently in front or behind your work and maintain this pattern throughout. This little habit keeps your work neat and reduces frustration.
Conclusion:
This checkered crochet bag showcases how simple stitches combined with thoughtful color changes can create a striking and functional accessory. The pattern’s flexibility allows you to tailor the bag to your preferred size and style. With practice, anyone from beginner to intermediate crocheters can master the color switch technique and create a beautifully finished piece.