Stitch your way to standout style with this delightful crochet checkered bikini top pattern that’s perfect for sunny days and beach vibes!
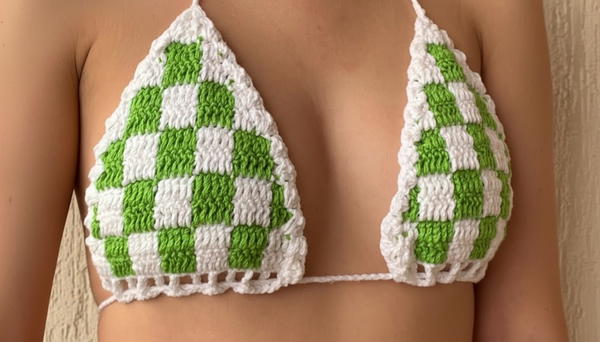
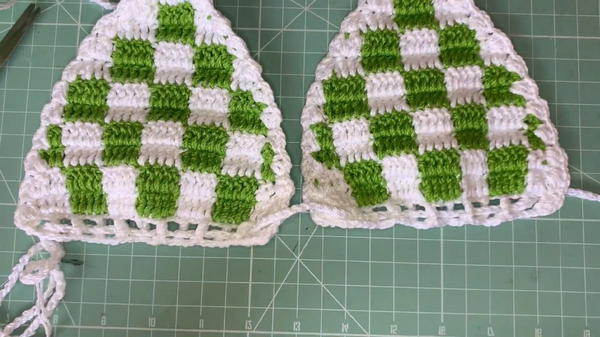
Not all bikini tops are comfortable or unique, but this one breaks the mold with its soft, checkered design that’s both fun and stylish. The bright colors and simple pattern create a cheerful look that’s perfect for sunny days by the beach or pool. Made with gentle yarn, it feels light and cozy on your skin, making it easy to wear all day long. Its neat squares add a playful touch that stands out in any crowd.
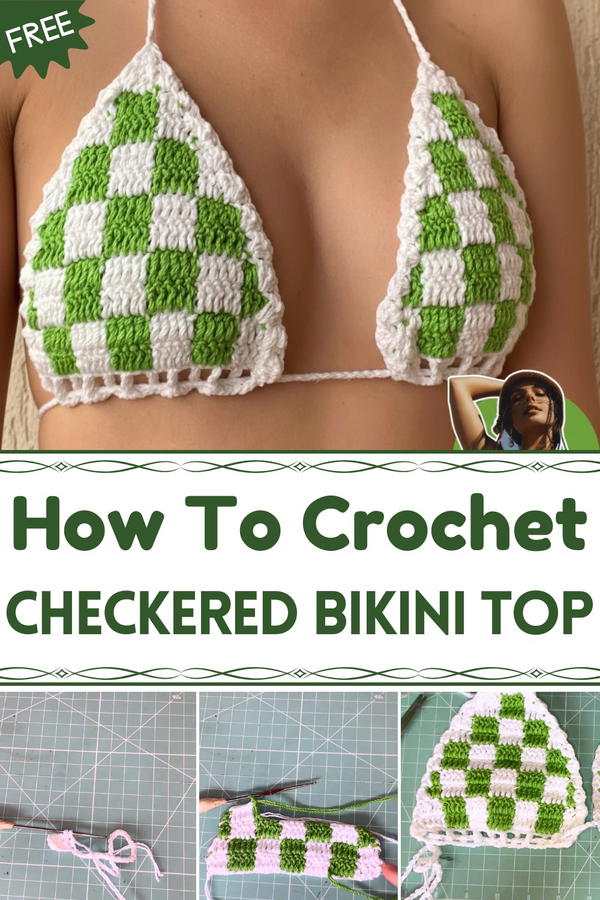
Vibrant and Easy Crochet Checkered Bikini Top Pattern for You
Whether you're lounging or playing, this top stays snug without being tight, giving you confidence and comfort. Easy to clean and quick to dry, it fits perfectly into a busy summer routine. This bikini top turns everyday swimwear into something special, combining everyday comfort with a joyful, handmade charm. It’s a great choice for anyone wanting a cute, practical, and eye-catching piece that brightens up warm days.
Crochet Checkered Bikini Top Pattern
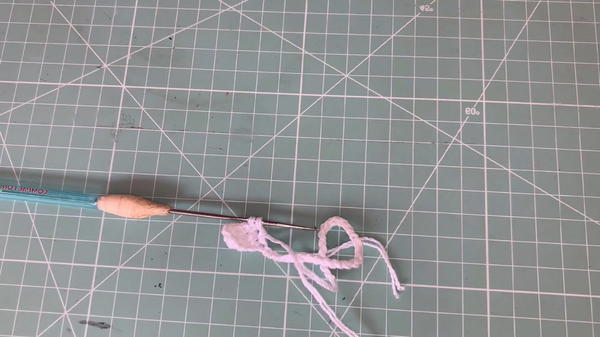
Materials
- Anne yarn (white and green) – double yarn strand
- Crochet hook size 2 mm
- Scissors
- Yarn needle for weaving in ends
Pattern Features
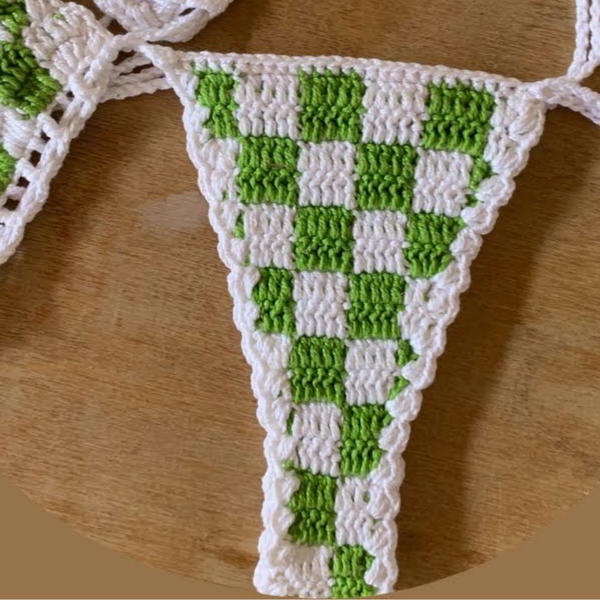
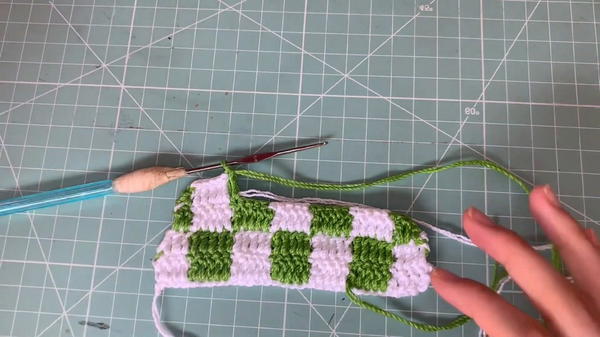
- Classic checkerboard pattern created with alternating clusters of five double crochet stitches
- Neat color changes with guided yarn technique for hidden yarn ends
- Size variations with chain count adjustments: size S (34 chains), M (36 chains), L (38 chains)
- Strategic increases and decreases for personalized shaping and fit
- Delicate finishing edge with single crochet and chain stitch details
- Side straps (cords) made with chains for comfortable neck and back ties
Step-by-Step Pattern
1. Start the Foundation Chain
- Chain 34 (for size S; modify to 36 or 38 for size M or L).
- Chain 3 more stitches to replace the height of the first double crochet (dc) in the row.
2. Row 1 – First Block of Color (White)
- Make a total of 5 dc stitches in white yarn, starting from 5th chain from hook, one stitch per chain.
3. Color Change to Green
- On the 5th dc, pull only two loops, then switch to green yarn and finish the dc with it (pull green yarn through last two loops).
- Continue with 5 green dc stitches to complete the green block.
- Keep yarn in front for the guided yarn technique, making sure white is hidden behind when working the green stitches.
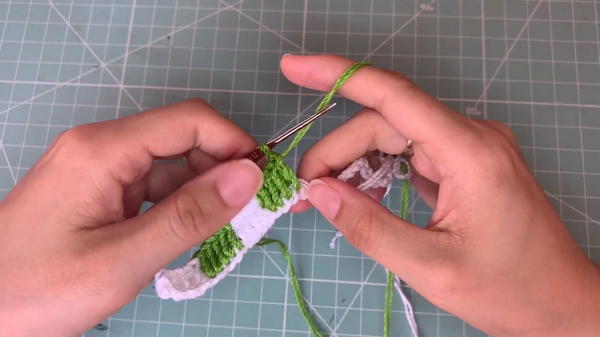
4. Alternate White and Green Blocks
- After completing the green block, switch back to white yarn using the same loop change technique on the last stitch of the block.
- Repeat the alternating 5-dc block pattern for the entire row, maintaining color changes clean and yarn guided inside.
5. Continue Rows Maintaining Checker Pattern
- Repeat rows alternating white and green blocks exactly as in the first row, keeping yarn tensions even.
- Make sure to guide yarns so color changes are nearly invisible and yarn ends are tucked inside.
6. Beginning Increases for Shaping
- After working a number of rows straight, begin increasing by making two dc stitches in the first and second-to-last stitches of rows.
- Alternate 4 rows with increases and one row with no increases, repeating until desired top length and width are reached.
7. Managing Color Changes in Increases
- Always ensure you finish each block color by pulling yarn of the new color through the last two loops of dc stitch, for smooth transition.
- Keep yarns guided inside the work to prevent loose ends.
- Change colors only at designated block endings to maintain neat checkerboard.
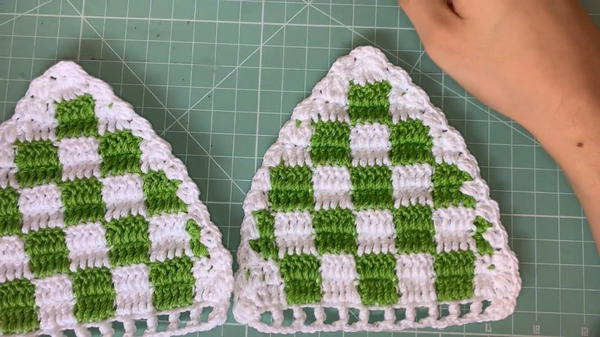
8. Decreasing Rows for Bust Shaping
- Begin decreasing rows to shape bust by skipping first stitch and last stitch of rows gradually over 6 rows.
- Maintain checkerboard pattern and color swapping during decreases.
- Keep stitches neat and yarns hidden according to established techniques.
9. Finishing Edge – Small Shell and Chains
- Finish with rows consisting of single crochets and chain stitches to create a delicate border.
- This adds a nice wave effect to the edge and further neatens the piece.
10. Create Neck and Back Ties
- Use a 2.5 mm hook to chain a long enough cord to tie comfortably around neck.
- Repeat for the other side for symmetrical ties.
- Also crochet a chain cord for the back tie that will fasten around torso, threading securely between blocks.
11. Assembly
- Weave all yarn ends securely into the fabric.
- Make sure ties are attached firmly and neatly.
- Block the finished bikini top to shape and settle stitches.
Tutor’s Suggestions
- Practice the guided yarn color change technique on a small swatch before starting.
- Follow size guidelines closely and adjust chain counts as needed for your body measurements.
- Use stitch markers at block edges to keep color changes aligned.
- Keep tension consistent for even block shaping and fabric flatness.
- For durability, securely weave in all tails before finishing.
Uses
- Perfect for stylish and vibrant swimwear.
- Great gift idea or a fun beach project.
- Customizable with your color choices and yarn types.
Tip
To keep color transitions smooth and tidy, always finish the last stitch of a color block with the new color by pulling the yarn through the last two loops of the stitch. This secured change keeps your bikini neat and professional looking.
Conclusion
This crochet bikini top with a checkered design is an eye-catching and fun project to create. The step-by-step color changes, careful increases and decreases, and smart finishing techniques allow you to produce a well-fitting, gorgeous piece. Follow these clear instructions, and your finished bikini will be a stylish addition to your summer wardrobe!