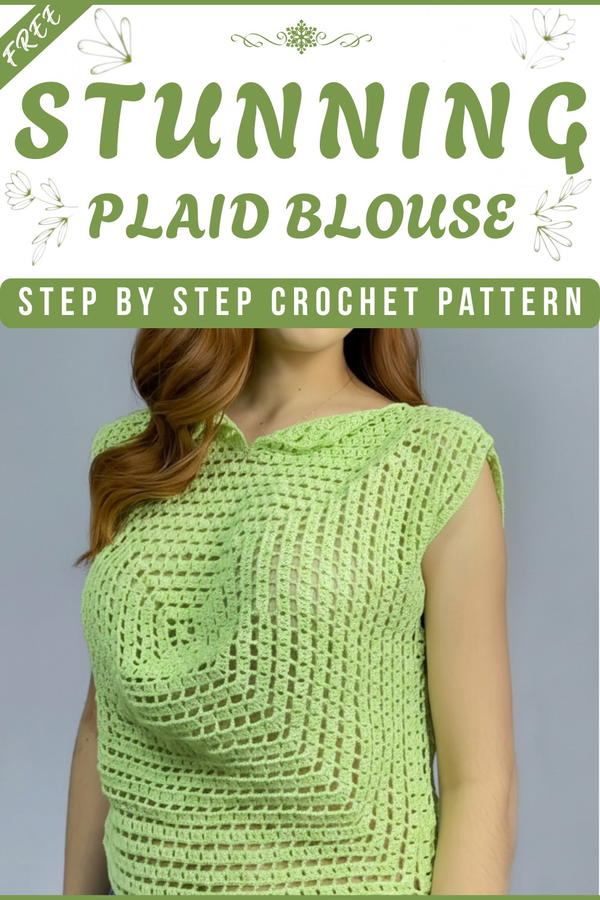
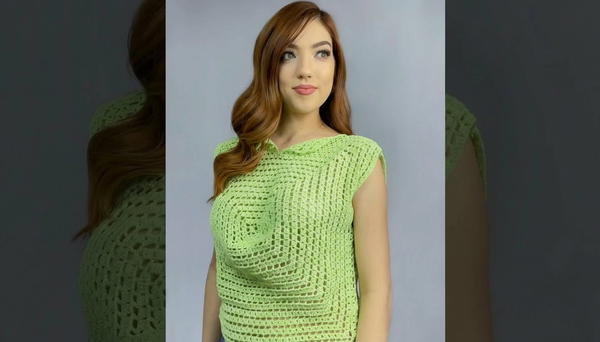
Fall in love with this stylish crochet plaid blouse pattern that's chic, and perfect for enhancing your everyday wardrobe with a touch of handmade charm.
Want to add charm and style to your wardrobe? This blouse radiates beauty and elegance, making every outfit feel extra special. With its timeless plaid design, the crochet plaid blouse pattern blends intricate artistry with a cozy, wearable look. Its unique texture and eye-catching appearance make it stand out, whether you're wearing it for a casual outing or layering up for chilly weather.
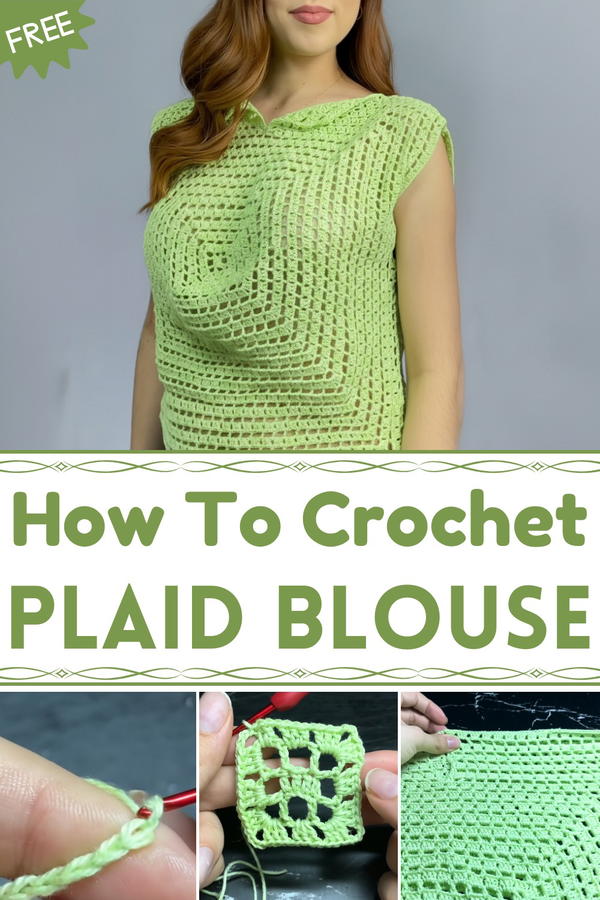
Crochet Plaid Blouse Pattern That’s Absolutely Stunning
Soft and versatile, this blouse pairs effortlessly with jeans, skirts, or even as a statement layer over dresses. Each stitch carries a touch of handmade love, turning it into more than just clothing—it’s a masterpiece. Whether for everyday wear or special occasions, it’s a cozy way to celebrate style and creativity while staying comfortable. Perfect for adding warmth, charm, and a pop of personality to your wardrobe, this blouse is your new favorite fashion piece.
Crochet Blouse – Step-by-Step Pattern
Materials Needed:
- Cotton Yarn: Dalia cotton by Omega is recommended (100% cotton).
- Crochet Hook: Size suitable for your yarn weight (used here: 2.5 mm).
- Scissors
- Yarn needle (optional for weaving seams).
- Measuring tape
- Medium-sized buttons (optional for accessory details like closures).
Pattern Instructions
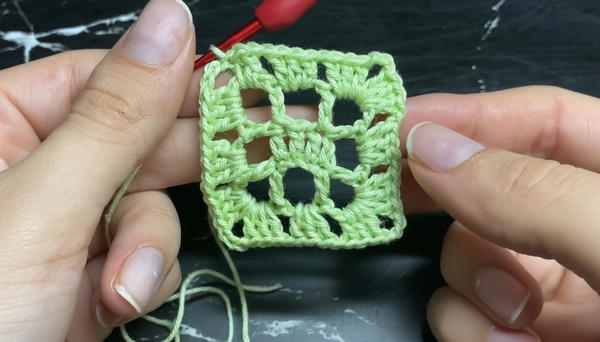
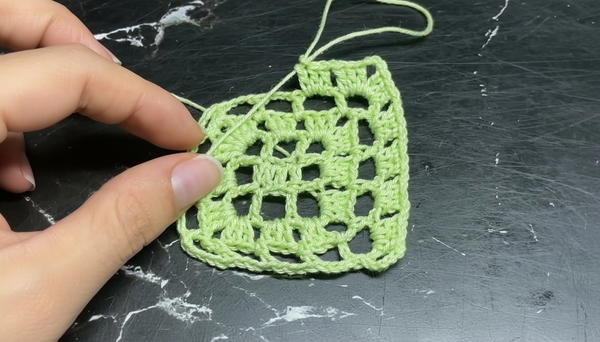
Step 1: Creating the Foundation Square
- Start with a slip knot.
- Chain 6 (CH) to form the center loop.

- Close the loop by inserting your hook into the first chain and making a slip stitch (SS).
Step 2: First Round (Building the Square Base)
- Chain 3 (CH 3) to begin forming the square (represents the first double crochet).
- Work 3 double crochets (DC) into the center of the circle.
- Separate with 3 CH (this forms one corner of the square).
- Repeat the following sequence 3 times:
- 3 DC into the center of the circle.
- 3 CH (for corners).
- Finish the first round with a slip stitch (SS) to the third chain of the starting chain (CH 3). You now have a basic square with four corners.
Step 3: Adding Layers to the Square
- Begin each round by chaining 6 (CH 6). This acts as the equivalent of a double crochet and 3 chains for the next corner.
- In each corner:
- Work 3 DC, CH 3, 3 DC into the corner chain space.
- In each gap (or space between clusters):
- Work 3 DC into the space and chain 1.
- Continue this pattern around the square for each round.
- Close each round with a SS to the third chain from the start.
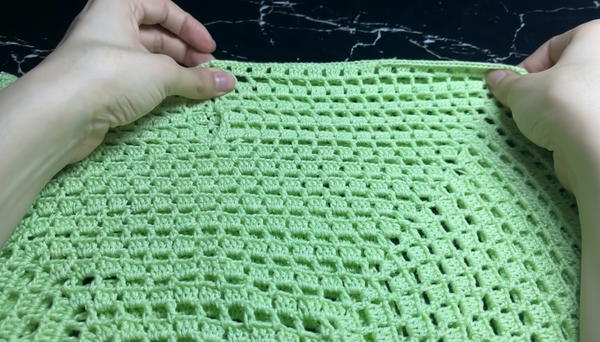
Step 4: Measuring and Customizing the Square
- For a medium size blouse, continue working rounds until the square measures approximately shoulder-to-shoulder width.
- For this tutorial, 35 total rounds were used, with alternating rounds of solid filled corners and openwork gaps (CH 1).
- The square will eventually form the back panel of your blouse.
Step 5: Creating the Front Panels
- To shape the front neckline, create another square, but stop 5 rounds earlier than the back panel. For example:
- Back panel: 35 rounds.
- Front panel: 13 rounds with 5 reserved for the neckline shaping.
- After completing the initial 13 rounds:
- Cut your yarn and secure the end.
Shaping the Neck Opening:
- Locate the center of the square panel (measure carefully).
- Join the yarn at the edge of one side of the center and begin shaping the neckline:
- Skip the center stitches to leave the neck opening.
- Work on either half of the square only.
- Continue the pattern for the remaining rounds, maintaining the square structure on both halves but leaving the neckline opening.
Step 6: Assembly
Joining the Back and Front Panels:
- Lay both pieces flat, with the wrong sides facing out for easy sewing.
- Seam the pieces together along the shoulders, leaving space at the neck opening.
- Use slip stitches (SS) or a yarn needle for an invisible seam.
- Seam the sides of the blouse up to the desired armhole opening for the sleeves.
Forming the Sleeves:
- To create short sleeves using the extended back and front panels, allow the blouse edges to hang loosely and flare slightly at the shoulders.
Special Features
- Difficulty Level: Advanced Beginner to Intermediate – The blouse uses simple stitches but involves shaping and assembly, making it a good practice for learning structuring techniques.
- Design Details: The alternating rounds of DC clusters and chain gaps give the blouse a delicate, lace-like appearance. The square motif keeps things simple and classic.
- Customizable Size: Adjust the square size by adding/subtracting rounds to suit your body measurements.
- Suggested Yarn: Cotton yarn keeps this blouse breathable and easy to maintain, while ensuring durability.
Conclusion
Your crochet blouse is now complete! This versatile design is great for casual wear, pairing with jeans or skirts, or as a swim cover-up. Lightweight and airy, it’s perfect for warmer days or layering in cooler seasons. The intricate square pattern adds elegance, while the open neckline gives it a modern touch.
Final Tip:
Take time to block your finished blouse before wearing to even out stitches and give it a polished look. To block, gently dampen the blouse, stretch it into shape, and lay flat to dry.