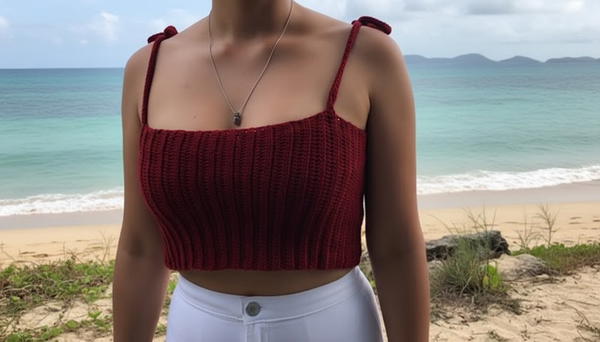
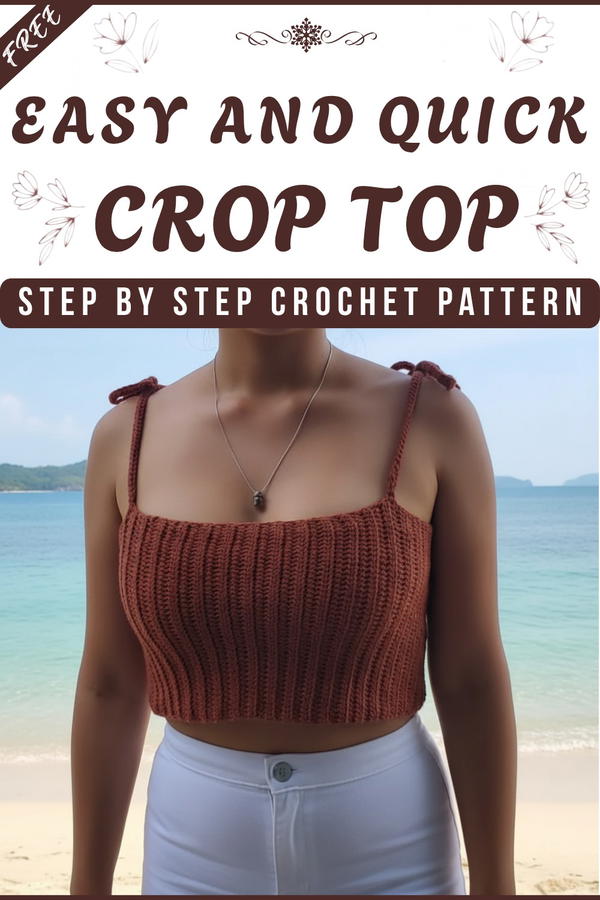
Show off your summer vibes with this Free Crochet Crop Top Pattern, a stylish and easy project that adds fun, comfort, and handmade flair to your wardrobe.
Sometimes a plain ball of yarn can feel ordinary, but with a few simple stitches it can become something stylish and fun to wear. The Free Crochet Crop Top pattern transforms basic yarn into a cute, comfortable top that fits snugly and looks lovely on the body. It is made by working neat rows for the front and back, then adding straps that sit gently on the shoulders. The design creates small open patterns that make the top light, airy, and perfect for warm days.
Crochet Crop Top Free Pattern - Fast & Fun Make
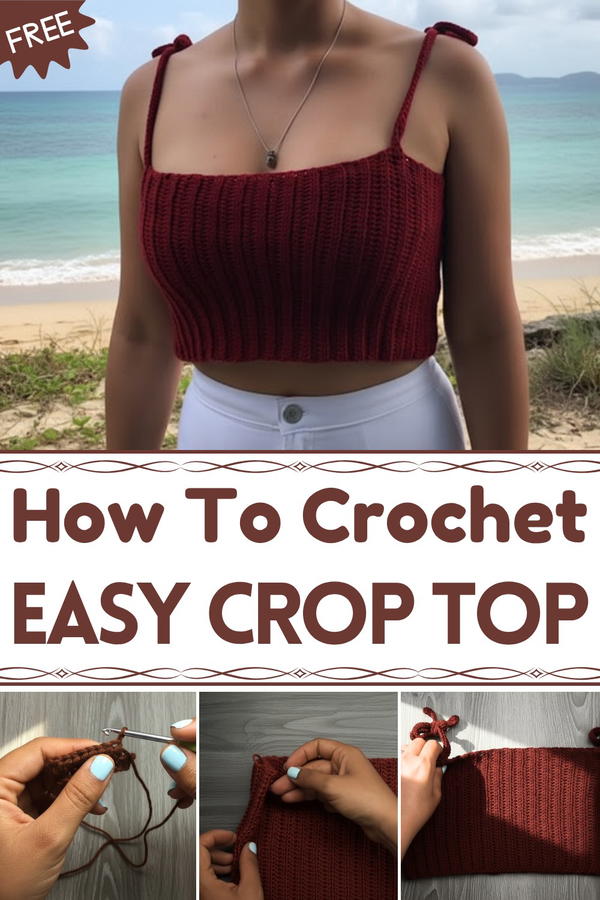
Its soft texture feels nice against the skin, while the bright or pastel colors add charm and personality. This top can be worn casually, paired with skirts or shorts, or layered for a fashionable look. Its size and color can be easily adjusted, making it comfortable and unique for anyone. With this pattern, simple yarn becomes a beautiful, wearable piece full of style and charm.
Crochet Elastic Stitch Crop Top Pattern
Materials List
To complete this project, you’ll need the following:
- Yarn: Weight category #3 (DK/light worsted); choose a soft, stretchy yarn for comfort.
- Hook Size: 4mm crochet hook.
- Stitch Markers: 4 pieces to mark strap placement and other spots as needed.
- Scissors: For cutting the yarn.
- Blunt Plastic Needle: To weave in ends and close seams.
- Tape Measure: To ensure accurate sizing.
Skill Level
- Intermediate
Great for crocheters with basic knowledge of chain stitches, half double crochet, and construction techniques.
Key Abbreviations (US Terminology)
- ch: Chain
- hdc: Half Double Crochet
- sl st: Slip Stitch
- st(s): Stitch(es)
- FLO: Front Loop Only
Special Notes
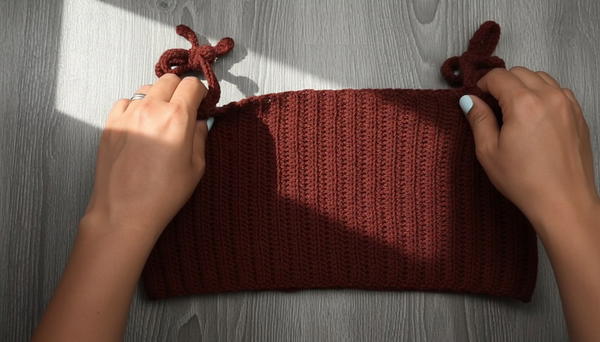
- The crop top is worked in a single rectangle (elastic stitch pattern) and then folded, sewn, and accessorized with straps.
- The width and height of the rectangle can be adjusted to fit different sizes.
- The elasticity of the stitch makes this crop top form-fitting yet comfortable to wear.
Pattern Instructions
Step 1: Foundation Chain
- Determine Width: For the standard size (M), chain 46 sts. If making a longer or shorter top, increase or decrease chains. Ensure the chain length measures 22 cm across.
- Add 2 extra chains to turn.
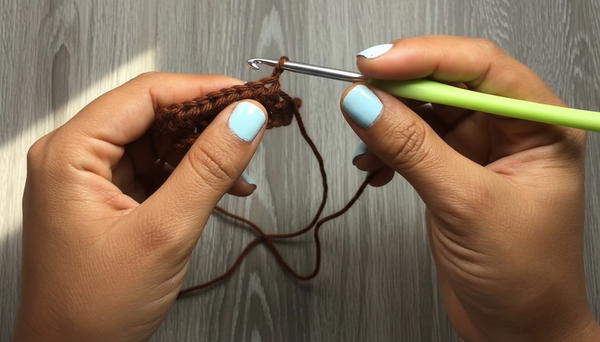
Step 2: First Row (Half Double Crochet)
- Yarn over and insert your hook into the third chain from the hook.
- Pull up a loop (3 loops on hook). Yarn over and pull through all 3 loops (this forms your first hdc).
- Continue making 1 hdc in each stitch across for a total of 46 hdc.
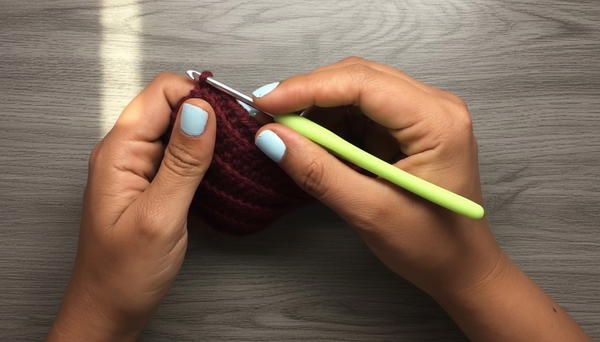
Step 3: Elastic Stitch in Rows
- Turn the Work: Chain 2 (to turn).
- Work in FLO (Front Loop Only):
- Yarn over, insert your hook into the back loop of the first stitch in this row (not the turning chain), yarn over again, and pull up a loop.
- Yarn over and pull through all 3 loops on the hook (another hdc).
- Repeat in FLO across the row to maintain the elastic texture.
- At the end of each row, turn the work and repeat until you’ve completed 96 rows (or 76 cm in height).
Step 4: Create the Rectangle
- Once you reach the desired length (76 cm for size M), fasten off with a long yarn tail (approximately 80 cm) for sewing the rectangle.
Step 5: Close the Rectangle
- Fold the rectangle in half, aligning the short sides.
- Use the yarn tail and a blunt plastic needle to sew the edges together neatly.
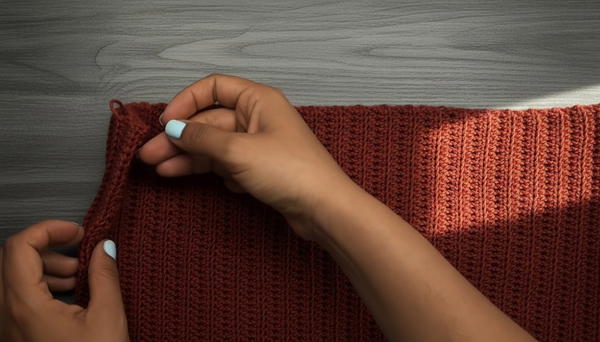
- Ensure the seam is secure but not bulky. Place the seam at the side of the finished top for neatness.
Step 6: Mark the Armhole Area
- Use stitch markers to measure and mark 10 cm on either side of the top's seam (these will become the armhole boundaries).
- Repeat on the other side to ensure symmetry.
Step 7: Add the Straps
- Attach yarn to one of the marked points.
- Chain 60 sts (or longer, depending on desired strap length).
- Add 2 extra chains for turning, then work 1 hdc in each of the 60 sts back along the chain to complete the strap. Fasten off.
- Repeat this step to create a second strap on the opposite side.
Step 8: Attach Straps to the Back
- Align the free ends of the straps to their corresponding spots at the back of the crop top. Secure each with sewing or by crocheting them directly into the fabric for a seamless look.
Step 9: Finishing
- Weave in all loose ends with a darning needle for a clean finish.
- Stretch the fabric slightly to ensure the straps are secure and the top has the desired elasticity.
Final Touches
- Steam block the top gently to soften and even out stitches (optional, depending on yarn).
- Test for fit and make any adjustments to straps, if needed.
Conclusion
Congratulations on completing your stretchy and stylish crop top! It’s a perfect addition to your summer wardrobe or a thoughtful handmade gift. The elastic stitch ensures a snug fit while remaining comfortable and elegant. Pair it with a pair of high-waisted pants, shorts, or a flowing skirt for a polished look.
Pattern Corrections
- Ensure precise measurements for both the rectangle and the straps to avoid asymmetry.
- Verify your stitch count frequently to avoid accidental increases or decreases.
Tips
- Customization: Experiment with different colors or yarn textures for a unique look. You can also embellish the straps with beads or tassels.
- Stretch: Remember that this pattern is naturally stretchy, so measurements may not need to be exact.
- Beginners: Take your time to practice working into the front loop only (FLO) technique to ensure a uniform elastic texture.