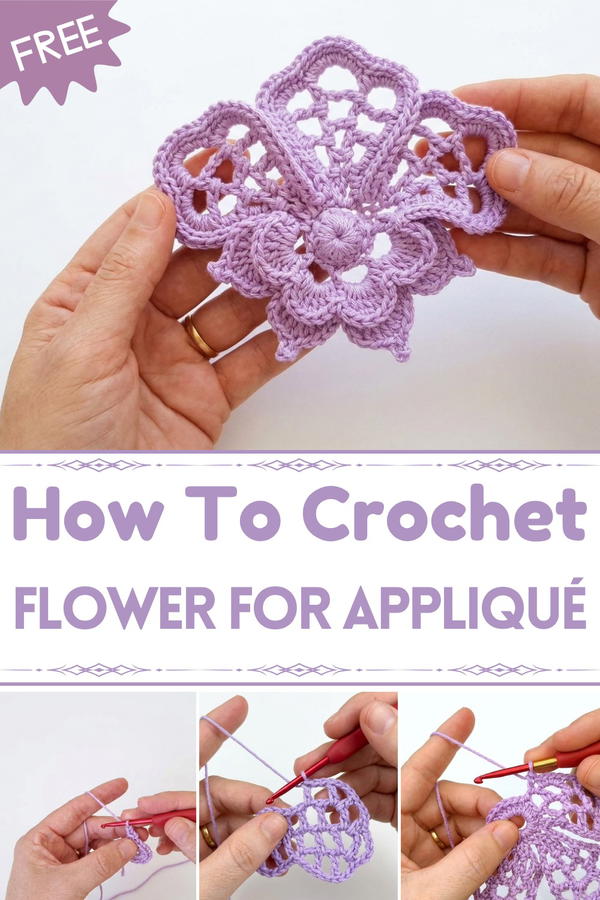
Give life to your accessories and décor with a free crochet flower applique pattern, adding visual appeal and charm to personal projects and creative designs.
Soft petals that never wilt and vibrant colors that brighten up any item—crochet flower applique bring charm and elegance wherever they are used. This tiny works of art is perfect for adding beauty to bags, dresses, pillowcases, or even headbands. With a free crochet flower applique pattern, anyone can make these little blooms a part of their accessories. They look delicate, but they are durable and last much longer than real flowers.
Free Crochet Flower Applique Pattern for Decoration
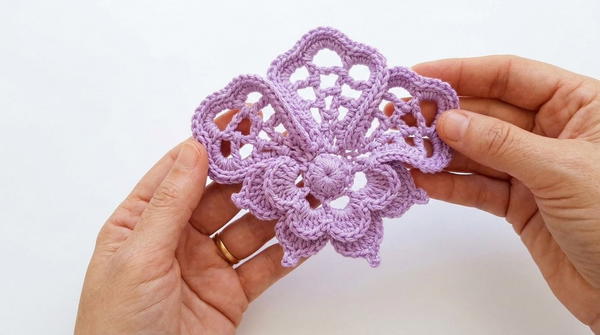
Each applique carries intricate details that resemble nature’s finest blooms, providing endless ways to enhance everyday items. Whether it’s a single flower adorning a simple scarf or a cluster of flowers decorating a gift box, these appliques add personality and style effortlessly. Use them to embellish a child’s frock or to freshen up home décor—they work wonderfully for any purpose.
Crochet Flower Pattern
The process of stitching a crochet flower applique is simple, with soft loops and bright yarn forming wonderful shapes. Add a single applique as an accent or combine them for a more striking look. Their beauty and versatility make them a charming addition to any personal or household item. By using a free crochet flower applique pattern, anyone can work on this joyful technique and brighten their world one flower at a time.
Materials
Yarn
- Recommended: Amigurumi yarn in Canary color (or any yarn of your choice).
- Quantity: Small amount suitable for one flower.
Hook Size
- 2.5 mm crochet hook (adjust based on yarn thickness).
Notions
- Scissors.
- Tapestry needle (for sewing the center and finishing ends).
Optional Items
- Measuring tape (for verifying petal sizes).
- Pen (to wrap yarn for the flower's center).
Skill Level
Beginner: Includes basic stitches like chain, single crochet, half double crochet, double crochet, and picots.
Key Abbreviations
- ch: Chain
- sc: Single Crochet
- hdc: Half Double Crochet
- dc: Double Crochet
- tr: Treble Crochet
- sl st: Slip Stitch
Special Notes:
- This pattern uses US crochet terminology.
- Maintain consistent tension for neat petals and an even center.
- Use stitch markers if desired to track petal progress.
Pattern Instructions
Step 1: Foundation Circle
- Begin with a slip knot.
- Ch 10, sl st into the first chain to form a ring.
Step 2: Base Round
- Work 20 sc into the center of the ring. (Skip the first chain when starting.)
- Join the round with sl st to the first sc.
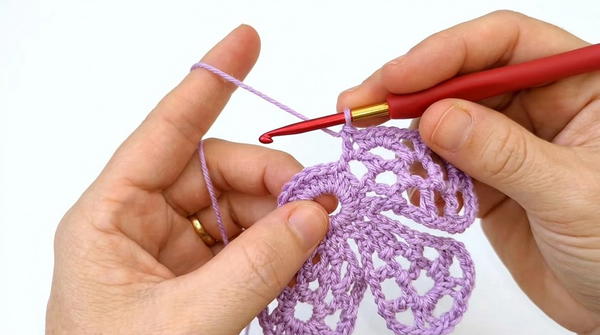
Step 3: First Petal
Step 3.1: Starting Petal
- Ch 15 (this forms the long stem for the petal).
- Count 7 chains from the hook, and work dc into the 7th chain.
- Ch 2, dc into the next chain.
- Ch 2, hdc into the third chain from the hook.
- Ch 2, sc into the next chain.

Step 3.2: Reverse Work
- Make 2 ch, turn the work, and skip the first space.
- Work hdc into the next space, ch 2, hdc into the next space.
- Ch 2, dc into the next space.
- Ch 2, dc into the next space again.
Step 3.3: Final Petal End
- Without chaining, work 4 tr into the next space. Pull through two loops four times for each treble stitch.
- Ch 6, turn the work.
- Work dc into the next space and ch 2. Repeat this process to form the structured part of the petal.
- End the petal with sc into the base.
Note: Repeat the petal process for additional petals as required. In total, there will be 3 repeating petals.
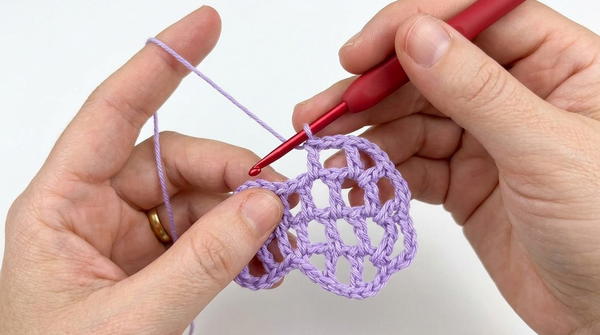
Step 4: Petal Outlining
- After completing the petals, crochet around the edges using sc stitches for a finished look:
- Work sc in all loops at the base and petal edges, including inside loops.
Step 5: Flower Center
Step 5.1: Wrapping the Yarn
- Wrap yarn 10 times around a pen. Carefully slide the loops off the pen.
Step 5.2: Crochet Center
- Insert the tapestry needle through all loops, evenly distributing them into a circle.
- Work 20 sc into the circle, filling it out firmly.
Step 6: Assembly
- Using a tapestry needle, sew the center of the flower securely to the petal section.
- Ensure the stitches are firm but carefully hidden beneath the flower.
Finishing
- Weave all ends with a tapestry needle for a polished look.
- Block the flower gently, if needed, to smooth out the petals.
Final Words
Congratulations—your crocheted flower is complete! This versatile, economical flower is perfect for embellishments and adds charm and personality to your creative projects. Whether added to bags, rugs, clothing, or other designs, this flower will bring beauty and handcrafted touches.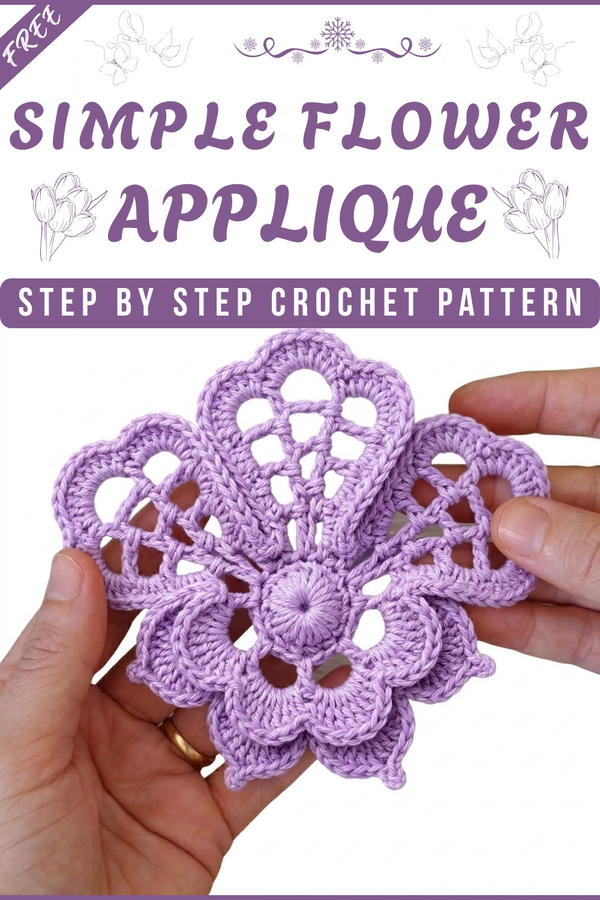
Tips to Maintain the Pattern
- Experiment with Yarn: Try different weights or colors for varied textures or effects.
- Add Leaves: Crochet leaves to pair with this floral design for further customization.
- Secure the Center: Use sturdy stitches to ensure the center will not detach over time.
- Count Carefully: Keep track of chains and stitches to maintain petal uniformity.


