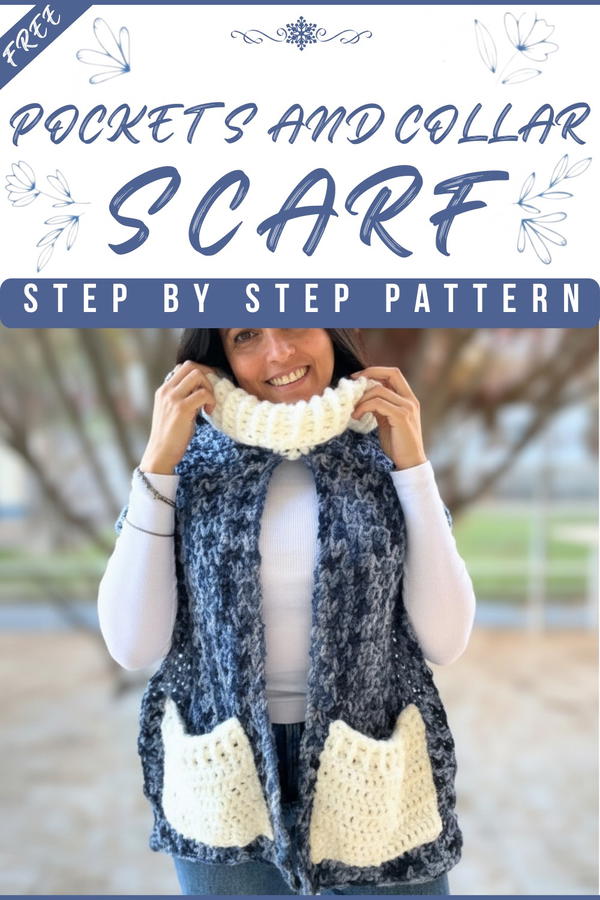
Warm and soft accessories make cold days feel much nicer. A Crochet Pocket Scarf pattern helps create a stylish scarf that is not only beautiful but also very useful. Its charm comes from the soft yarn, neat stitches, and attached pockets that add both style and function. The appearance is simple yet attractive, and the pockets give a playful and practical touch that keeps hands warm or holds small items like keys and phones.

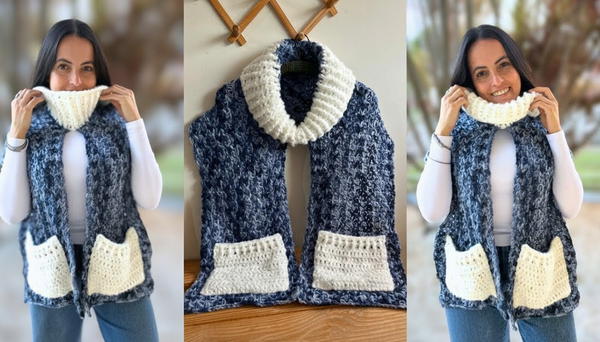
Adorable Crochet Pocket Scarf Pattern for All Ages
This scarf can be worn with coats, jackets, or sweaters, making it perfect for winter walks, school, or daily errands. Beginners enjoy it because the pattern is easy to follow, and it comes together quickly without complicated steps. The handmade texture gives it a unique and personal look. Overall, this scarf is soft, cozy, and eye-catching, combining fashion with function in a way that anyone can enjoy.
Necessary Materials and Supplies
Yarns:
Flash Yarn by Fios Pingouin:
- Composition: 100% Acrylic.
- Tex: 500.
- Each ball contains 200m.
- Total needed: 2.5 balls for the scarf section.
- Suggested color: 68 (optional, other solid or mixed colors can be used).
Mantiqueira Yarn by Fios Pingouin (for collar and pockets):
- Composition: 53% Viscose, 37% Acrylic, and 10% Polyamide.
- Tex: 667.
- Each ball contains 150m.
- Total needed: 1 ball for both pockets and the collar.
Crochet Hook:
- 8 mm hook (adjust size based on your yarn tension).
Other Tools:
- Tape Measure (for measuring overall dimensions and neck circumference).
- Scissors.
- Invisible Sewing Thread (used for attaching the pockets).
- Sewing Needle (compatible with sewing thread).
- Pins (to keep the pockets securely positioned while sewing).
Pattern Outline
The scarf comprises three main components: a textured scarf base, a high collar, and two functional pockets. Below is a step-by-step breakdown of each section.
Scarf Base
Step 1: Foundation Chains
- Begin by creating a slip knot on the crochet hook.
- Chain 30 stitches, ensuring consistent tension.
- Add 1 more chain (totaling 31 chains) to account for turning.
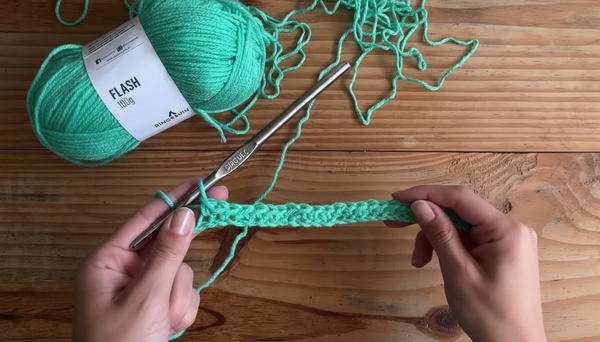
Step 2: Row 1 (Single Crochet Foundation)
- Skip the first chain from the hook, and insert the hook into the second chain.
- Work 1 single crochet in this stitch.
- Continue making single crochets into each chain until reaching the end of the row.
- Turn the work.
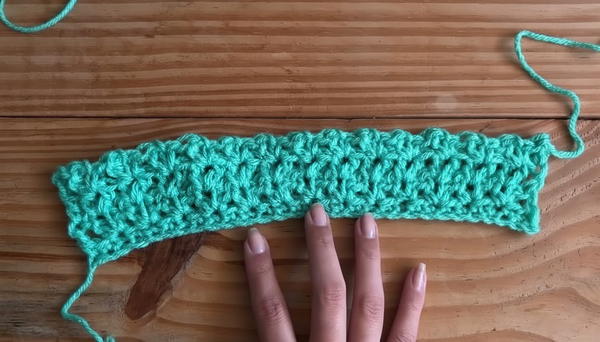
Step 3: Textured Stitch Pattern (From Row 2 Onwards)
Row Setup:
- Chain 2 stitches (equivalent to 1 double crochet).
- Turn the work.
Creating the Textured Stitch:
- Skip the first stitch from the previous row.
- In the next stitch:
- Work 1 double crochet, 1 chain stitch, and 1 single crochet in the same space.
- Skip the next stitch from the previous row, and repeat the sequence:
- 1 double crochet, 1 chain stitch, and 1 single crochet.
End of Row:
- When only one stitch remains, finish the row with 1 double crochet in the last stitch.
Repeat this process for subsequent rows:
- Always begin and end each row with 1 double crochet.
- Work the textured stitch pattern into the chain stitch space of the previous row.
Step 4: Continuation and Length
- Continue working rows until the scarf measures approximately 1.80 meters in length or your desired measurement.
- Width: A total of 25 cm after counting all rows (adjustable to personal preference).
Step 5: Final Row (Single Crochet)
- To finish the scarf, work a row of single crochet stitches for one last clean edge.
- Make sure this finishing row aligns with the texture direction (check right/wrong side of the fabric).
High Collar
Step 1: Measuring and Setting Up
- Fold the scarf in half to find the middle.
- Measure the neck circumference or head opening needed for comfortable wear (approximately 60 cm).
Step 2: Starting the Collar
- Insert the yarn at the measured neck opening.
- Begin working in a continuous circular motion.
- Row 1:
- Chain 2 stitches (counts as double crochet).
- Work double crochet stitches evenly along the opening, filling all stitch spaces from the scarf edge.
- Close the row with a slip stitch.
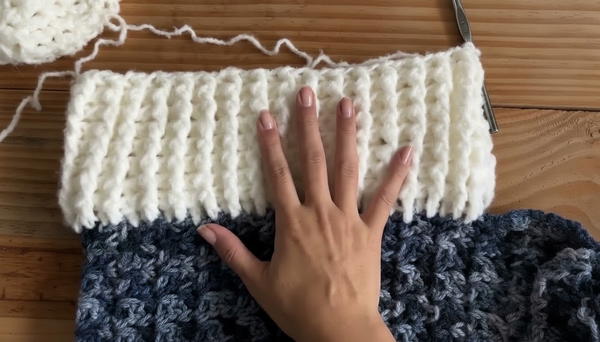
Step 3: Textured Collar Rows
Row 2 and Beyond (Relief Stitch):
- Work front post double crochet in the first stitch:
- Wrap yarn over, insert the hook under the body of the stitch (front loop), pull yarn through, and complete as a double crochet.
- Work back post double crochet in the next stitch:
- Wrap yarn over, insert the hook into the back loop of the stitch, pull yarn through, and complete.
- Alternate between front and back post double crochet stitches until completing the row.
- Close the row with a slip stitch.
- Work front post double crochet in the first stitch:
Repeat until the collar reaches your desired height (recommended: 8 rows or 10 cm).
Step 4: Final Row of the Collar
- Finish with single crochet stitches across all stitches for a clean final edge.
- Cut the yarn and hide loose ends on the wrong side of the piece.
Pockets
Step 1: Foundation Chains
- Chain 22 stitches (adjust width to suit scarf size).
- Work 9 rows of double crochet stitches back and forth.
Step 2: Embossed Edge
- On Row 10, alternate front and back post double crochet stitches (same technique as the collar).
- Finish the pocket edge with single crochet stitches across the last row.
- Cut yarn and hide ends.
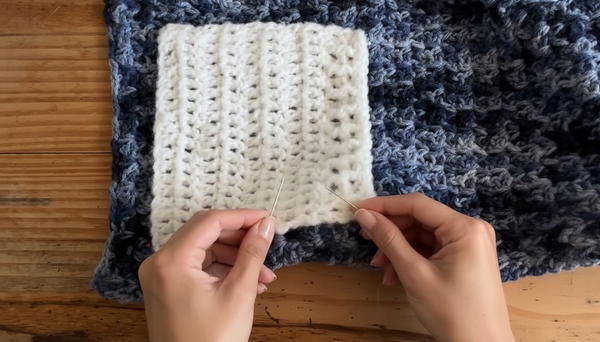
Step 3: Attaching the Pockets
- Place the pocket approximately 2 fingers away from the scarf edges.
- Use pins to secure the pocket’s position.
- Use invisible thread and a sewing needle to sew the pocket along the bottom and sides.
- Double-check alignment to avoid crooked edges.
Tips for Success
Consistent Stitch Count:
To avoid uneven edges or unintentional shaping, count stitches regularly, especially when working textured rows.Collar Fit:
Measure the neckline before beginning the collar. Adjust the circular opening to ensure comfortable wear.Durability:
Add a sturdy edge (single crochet) at pockets and collar to prevent stretching over time.Finishing Threads:
Use tapestry needles to hide thread ends neatly for a clean finish.
Customization Options
Colors:
Experiment with contrasting or complementary colors for the collar and pockets for added visual appeal.Pocket Shape and Size:
Modify pocket width or shape to fit your needs (e.g., deeper pockets for storing gloves).Scarf Edges:
Add fringe, scalloped edges, or decorative trim to personalize your scarf.
Conclusion
This scarf with pockets and a high collar is practical yet stylish, offering warmth and functionality for the colder months. The textured stitch patterns and finishing details ensure a polished result, while the pocket feature adds utility.
Crochet Scarf with Pockets and a High Collar
This detailed crochet tutorial walks you through creating a versatile scarf with pockets and a high collar for added warmth and functionality. Below, you will find a comprehensive pattern description, materials, and clear step-by-step instructions to guide your process. Whether you're a seasoned crocheter or a beginner, this pattern is well-suited for all skill levels.